Unlock your full potential by mastering the most common Knowledge of image manipulation and retouching techniques interview questions. This blog offers a deep dive into the critical topics, ensuring you’re not only prepared to answer but to excel. With these insights, you’ll approach your interview with clarity and confidence.
Questions Asked in Knowledge of image manipulation and retouching techniques Interview
Q 1. Explain your experience with different image file formats (JPEG, TIFF, PNG, RAW).
Understanding image file formats is crucial for efficient workflow and maintaining image quality. Each format has its strengths and weaknesses, making the choice dependent on the project’s needs.
- JPEG (JPG): A lossy format, meaning some image data is discarded during compression. This results in smaller file sizes, ideal for web use and situations where file size is paramount. However, repeated saving can lead to quality degradation. Think of it like repeatedly photocopying a photo – it loses sharpness and detail with each copy.
- TIFF: A lossless format that preserves all image data. This is excellent for archival purposes and situations requiring the highest possible image quality, such as print work or professional editing. File sizes are significantly larger than JPEGs. It’s like having a pristine original photograph; no information is lost.
- PNG: A lossless format supporting transparency, making it ideal for graphics with transparent backgrounds like logos or website elements. It offers a good balance between file size and quality, although generally larger than JPEGs. Think of it as a JPEG with the added ability to have transparent areas.
- RAW: This is uncompressed or minimally compressed image data directly from the camera’s sensor. It contains the maximum amount of information, allowing for extensive editing flexibility. RAW files are massive in size and require specialized software for editing. It’s like having a roll of undeveloped film; it holds the full potential for the final image.
In my workflow, I often start with RAW files for maximum flexibility and then export in JPEG or PNG based on the final destination (web or print).
Q 2. Describe your workflow for retouching a portrait photograph.
My portrait retouching workflow is meticulous and follows a non-destructive approach to ensure flexibility. It typically involves these steps:
- Import and Assessment: I start by importing the RAW file into Adobe Photoshop and assess the image for skin imperfections, lighting inconsistencies, and overall composition.
- Basic Adjustments: I begin with non-destructive global adjustments like exposure, contrast, white balance, and highlights/shadows using adjustment layers. This sets the foundation for the rest of the retouching.
- Skin Retouching: I use tools like the Healing Brush, Clone Stamp, and Patch Tool to delicately remove blemishes, wrinkles, and other imperfections. Frequency separation techniques may be employed for more advanced smoothing without losing texture.
- Color Correction and Grading: I refine skin tones using curves and color balance adjustments, aiming for natural and consistent colors. Color grading might involve subtle adjustments to enhance mood and atmosphere.
- Detail Refinement: I might subtly sharpen eyes or add catchlights to enhance realism and definition. Dodging and burning are often used for subtle lighting adjustments.
- Final Adjustments and Export: Final tweaks are made, ensuring sharpness and color balance. The image is then exported as a high-resolution JPEG or TIFF based on intended use.
Throughout this process, I prioritize a natural look, avoiding over-processing that results in an artificial appearance. Every adjustment is made on a separate layer for complete control and non-destructive editing.
Q 3. What are the key differences between non-destructive and destructive editing?
The difference between non-destructive and destructive editing is fundamental in image manipulation. Understanding this distinction is vital for maintaining flexibility and image integrity.
- Destructive Editing: Directly alters the original image file. Any changes made are permanent, meaning you cannot easily revert to the original version. Think of it like writing directly on a photograph with a marker; the change is indelible.
- Non-Destructive Editing: Applies changes using layers, adjustment layers, or smart objects without modifying the original image file. Changes can be easily adjusted, removed, or modified. It’s like working with tracing paper on top of the original; you can always remove the tracing paper and reveal the original untouched work.
I always favor non-destructive editing to allow for maximum flexibility and revisions during the project’s lifetime. Destructive editing may be appropriate only when finalized and ready for the final output.
Q 4. How do you handle color correction and color grading in your workflow?
Color correction and color grading are often intertwined but serve distinct purposes.
- Color Correction: Aims to restore natural and accurate colors, correcting imbalances or inaccuracies caused by lighting conditions or camera settings. This might involve fixing white balance, adjusting individual color channels, and removing color casts. Imagine restoring the true colors of a flower photo that was slightly blueish due to shade.
- Color Grading: Is a more stylistic approach that alters the overall color palette of the image to achieve a specific mood, look, or aesthetic. This can involve creating a warmer or cooler tone, boosting specific colors, or using creative color filters. Consider changing a wedding photo to have a warm, romantic feel or a landscape to be cooler and more dramatic.
In my workflow, I typically perform color correction first, ensuring accurate colors before applying color grading for stylistic enhancements. I use tools like curves, levels, color balance, and selective color adjustments in Photoshop. I usually start with subtle adjustments and gradually build up the desired effect.
Q 5. Explain your experience with masking and layer techniques in Photoshop.
Masking and layer techniques are essential for precise and non-destructive image manipulation. They allow me to target specific areas of an image without affecting others.
- Layer Masks: Allow you to selectively hide or reveal portions of a layer, giving precise control over the effect of adjustments or edits. It’s like using a stencil – only the area revealed by the stencil is affected.
- Vector Masks: Offer sharper, more precise masking than raster masks, ideal for working with shapes or lines. They’re easily scalable without quality loss. Think of using a perfectly clean cut-out instead of a roughly torn piece of paper.
- Clipping Masks: Restrict the effects of a layer to the layer directly below it, allowing for localized adjustments. It’s like applying a filter only to a specific area, contained within another layer.
I extensively use layer masks and vector masks for retouching portraits, separating elements like skin from hair or background for detailed editing. My proficiency in these techniques ensures clean and precise edits, essential for professional quality.
Q 6. Describe your process for removing blemishes and imperfections from an image.
Removing blemishes and imperfections requires a delicate touch and careful choice of tools. My approach depends on the severity and nature of the imperfections.
- Spot Healing Brush: For small blemishes, this tool automatically blends the surrounding pixels to seamlessly remove imperfections. It’s quick and generally leaves natural-looking results.
- Healing Brush Tool: Provides more control, allowing you to sample a source area and blend it over the blemish. This works well for larger areas or more complex imperfections.
- Clone Stamp Tool: Used for copying and pasting pixels from a source area, allowing more precise control over texture and detail matching. This tool demands a skilled hand to maintain a natural appearance.
- Patch Tool: Useful for removing larger imperfections, this tool allows you to select a problem area and patch it with a sample from another area of the image. It’s very helpful for removing unwanted objects.
I often combine these tools based on the specific needs. For example, the spot healing brush for minor blemishes and the clone stamp for more complex issues. It’s also very important to adjust the brush opacity and flow for natural-looking results.
Q 7. How do you adjust brightness, contrast, and saturation effectively?
Adjusting brightness, contrast, and saturation effectively involves understanding their interplay and using tools that provide non-destructive control.
- Brightness: Controls the overall lightness or darkness of an image. Too much brightness can wash out detail, while too little makes the image appear dull.
- Contrast: Determines the difference between the lightest and darkest parts of an image. High contrast images have a strong difference between light and dark areas, while low contrast images appear flat.
- Saturation: Adjusts the intensity of colors. High saturation means vibrant colors, while low saturation results in muted or desaturated colors.
In Photoshop, I primarily use adjustment layers like Levels and Curves for precise control over these attributes. Levels provide a visual histogram to adjust brightness, contrast, and color balance, while curves offer granular control by manipulating the tonal range of the image. I prefer these tools for their non-destructive nature, allowing for easy adjustments and experimentation.
Q 8. What methods do you use for sharpening images?
Sharpening enhances the details and contrast in an image, making it appear crisper. There are several methods, each with its strengths and weaknesses. I typically start with a non-destructive approach in my workflow. This allows me to adjust the sharpness later without affecting the original image.
Unsharp Mask: A classic technique that analyzes the contrast between pixels. It increases the contrast around edges, creating a sharper appearance. It’s often controlled by Amount, Radius, and Threshold parameters. A higher Amount increases the sharpness, but too much can create halos. Radius defines the area around edges affected, while Threshold limits the effect to areas with significant contrast changes.
Smart Sharpen (Adobe Photoshop): Offers more control and sophistication. It allows selecting different sharpening techniques like Gaussian Blur, Lens Blur, or Motion Blur, providing more precision when dealing with specific image issues. The ‘Reduce Noise’ option is especially useful in reducing noise that often accompanies high-sharpening levels. I generally prefer this over a simple Unsharp Mask.
High Pass Filter: This technique works by creating a high-pass filtered layer that contains only the high-frequency details (edges). This layer is then blended with the original image, effectively sharpening it. This method offers a very subtle and controlled approach to sharpening. I often use this method for fine-tuning after applying Smart Sharpen or Unsharp Mask
Output Sharpening: This is applied as the final step when the image is being exported for final use and depends largely on the output media (web, print, etc.). Web images, for instance, require less sharpening than images intended for print.
For example, I recently sharpened a landscape photo for a client’s website. The initial image was slightly soft due to the lens used. I used Smart Sharpen to address this. I chose ‘Gaussian Blur’ in the technique dropdown to reduce noise created and carefully adjusted the parameters for a natural look avoiding halos. I then used a High Pass filter for final subtle enhancements. The client was extremely happy with the crisp result, far superior to simply increasing the overall sharpness.
Q 9. How do you deal with chromatic aberration?
Chromatic aberration is a common optical issue where different wavelengths of light (colors) don’t converge at the same focal point, resulting in color fringing, typically purple or green, along edges with high contrast. I address it primarily during post-processing.
Software Tools: Most professional image editing software (Photoshop, Lightroom, Capture One) have built-in tools specifically designed to correct chromatic aberration. These tools typically use automated algorithms to detect and remove the color fringing along edges. Often, they’re one-click fixes but sometimes need manual adjustment. I find that using the lens profile correction is particularly helpful if the lens is already known by the software.
Manual Correction: In cases where automated correction isn’t sufficient, I use the Spot Healing Brush or the Clone Stamp Tool to carefully remove the fringing. This requires more skill and time but offers precise control, especially in complex scenarios. For this, precise masking is key to not affect the surrounding areas.
For instance, I recently edited a portrait that had noticeable purple fringing around the subject’s hair against the bright sky. I first used the automated chromatic aberration correction in Lightroom. Then, I refined it by selectively applying masking on areas that still showed minor fringing to carefully remove it using the Spot Healing Brush.
Q 10. Describe your experience with healing brushes and cloning tools.
Healing brushes and cloning tools are essential for retouching and removing blemishes or unwanted objects from images. The key difference lies in how they blend the sampled area:
Healing Brush: Samples the surrounding texture and color to seamlessly blend the retouched area, creating a more natural result. The software analyzes the surrounding pixels and matches them to the area being repaired. Different modes (e.g., Content-Aware Fill) influence how the blending occurs.
Clone Stamp: Directly copies pixels from a selected source area to the target area. It doesn’t blend or analyze texture, giving you precise control but requiring careful selection of the source area to maintain seamlessness.
I use both extensively, selecting the tool that best suits the task. For removing small blemishes like acne, the Healing Brush is quicker and usually provides a natural result. For more complex retouching, like removing larger objects or merging textures, the Clone Stamp is more appropriate, although more time-consuming due to the attention to detail needed.
Imagine removing a distracting branch in a landscape shot. I’d use the Clone Stamp to carefully sample from a nearby area with similar texture and then meticulously paint over the branch, ensuring a consistent appearance. Conversely, a small dust spot on a face is efficiently removed using the Healing Brush. The choice often depends on the size and complexity of the imperfection.
Q 11. How do you work with RAW files to optimize image quality?
RAW files contain significantly more image data than JPEGs, offering greater flexibility in post-processing. My workflow with RAW files focuses on non-destructive edits to preserve the original data.
Exposure and Contrast Adjustments: I begin by adjusting the exposure, contrast, highlights, shadows, whites, and blacks. RAW files provide a much wider dynamic range, allowing for more leeway in recovering details in both highlights and shadows.
White Balance Correction: Accurate white balance is crucial for realistic colors. I use RAW converters to adjust the white balance to achieve natural-looking colors or to create a specific mood. Sometimes, I prefer to shoot in RAW + JPEG so I have the option of quickly editing the JPEG if the shoot is time-sensitive.
Sharpness and Noise Reduction: As with other file formats, sharpening is done after other adjustments, to avoid amplifying noise. In RAW files, noise reduction can often be applied with less impact on detail.
Lens Corrections: RAW converters usually incorporate lens profiles which correct distortion, vignetting, and chromatic aberration. The RAW data allows for very effective correction of lens imperfections, reducing the amount of manual work needed.
Non-Destructive Editing: The greatest advantage of RAW is its non-destructive nature. All my adjustments are recorded as metadata, allowing me to revert to the original at any time.
For a recent wedding shoot, using RAW allowed me to recover details in the brightly lit ceremony photos that would have been blown out in JPEGs. Similarly, in shadowy areas, I could recover detail without introducing excessive noise. This flexibility ensures the final images are richer in detail and color, reflecting the quality that my clients expect.
Q 12. What techniques do you use for skin retouching?
Skin retouching requires a delicate balance between improving the image and maintaining a natural look. I avoid overly smoothed or artificial results. My approach is subtle and focuses on enhancing the subject’s natural beauty.
Frequency Separation: This technique separates the image into two layers: one for textures (pores, wrinkles) and one for colors (skin tone, blemishes). This allows me to retouch each layer separately, avoiding the loss of skin texture when addressing blemishes. This is a common approach for detailed skin retouching.
Healing Brush and Clone Stamp: I carefully use the Healing Brush and Clone Stamp tools for removing blemishes and imperfections, paying close attention to maintaining a natural texture.
Dodge and Burn: I gently use the Dodge and Burn tools to subtly shape and highlight areas of the face, adding depth and dimension without creating unnatural contrast or harsh edges. This allows me to enhance the subject’s facial features in a way that seems natural.
Masking: Masking is essential for applying retouching techniques only where needed, preventing artifacts in unaffected areas. This ensures a very natural look and the preservation of detail in other areas of the face or image.
For example, I recently retouched a portrait of a model for a fashion magazine. Using frequency separation, I removed imperfections while preserving her skin’s texture. Gentle use of the Dodge and Burn tools enhanced her cheekbones and eyes, creating a more defined look without making it look artificial. The final result was a natural-looking improvement in the model’s appearance, meeting the high standards of professional fashion photography.
Q 13. How do you handle high-dynamic range (HDR) images?
High-Dynamic Range (HDR) images capture a wider range of tones than standard images, resulting in more detail in both highlights and shadows. My approach depends on the image’s purpose and desired aesthetic.
HDR Software: I use dedicated HDR software (like Photomatix Pro or Luminar AI) to merge multiple exposures of the same scene into a single HDR image. These programs provide tools to tone map the image, compressing the dynamic range to display correctly on a standard screen.
Tone Mapping: This is the crucial step in processing HDR images. It involves converting the high dynamic range into a lower dynamic range suitable for display or print. I carefully select tone-mapping options to avoid an overly unrealistic or artificial look. This stage requires a fine balance between preserving detail and creating a pleasing aesthetic.
Local Adjustments: After tone mapping, I often refine the image with local adjustments (using masks or brushes) to adjust specific areas, like brightening shadows or reducing highlights in overexposed portions.
For instance, I created an HDR image of a cityscape. I merged three bracketed exposures and used tone mapping to balance the image. I focused on preserving details in both bright and dark areas, resulting in a photo with an enhanced sense of realism and depth. Then, I performed local adjustments to refine the clouds and architectural details, ensuring there was no overly high contrast.
Q 14. Explain your knowledge of different sharpening techniques (Unsharp Mask, Smart Sharpen).
Both Unsharp Mask and Smart Sharpen are used to increase the apparent sharpness of an image, but they differ significantly in their approach and control.
Unsharp Mask: A relatively simple filter that works by increasing the contrast around edges. It uses three main parameters: Amount (how much to sharpen), Radius (the area around edges affected), and Threshold (ignores areas with low contrast). While effective for quick sharpening, it can create halos (bright edges) around sharp contrasts if the parameters are not carefully adjusted. It’s a more global approach to sharpening.
Smart Sharpen (Adobe Photoshop): A more advanced filter offering greater control and flexibility. It provides various sharpening algorithms, allowing to tackle different types of blur. For instance, the ‘Gaussian Blur’ setting is typically best for general sharpening, while ‘Lens Blur’ or ‘Motion Blur’ can target specific issues. It also includes a ‘Reduce Noise’ option, helpful when sharpening noisy images. This allows for a more nuanced approach to sharpening, and it can deal more effectively with specific sharpening needs. It generally allows for more precise sharpening with less artifacts compared to a simple Unsharp Mask.
In practice, I often use Smart Sharpen as my primary sharpening tool due to its superior control and ability to handle noise. I might use Unsharp Mask for quick, minor adjustments or for final output sharpening in very specific instances, but Smart Sharpen offers greater control and flexibility for professional results.
Q 15. What is your experience with frequency separation techniques?
Frequency separation is a powerful retouching technique that allows for independent editing of texture and color in an image. Think of it like separating the skin’s fine details (texture) from its overall tone and color. This is crucial because aggressively adjusting color and tone can easily smudge or lose fine details. By separating them, you can smooth out skin tones without losing pores or wrinkles.
The process typically involves duplicating the image layer, applying a high-pass filter to one layer (to isolate the texture), and a low-pass filter (like a Gaussian blur) to the other (to isolate the color/tone). Adjustments are made to these separate layers, then they are blended back together for a natural result. For example, you might reduce redness in the low-pass layer, while carefully preserving the fine details of the pores in the high-pass layer.
I’ve used frequency separation extensively for portrait retouching, allowing for detailed skin smoothing without that dreaded ‘plastic’ look. It’s a more nuanced and sophisticated approach than simply using a blur tool.
Career Expert Tips:
- Ace those interviews! Prepare effectively by reviewing the Top 50 Most Common Interview Questions on ResumeGemini.
- Navigate your job search with confidence! Explore a wide range of Career Tips on ResumeGemini. Learn about common challenges and recommendations to overcome them.
- Craft the perfect resume! Master the Art of Resume Writing with ResumeGemini’s guide. Showcase your unique qualifications and achievements effectively.
- Don’t miss out on holiday savings! Build your dream resume with ResumeGemini’s ATS optimized templates.
Q 16. How do you create realistic composite images?
Creating realistic composite images requires meticulous attention to detail and a deep understanding of lighting, shadow, and color harmony. Think of it like piecing together a puzzle where each piece needs to seamlessly blend with its surroundings. It’s not just about placing images together; it’s about making them convincingly interact.
My process begins with selecting high-quality source images with similar lighting conditions and color palettes. Then I carefully mask and blend the elements, paying close attention to the edges. I frequently use layer masks with soft edges and refine them with tools like the brush and the lasso. Color correction and matching are key—I utilize tools like Curves and Color Balance to adjust the hue, saturation, and brightness until the elements appear unified. Finally, I add subtle shadows and highlights to create depth and realism, making the composite look natural and unmanipulated.
For instance, I once created a composite image of a model standing in a fantasy landscape. I had to carefully match the lighting on the model to the landscape, adjust the colors to ensure a harmonious blend, and add realistic shadows to give the image depth.
Q 17. Describe your experience with different types of filters (Gaussian Blur, Motion Blur).
Gaussian Blur and Motion Blur are two common types of filters that affect an image’s sharpness and movement perception. Gaussian Blur is a non-directional blur; it softens an image equally in all directions. It’s often used to soften harsh edges, reduce noise, or create a dreamy effect. Motion Blur, conversely, simulates the effect of movement, resulting in streaks or trails in the direction of motion. It’s very useful for adding a sense of speed or action to an image.
Gaussian Blur is defined by its radius, controlling the amount of blur. A larger radius results in a more significant blur. Motion Blur is defined by both angle and distance, determining the direction and intensity of the blurring effect. I frequently use Gaussian Blur for skin smoothing in portrait retouching and for creating soft focus effects in background elements. Motion blur is used to create dynamic images such as images of a car speeding down a road.
The selection and application of filters depends heavily on the context and desired aesthetic. Understanding their different properties allows me to create targeted and impactful results.
Q 18. How do you retouch images for various media (print, web)?
Retouching for print and web requires different approaches due to variations in resolution and color profiles. Print media demands significantly higher resolution than web images. Images intended for print usually need to be in CMYK color space to accurately represent colors using the printing process. Web images are typically in RGB, the color space of most screens.
For print, I ensure images are at the required resolution (usually 300 DPI or higher) and in CMYK. I perform color correction that is consistent with the printing method’s limitations, and I meticulously review the image for any artifacts that might be amplified during printing. For web, I optimize images for size and load times while maintaining visual quality. I use techniques like sharpening and resizing to balance visual appeal and web performance. I may even use different compression techniques depending on the need for speed versus quality.
For example, a photograph meant for a large-format print requires more attention to detail and higher resolution, whereas a similar image used on a website needs to be optimized for size and web compatibility.
Q 19. Explain your knowledge of color spaces (RGB, CMYK).
RGB (Red, Green, Blue) and CMYK (Cyan, Magenta, Yellow, Key/Black) are the two most common color spaces used in image editing. RGB is an additive color model used for screen displays; by mixing red, green, and blue light, you can create a wide range of colors. CMYK is a subtractive color model used in printing; cyan, magenta, yellow, and black inks are combined to create colors by subtracting light from white. Understanding the differences between these two models is essential for achieving consistent color across different media.
The primary difference lies in how colors are created: RGB adds light to create color, while CMYK subtracts light from white to create color. This means that a color represented accurately in RGB might look different when converted to CMYK, and vice-versa. Color management profiles help bridge this gap by translating colors between spaces more accurately. I frequently convert images between RGB and CMYK depending on whether they are meant for screen or print, and I utilize color management profiles to ensure accurate color representation.
Imagine painting a picture: on a screen (RGB), you add colors to black to create brightness; in printing (CMYK), you subtract colors from white to create the image.
Q 20. What software and hardware are you proficient with?
My software proficiency encompasses Adobe Photoshop, Lightroom, and Capture One. I am highly skilled in using their advanced features for retouching, compositing, and color correction. I’m also familiar with other image editing software such as GIMP, but I primarily use the Adobe Creative Suite. My hardware experience primarily revolves around high-resolution monitors with color calibration, powerful computers equipped to handle large image files, and graphic tablets for precise editing.
I regularly use a calibrated monitor to ensure color accuracy, a high-end graphics tablet for precise brush control and natural retouching, and a high-specification computer to handle the demanding processing requirements of large image files and complex operations. This setup allows me to work efficiently and produce high-quality results.
Q 21. How do you manage large image files efficiently?
Managing large image files efficiently is crucial for workflow optimization. My approach involves a combination of strategies. Firstly, I utilize non-destructive editing techniques in Photoshop, ensuring that edits are recorded as instructions rather than directly altering the image data. This preserves the original image and makes it easier to revert changes.
Secondly, I work with proxy files or lower-resolution previews while editing, switching to the full-resolution images only when necessary. This greatly reduces the computer’s processing load. Finally, I employ proper file management and organization, using naming conventions and folder structures to keep track of images and their versions. This helps with efficient searching and prevents data loss. I also utilize external hard drives and cloud storage to ensure data security and accessibility.
Imagine working on a huge building—instead of carrying all the bricks simultaneously, you work with smaller sections, and use blueprints to ensure efficient coordination and organization.
Q 22. What techniques do you use to enhance the details in an image?
Enhancing image detail involves sharpening, noise reduction, and recovering lost information. Think of it like polishing a gemstone – you want to bring out its inherent beauty without distorting it.
Sharpening: This technique increases the contrast at edges, making them appear crisper. I often use unsharp masking (USM) which works by subtly blurring the image then increasing the contrast at the edges of that blur. The key is to be subtle; over-sharpening leads to a harsh, unnatural look. I usually adjust the amount, radius (the area affected by the sharpening), and threshold (minimum contrast needed for sharpening) settings carefully depending on the image.
Noise Reduction: Digital noise (grain) is common, especially in low-light situations. I employ AI-powered denoising tools, coupled with careful masking, to reduce noise while preserving important details. The goal is to make the image appear cleaner without losing its texture or detail. A good balance is crucial here – overly smoothed images will lack the depth and visual interest of the original.
Detail Recovery: Sometimes, images are underexposed or lack dynamic range. Here, I carefully use tools like curves or levels adjustments to bring out details in the shadows and highlights without clipping (losing detail in pure black or white). In advanced cases, techniques like HDR (High Dynamic Range) imaging can be employed to combine multiple exposures, maximizing the captured detail.
Q 23. How do you maintain consistency in your retouching style across multiple images?
Consistency is paramount in retouching. To maintain a uniform style, I establish a standardized workflow and a set of preset adjustments. This might involve creating custom actions or presets in Photoshop that automate certain steps like skin smoothing, color correction, or sharpening.
I also create a reference image – a meticulously retouched image that sets the benchmark for consistency. This allows me to visually compare the progress of other images and make sure the final products align. Furthermore, I maintain detailed records of my adjustments, including layer styles and specific settings, so that similar edits can be replicated across different projects.
Think of it as a painter preparing a palette – consistent color mixing techniques and a planned color scheme ensure that all the paintings have a similar style and feel.
Q 24. Describe your experience with batch processing and automation.
I’m proficient in batch processing and automation using both Photoshop’s built-in tools and external scripting languages like JavaScript. Batch processing allows me to apply the same set of retouching steps to multiple images simultaneously, saving significant time and effort.
For instance, I often automate the resizing, color correction, and watermarking of hundreds of images for web use. I have created custom scripts that streamline these tasks, drastically reducing turnaround time. This automation ensures efficiency and consistency while handling large volumes of work.
For example, I might use a simple batch script to rename all images and then use Photoshop’s Image Processor to resize and compress them all to specific specifications.
// Example Javascript snippet (simplified):// This is a simplified illustration and might require adjustments for a real-world scenariofor (let i = 0; i < images.length; i++) { // Resize image // Apply color correction // Add watermark}Q 25. How do you handle client feedback and revisions?
Handling client feedback is crucial. I always encourage clients to provide specific feedback, pointing out areas for improvement. I then address these concerns, making appropriate adjustments while ensuring the overall aesthetic integrity of the image remains intact. I clearly communicate the scope of possible revisions upfront to avoid misunderstandings.
When revisiting the image based on feedback, I maintain a well-organized layer system so that changes can be easily implemented, tracked, and reverted if necessary. For extensive revisions, I often create new versions to track progress and present different options to the client.
Think of it as a collaborative process; the client's vision combined with my expertise results in the best possible outcome. Transparency and clear communication are key.
Q 26. What are some common challenges you encounter during retouching and how do you overcome them?
Common challenges include dealing with difficult lighting conditions, severe image artifacts, and maintaining a natural look during retouching. Overcoming these requires a combination of technical skills and artistic judgment.
Difficult Lighting: Images with harsh shadows or extreme highlights require careful manipulation of curves, levels, and dodging/burning to balance the exposure and recover detail. Masking is often crucial to target specific areas.
Severe Artifacts: Dealing with artifacts like motion blur or lens distortion requires specialized tools and techniques. For example, lens correction filters can address distortions, while content-aware fill can subtly remove minor artifacts.
Maintaining a Natural Look: Over-retouching can result in unnatural-looking skin, plastic-like effects, or an overall artificial appearance. Subtlety is key, and I always aim to enhance, not mask, the natural beauty of the image. I utilize techniques like frequency separation to modify texture and color separately for fine control and a natural look.
Q 27. Describe your experience working with different types of cameras and lenses.
My experience encompasses various camera systems, from high-end professional DSLRs to mirrorless cameras, and smartphones. Each camera has its own strengths and weaknesses, influencing the image's characteristics, such as dynamic range, noise levels, and color rendition. Understanding these characteristics is crucial for effective retouching. For example, images from cameras with high ISO performance require different noise reduction techniques compared to those with lower ISO capabilities.
Similarly, different lenses produce unique image characteristics— some have wider apertures leading to shallower depth of field while others have exceptional sharpness. This understanding of lens characteristics impacts the editing strategy. A lens with strong vignetting (darkening at the edges) might require targeted brightening during post-processing.
Q 28. What are your preferred methods for background removal?
Background removal is a frequent task. My preferred methods are tailored to the complexity of the image and the desired outcome. For clean, sharp edges, the pen tool offers precise control and provides excellent results, particularly for images with well-defined subjects. For complex backgrounds or images with fine details, AI-powered selection tools provide efficiency by detecting and separating subjects with remarkable accuracy. I often refine the selection manually, ensuring the edge is clean and the subject is completely separated from the background.
Beyond selection tools, techniques like masking, utilizing channels, and color range selections are useful. The choice ultimately depends on the specifics of the image. Sometimes, a combination of methods is employed for optimal results.
Key Topics to Learn for Image Manipulation and Retouching Techniques Interview
- Color Correction and Adjustment: Understanding color spaces (RGB, CMYK), white balance, exposure correction, and techniques for achieving consistent color across images. Practical application: Correcting skin tones in portrait retouching, enhancing product photos for e-commerce.
- Retouching and Restoration: Mastering techniques for removing blemishes, wrinkles, and other imperfections. Understanding the use of healing tools, cloning, and frequency separation. Practical application: Restoring damaged historical photos, preparing images for high-resolution printing.
- Image Composition and Cropping: Applying principles of design to improve the visual appeal of images through strategic cropping and composition adjustments. Practical application: Creating compelling marketing images, enhancing visual storytelling in photography.
- Layer Management and Masking: Efficiently using layers and masks for non-destructive editing, achieving precise selections, and blending images seamlessly. Practical application: Creating complex composites, retouching specific areas without affecting others.
- Software Proficiency: Demonstrating expertise in industry-standard software like Photoshop, Lightroom, or Affinity Photo. Understanding various tools and shortcuts to optimize workflow. Practical application: Efficiently completing retouching tasks within tight deadlines.
- File Formats and Resolution: Understanding the differences between various image formats (JPEG, TIFF, PNG) and their appropriate uses. Knowing how resolution impacts image quality and print suitability. Practical application: Preparing images for web and print, optimizing file sizes for efficient delivery.
- Problem-Solving and Troubleshooting: Demonstrating the ability to identify and resolve common image editing challenges, such as artifacts, color banding, and other technical issues. Practical application: Diagnosing and fixing image problems efficiently and effectively.
Next Steps
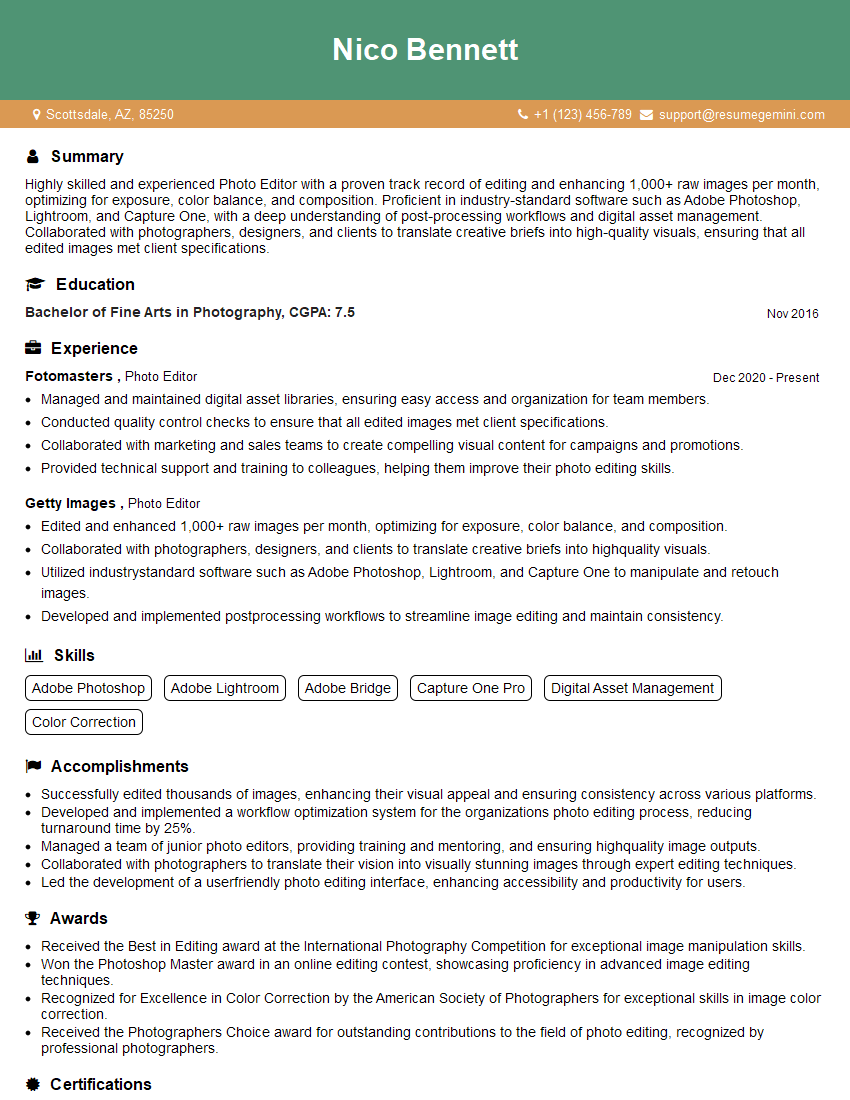
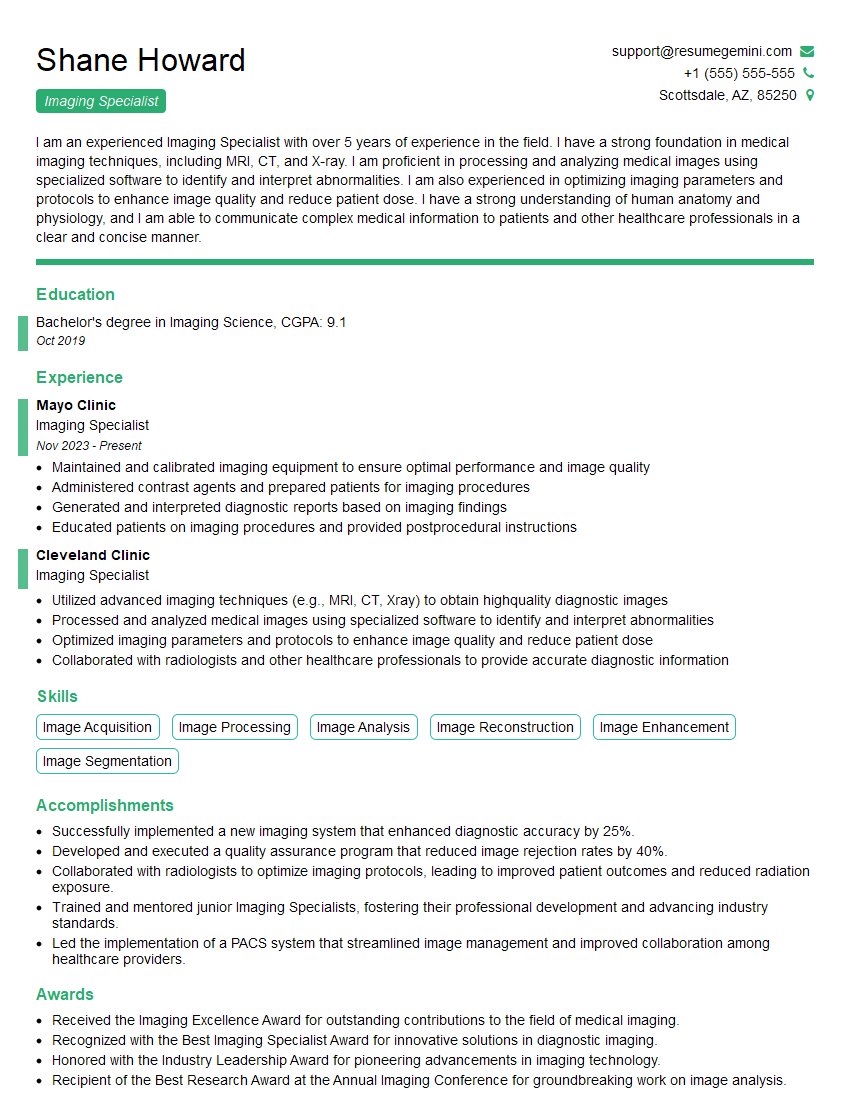
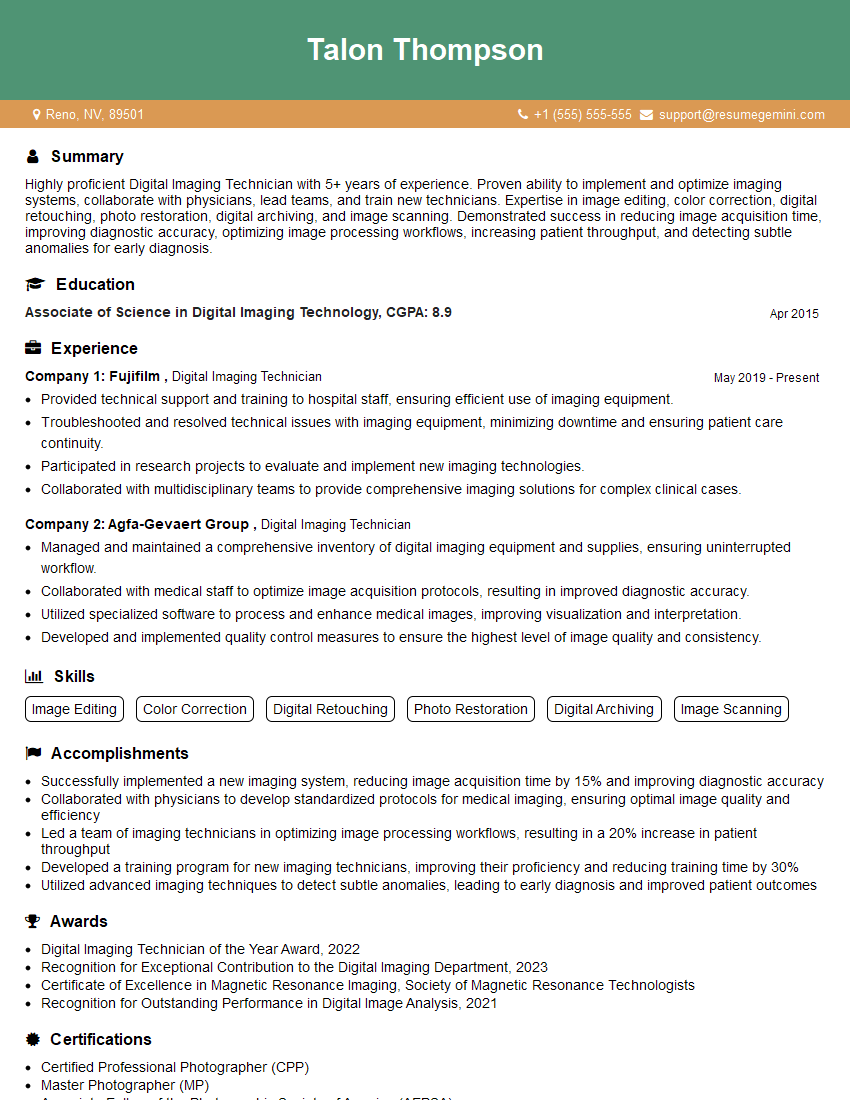
Mastering image manipulation and retouching techniques is crucial for career advancement in fields like graphic design, photography, e-commerce, and advertising. A strong understanding of these skills allows you to create visually compelling content and efficiently meet client needs. To maximize your job prospects, focus on building an ATS-friendly resume that highlights your technical skills and experience. ResumeGemini is a trusted resource that can help you craft a professional resume that showcases your abilities effectively. Examples of resumes tailored to image manipulation and retouching techniques are available to guide you.
Explore more articles
Users Rating of Our Blogs
Share Your Experience
We value your feedback! Please rate our content and share your thoughts (optional).
What Readers Say About Our Blog
Very informative content, great job.
good
