Cracking a skill-specific interview, like one for Basic Electrical and Mechanical Troubleshooting, requires understanding the nuances of the role. In this blog, we present the questions you’re most likely to encounter, along with insights into how to answer them effectively. Let’s ensure you’re ready to make a strong impression.
Questions Asked in Basic Electrical and Mechanical Troubleshooting Interview
Q 1. Explain the difference between AC and DC electricity.
The main difference between AC (Alternating Current) and DC (Direct Current) electricity lies in the direction of electron flow. In DC, electrons flow consistently in one direction, like a river flowing downstream. This is the type of electricity produced by batteries. AC, on the other hand, periodically reverses its direction, oscillating back and forth like a pendulum. This is the type of electricity that powers our homes and offices, supplied by power grids.
Think of it like this: a battery provides a steady push of electrons (DC), while a generator produces a push that regularly changes direction (AC). AC is preferred for long-distance power transmission because it’s easier and more efficient to transform its voltage using transformers, minimizing energy loss.
Q 2. Describe Ohm’s Law and its applications in troubleshooting.
Ohm’s Law describes the relationship between voltage (V), current (I), and resistance (R) in an electrical circuit. It states that Voltage is equal to Current multiplied by Resistance: V = I * R
This simple equation is fundamental to electrical troubleshooting. For example, if you know the voltage across a component and its resistance, you can calculate the current flowing through it. If the current is unexpectedly high, it indicates a lower-than-expected resistance, possibly due to a short circuit or a faulty component. Conversely, a low current might suggest a higher-than-expected resistance, indicating an open circuit or a component failure.
Let’s say you’re troubleshooting a circuit with a known voltage of 12V and a resistor rated at 100Ω. According to Ohm’s Law, the expected current is I = V / R = 12V / 100Ω = 0.12A. If your multimeter shows a significantly higher current, it points towards a problem in the circuit.
Q 3. How do you use a multimeter to test voltage, current, and resistance?
A multimeter is a versatile tool used to measure voltage, current, and resistance. Before using it, always ensure it’s properly set to the correct function and range to avoid damaging the meter or the circuit under test.
- Measuring Voltage: Set the multimeter to the voltage mode (usually indicated by a ‘V’ symbol) and select an appropriate range (higher than the expected voltage). Connect the probes across the component you’re testing; the red probe is typically connected to the positive side and the black probe to the negative side. The multimeter will display the voltage.
- Measuring Current: This requires breaking the circuit. Set the multimeter to the current mode (usually indicated by an ‘A’ symbol), selecting an appropriate range. Insert the multimeter in series with the component, ensuring the circuit is complete before powering on.
- Measuring Resistance: Set the multimeter to resistance mode (usually indicated by an ‘Ω’ symbol). Make sure the circuit is completely disconnected from the power source. Connect the probes across the component; the multimeter displays the resistance.
Remember to always follow safety precautions when using a multimeter, such as disconnecting power before measuring resistance and using appropriate safety equipment. Incorrect usage can lead to damage or injury.
Q 4. What are the common causes of a blown fuse?
Blown fuses are a common occurrence, indicating an overload or a short circuit in the electrical system. Several factors can cause a fuse to blow:
- Overcurrent: This is the most frequent cause. If the current flowing through the circuit exceeds the fuse’s rating, the fuse melts, breaking the circuit and preventing damage to other components.
- Short Circuit: A short circuit occurs when there’s an unintended low-resistance path between the positive and negative terminals, resulting in a surge of current that blows the fuse.
- Faulty Appliances: A malfunctioning appliance, such as a motor with a short circuit, can draw excessive current and blow the fuse.
- Power Surge: A sudden surge in voltage, often due to lightning strikes, can exceed the fuse’s capacity, causing it to blow.
Replacing a blown fuse requires identifying the cause of the failure. Simply replacing the fuse without addressing the root cause can lead to further problems, potentially damaging equipment or creating a fire hazard. Always use a fuse of the correct rating.
Q 5. How do you troubleshoot a faulty circuit breaker?
Troubleshooting a faulty circuit breaker involves a systematic approach prioritizing safety. Never work with electrical systems without proper safety precautions and knowledge.
- Check the breaker’s position: Is it tripped (in the off position)? If so, this indicates an overload or short circuit.
- Identify the circuit: Determine which circuit the breaker controls. Is it a specific room, appliance, or group of outlets?
- Check for overloads: Examine the circuit for appliances drawing excessive power. Are there too many devices plugged into a single circuit?
- Look for short circuits: Inspect the wiring for damage, exposed wires, or loose connections. Check appliances connected to the circuit for any signs of malfunction.
- Reset the breaker: If you’ve identified and resolved the overload or short circuit, attempt to reset the breaker (switching it off and then on). If it trips immediately, the problem hasn’t been addressed.
- Call an electrician: If you are unable to identify and resolve the problem, it’s best to contact a qualified electrician.
Circuit breakers are safety devices; never attempt to bypass or tamper with them.
Q 6. Explain the function of a relay.
A relay is an electrically operated switch. It uses a small electrical current to control a much larger current in another circuit. Imagine a relay as a remote-controlled switch: a low-voltage signal activates a mechanism that switches a high-voltage circuit on or off.
This is useful in numerous applications:
- Remote switching: Controlling high-voltage circuits from a low-voltage control panel.
- Overload protection: Protecting delicate control circuits from damage by using a relay to switch higher-current circuits.
- Automotive applications: Controlling headlights, fuel pumps, and other components.
- Industrial automation: Controlling motors, valves, and other industrial equipment.
Relays are essentially electromagnetic switches. A coil is energized by a low-voltage signal, creating a magnetic field that attracts a switch, closing the high-voltage circuit.
Q 7. What are some common types of motors and their applications?
Many types of motors exist, each with specific applications:
- DC Motors: These motors run on direct current. They are simple, efficient at low speeds, and widely used in small appliances, toys, and electric vehicles. Brushed DC motors use brushes to switch current to the coils, while brushless motors use electronic switching, resulting in longer life and higher efficiency.
- AC Motors: These motors run on alternating current. They are robust and commonly used in industrial applications and household appliances. Common types include induction motors (simple, rugged, and widely used in fans and pumps) and synchronous motors (precise speed control, used in clocks and high-precision applications).
- Stepper Motors: These motors move in precise steps when supplied with a series of pulses. They are commonly used in robotics, 3D printers, and other applications requiring accurate positional control.
- Servo Motors: These motors provide precise control of speed and position, often incorporating feedback mechanisms. They are used in robotics, industrial automation, and precision instruments.
The choice of motor depends on factors like required speed, torque, efficiency, cost, and control requirements. For example, a high-torque motor is needed for a washing machine, while a precise servo motor is suitable for a robot arm.
Q 8. How do you identify a faulty motor?
Identifying a faulty motor involves a systematic approach combining visual inspection with operational checks. First, visually inspect the motor for obvious signs of damage like loose connections, burnt insulation, or physical damage to the casing. Then, check for proper voltage supply using a multimeter. If the voltage is correct but the motor isn’t running, the problem could lie within the motor itself or its control circuitry. You can then listen for unusual noises – grinding, humming, or clicking sounds indicate internal problems. Excessive vibrations also point to a faulty bearing or rotor imbalance. Finally, measure the motor’s current draw. A significantly higher or lower current than the rated value suggests an issue with the windings or other internal components. For example, a higher-than-normal current draw often indicates a shorted winding, requiring motor replacement or rewinding. Conversely, a low current draw might imply a broken winding or a problem with the power supply.
Q 9. Describe different types of bearings and their applications.
Bearings are crucial mechanical components that reduce friction and support rotating shafts. Several types exist, each with specific applications:
- Ball Bearings: These use steel balls to reduce friction between the rotating shaft and the stationary housing. They are ideal for high-speed applications and handle both radial (sideways) and axial (end) loads. Think of the wheels on your car, which use ball bearings for smooth rotation.
- Roller Bearings: Instead of balls, these use cylindrical or tapered rollers, offering higher load-carrying capacity than ball bearings. Tapered roller bearings are excellent for applications with significant axial loads, such as car axles. Cylindrical roller bearings are best suited for radial loads, commonly found in industrial machinery.
- Sleeve Bearings (Journal Bearings): These are simpler, consisting of a lubricated sleeve around a rotating shaft. They are less precise than rolling element bearings but better suited for low-speed, high-load applications where lubrication is readily available. Imagine a simple pulley system; sleeve bearings might be utilized.
- Thrust Bearings: Specifically designed to handle axial loads, preventing movement along the shaft’s axis. These are found in applications like propeller shafts where axial force is significant.
The choice of bearing depends on factors like speed, load, and required precision. A high-speed application will benefit from low-friction ball bearings, while a heavy-duty application might necessitate roller bearings.
Q 10. How do you identify a worn or damaged bearing?
Identifying worn or damaged bearings relies on both auditory and tactile inspection. A worn bearing will often produce noticeable noises such as grinding, growling, or squealing sounds during operation. These noises are caused by the metal-to-metal contact resulting from reduced lubrication or wear. Additionally, you might feel increased vibration or play (loose movement) in the shaft. To confirm the suspicion, you can try to measure the bearing’s play using a dial indicator or feeler gauge. Excessive play indicates significant wear. Sometimes, the bearing may overheat due to increased friction. An infrared thermometer can help detect this. In severe cases, metal shavings or debris may appear in the lubricant, clearly indicating bearing failure. Visual inspection of the bearing itself for pitting, scoring, or corrosion can also reveal the extent of the damage.
Q 11. Explain the function of a gear system.
A gear system is a collection of gears working together to transmit power and motion. Gears are toothed wheels that mesh to transfer rotational motion between shafts. They can modify speed, torque, and direction of motion. Think of a bicycle – the pedals rotate relatively slowly, but the gears and chain mechanism drastically increase the rotational speed of the rear wheel. This is a simple example of how a gear system modifies speed. Gear systems are found everywhere, from clocks and watches to automotive transmissions and industrial machinery. The ratio of teeth on two meshing gears defines the speed and torque change. A larger gear driving a smaller gear increases rotational speed but reduces torque, and vice-versa.
Q 12. How do you troubleshoot a gear system malfunction?
Troubleshooting gear system malfunctions requires a systematic approach. Start by carefully inspecting all gears for visible damage like chipped or broken teeth, excessive wear, or misalignment. Listen for unusual noises – grinding, whining, or clicking indicate problems with meshing, lubrication, or bearing failure. Check for proper lubrication – insufficient lubrication is a common cause of premature wear and failure. Measure the backlash (the clearance between meshing teeth) using a feeler gauge. Excessive backlash can indicate wear or misalignment. Misalignment of gears can cause uneven wear and load distribution leading to noise, vibration and premature failure. If the problem persists after checking these aspects, further investigation involving the use of specialized tools and possibly dismantling parts of the system might be necessary to identify root cause.
Q 13. What are the common causes of belt slippage or breakage?
Belt slippage or breakage is often caused by several factors: Excessive wear is a primary culprit; worn belts lose their grip, resulting in slippage. Misalignment of pulleys causes uneven tension and stress on the belt, leading to premature wear and breakage. Incorrect belt tension – either too tight or too loose – is another frequent cause; too tight leads to premature wear while too loose results in slippage. Contaminants such as oil, grease, or dust on the belt surface reduce the coefficient of friction, causing slippage. Finally, a damaged or deteriorated belt itself, due to age, heat, or chemical exposure, can lead to breakage or slippage.
Q 14. How do you troubleshoot a hydraulic system leak?
Troubleshooting a hydraulic system leak involves careful observation and systematic checking. First, visually inspect all connections, hoses, fittings, and components for signs of leakage – wet spots, dripping fluid, or fluid trails. Next, use a pressure gauge to check the system pressure; low pressure indicates a leak. Trace the fluid leak by carefully examining the system under pressure and noting the location of the leak. Once the location is identified, repair or replace the damaged component. If the leak is from a hose, replace the hose. For leaks from fittings, tighten the fittings or replace the seals. Leaks from seals or hydraulic cylinders might require more advanced repair techniques or component replacement. Regular inspection, proper maintenance, and use of high-quality components are essential to prevent hydraulic system leaks.
Q 15. Explain the principles of pneumatics.
Pneumatics is the science and technology of using compressed air or gas to generate power and motion. Think of it like a system of air muscles! It relies on the principles of fluid mechanics, specifically dealing with compressible fluids. Compressed air is used to power various components, such as actuators (which create linear or rotary motion), valves (which control airflow), and cylinders (which convert compressed air into mechanical work).
A basic pneumatic system involves a compressor to generate compressed air, an air reservoir to store it, valves to control its flow, and actuators to do the work. For instance, a pneumatic system might power the robotic arm on an assembly line, or operate a braking system in a vehicle.
- Generation of Compressed Air: A compressor takes in atmospheric air and increases its pressure.
- Air Storage and Distribution: Air is stored in a tank and distributed through a network of pipes and tubing.
- Control Valves: Valves direct and regulate the flow of compressed air, acting like switches.
- Actuators: Actuators use the pressurized air to perform tasks; pneumatic cylinders are a common example, converting pressure into linear motion.
Career Expert Tips:
- Ace those interviews! Prepare effectively by reviewing the Top 50 Most Common Interview Questions on ResumeGemini.
- Navigate your job search with confidence! Explore a wide range of Career Tips on ResumeGemini. Learn about common challenges and recommendations to overcome them.
- Craft the perfect resume! Master the Art of Resume Writing with ResumeGemini’s guide. Showcase your unique qualifications and achievements effectively.
- Don’t miss out on holiday savings! Build your dream resume with ResumeGemini’s ATS optimized templates.
Q 16. How do you troubleshoot a pneumatic system malfunction?
Troubleshooting a pneumatic system malfunction requires a systematic approach. I typically follow these steps:
- Safety First: Isolate the system and depressurize it before beginning any troubleshooting. This prevents unexpected movement or air blasts.
- Visual Inspection: Look for any obvious issues like leaks (check for hissing sounds or escaping air), loose connections, damaged tubing, or foreign objects obstructing airflow.
- Check Air Pressure: Verify that the compressor is functioning correctly and that the system has adequate air pressure. A pressure gauge is essential here.
- Test Individual Components: Systematically test each component: valves, actuators, and connections. For instance, manually actuate valves to check their function, inspect cylinders for internal damage or leaks, and check connections for tightness.
- Trace Airflow: Follow the compressed air path, checking pressure at various points to pinpoint the location of a pressure drop or blockage. Using a pressure gauge at different points allows you to isolate the faulty component.
- Listen for Clues: Unusual sounds, like knocking or rattling, can indicate problems within components.
- Use a Pneumatic Schematic: Refer to the system’s schematic diagram to understand the airflow path and component interconnections. This helps to trace potential problem areas.
For example, if a pneumatic cylinder fails to extend, I’d first check the air pressure at the cylinder’s input port. If the pressure is low, I’d trace the air line back to find a leak or valve problem. If the pressure is normal, the problem might be within the cylinder itself (seals, piston, etc.).
Q 17. What safety precautions should be taken when working with electricity?
Working with electricity demands utmost caution. Safety must be paramount. Key precautions include:
- Lockout/Tagout Procedures: Always use lockout/tagout procedures to de-energize equipment before working on it, preventing accidental energization.
- Personal Protective Equipment (PPE): Wear appropriate PPE, including insulated gloves, safety glasses, and non-conductive footwear. Insulated tools are also crucial.
- Proper Wiring and Grounding: Ensure all electrical systems are properly wired and grounded to prevent electrical shocks.
- Circuit Breakers and Fuses: Know how to properly use and reset circuit breakers and replace fuses, ensuring they are rated appropriately.
- Avoid Contact with Live Wires: Never touch exposed wires or electrical components while the system is energized. Assume all circuits are live unless proven otherwise.
- Awareness of Electrical Hazards: Understand the risks associated with working with electricity, including arc flash hazards and electrocution. Regular training is vital.
- Dry Working Conditions: Never work with electricity near water or other conductive liquids. Avoid working in damp environments to reduce risk.
A clear understanding of electrical safety is not just a good practice; it’s a life-saving necessity.
Q 18. What safety precautions should be taken when working with machinery?
Machine safety is critical. Precautions include:
- Lockout/Tagout: Before any maintenance or repair, ensure the machine is completely shut down and locked out to prevent accidental startup.
- Guards and Safety Devices: Confirm that all safety guards and devices (e.g., emergency stops, light curtains) are in place and functioning correctly.
- Personal Protective Equipment (PPE): Wear appropriate PPE, such as safety glasses, hearing protection, steel-toed shoes, and gloves, depending on the specific machine and task.
- Proper Training: Receive comprehensive training on the operation and safety procedures of the specific machine before operating or maintaining it.
- Clear Work Area: Maintain a clean and organized work area around machinery, free of obstructions. Clutter increases the risk of accidents.
- Regular Inspection: Regularly inspect machinery for damage, wear, or loose parts. Report any safety concerns promptly.
- Safe Lifting Techniques: If handling heavy components or parts, utilize proper lifting techniques to avoid injury.
For instance, before working on a press, I’d ensure it’s locked out and tagged out, verify the safety guard is in place, and wear appropriate PPE like safety glasses and gloves. Neglecting these precautions can lead to serious injury.
Q 19. Explain the importance of lockout/tagout procedures.
Lockout/Tagout (LOTO) procedures are essential for preventing accidental energization or startup of equipment during maintenance or repair. They ensure that energy sources (electrical, mechanical, hydraulic, pneumatic) are isolated and prevented from being accidentally reactivated while someone is working on the equipment.
The process involves identifying energy sources, shutting them down, isolating them using locks or other devices, and tagging them to indicate who has locked out the equipment. Only the person who applied the lockout can remove it after verifying the equipment is safe to restart. This prevents accidents caused by unexpected energy release and protects personnel working on machinery.
LOTO procedures are non-negotiable. A failure to follow these procedures can have catastrophic consequences, resulting in serious injury or even death.
Q 20. Describe your experience with troubleshooting complex electromechanical systems.
I’ve had considerable experience troubleshooting complex electromechanical systems, particularly in industrial automation settings. One example involved a malfunctioning automated packaging machine. The machine unexpectedly stopped during operation, causing production delays.
My troubleshooting involved systematically checking the electrical components (motors, sensors, PLC, power supply) and the mechanical components (conveyor belts, actuators, grippers). I used a combination of multimeters, logic analyzers, and my knowledge of PLC programming to diagnose the problem. Ultimately, I discovered that a faulty proximity sensor was causing the machine to shut down due to a false signal. Replacing the sensor resolved the issue and restored production.
Another project involved an automated welding system that was producing inconsistent welds. Through careful analysis and testing, I determined that the problem was related to inconsistent air pressure in the pneumatic system which activated the welding clamps. I adjusted the pneumatic pressure regulator and performed regular maintenance to maintain a consistent pressure. This improved the consistency of the welds, thereby improving the quality and reducing material waste.
Q 21. How do you approach troubleshooting a problem when you don’t know the cause?
When faced with an unknown problem, I employ a structured approach:
- Gather Information: Begin by gathering as much information as possible. What are the symptoms? When did the problem start? What were the preceding events? Talking to operators or those who witnessed the malfunction can provide valuable clues.
- Visual Inspection: Conduct a thorough visual inspection of the system. Look for any obvious signs of damage, unusual wear, or anything out of the ordinary.
- Systematic Testing: Use appropriate diagnostic tools (multimeters, oscilloscopes, etc.) to systematically test individual components. Isolate sections of the system to narrow down the possibilities.
- Process of Elimination: Based on tests, eliminate possible causes one by one. This narrows the field of potential problems.
- Consult Resources: Refer to schematics, manuals, and online resources to understand the system’s functionality and potential problem areas. Sometimes a quick online search can provide solutions to common problems.
- Seek Expertise: If the problem remains unresolved, don’t hesitate to seek help from colleagues or specialists. A fresh pair of eyes can often spot something overlooked.
- Document Findings: Meticulously document all findings, tests performed, and troubleshooting steps taken. This is essential for future reference and to improve troubleshooting efficiency.
Troubleshooting is often a detective game; the key is to be methodical and persistent.
Q 22. Describe a time you had to troubleshoot a difficult problem. What was your approach?
One particularly challenging troubleshooting experience involved a conveyor belt system in a manufacturing plant that kept unexpectedly stopping. My initial approach followed a structured methodology. First, I gathered information: I interviewed operators to understand the circumstances of the stoppages (e.g., load size, speed, preceding events), and reviewed any existing maintenance logs. This helped me pinpoint potential areas of concern. Next, I performed a visual inspection, checking for obvious issues like loose belts, damaged components, or obstructions. This revealed nothing immediately apparent.
Moving on to more in-depth diagnostics, I used a multimeter to check the motor’s voltage and current draw, revealing that the current spiked just before each stoppage. This indicated a possible problem with the motor itself or its control circuitry. I then consulted the electrical schematics and, after meticulously checking each connection and component, discovered a faulty proximity sensor that was sending incorrect signals to the PLC (Programmable Logic Controller), causing the system to shut down as a safety measure. Replacing the sensor resolved the issue. The key to solving this problem was systematic investigation—starting with the simplest checks and progressively moving toward more complex diagnostics—coupled with careful documentation of each step.
Q 23. What are some common diagnostic tools you use in troubleshooting?
My diagnostic toolkit is quite diverse, encompassing both electrical and mechanical tools. For electrical troubleshooting, I regularly use multimeters (for voltage, current, and resistance measurements), oscilloscopes (to analyze waveforms and identify signal integrity problems), and clamp meters (for non-invasive current measurements). These tools help pinpoint faults in wiring, circuits, and electrical components. For mechanical troubleshooting, I utilize various tools depending on the equipment. This might include dial indicators (to measure runout and alignment), stroboscopes (for examining moving parts at slow speeds), torque wrenches (to ensure proper fastener tightening), and laser alignment tools (to ensure proper shaft alignment in rotating equipment). Often, I also use thermal imaging cameras to identify overheating components, which could indicate a problem before it escalates into a catastrophic failure. In addition, a good set of mechanical measuring tools, like calipers and micrometers, are essential for precise measurements.
Q 24. How do you document your troubleshooting process?
Thorough documentation is crucial for effective troubleshooting and preventative maintenance. I maintain detailed records of every troubleshooting event, including the date, time, affected equipment, initial symptoms, diagnostic steps taken, measurements obtained (with specific values!), components replaced or repaired, and the final resolution. I typically use a combination of methods: I use a digital logbook (e.g., a dedicated software or a spreadsheet) to record information systematically and digitally store supporting images, screenshots, or electrical schematics. I also often write a concise summary, including relevant diagrams, and attach it to the equipment’s maintenance file. This comprehensive documentation is essential for future reference and facilitates efficient troubleshooting for recurring problems or similar issues on other equipment.
Q 25. How do you prioritize multiple maintenance tasks?
Prioritizing maintenance tasks requires a systematic approach. I typically use a combination of factors to establish priority: First, safety-critical tasks (those that directly impact safety) always take precedence. Next, I consider the severity of the problem. A critical failure that could lead to a production halt or safety hazard takes precedence over a minor cosmetic issue. Third, I factor in the urgency of the repair. A task that needs immediate attention to avoid further damage or production downtime is prioritized higher. Finally, I consider the impact of the task on production and the potential cost of the downtime. I often use a simple matrix or prioritization system to visually track the tasks and ensure the most urgent and critical issues are addressed first.
Q 26. Explain your understanding of preventative maintenance.
Preventative maintenance (PM) is proactive maintenance aimed at preventing equipment failures before they occur. It’s far more cost-effective than reactive maintenance (fixing problems after they’ve happened). A strong PM program involves regular inspections, lubrication, cleaning, adjustments, and replacement of parts based on scheduled intervals or usage hours. This significantly extends the lifespan of equipment, minimizes downtime, and enhances safety. For example, in a manufacturing setting, a PM program for a motor might include regularly checking the motor’s vibration levels (using vibration sensors), lubricating the bearings, inspecting the windings for signs of wear, and performing thermal imaging checks. These preventative steps are cheaper than a complete motor overhaul or a costly production shutdown due to a motor failure.
Q 27. Describe your experience with different types of sensors and transducers.
I have extensive experience with various types of sensors and transducers, including:
- Temperature sensors: Thermocouples, RTDs (Resistance Temperature Detectors), and thermistors for measuring temperature in various applications.
- Pressure sensors: Strain gauge-based pressure sensors, piezoelectric sensors, and capacitive sensors, used for measuring pressure in hydraulic and pneumatic systems.
- Position sensors: Potentiometers, LVDTs (Linear Variable Differential Transformers), and encoders (rotary and linear), used for position feedback in robotics and automated systems.
- Flow sensors: Orifice plates, rotameters, ultrasonic flow meters, and turbine flow meters for measuring fluid flow rates.
- Proximity sensors: Inductive, capacitive, and photoelectric sensors used for object detection and position sensing in automation and control systems.
Understanding the principles of operation, calibration techniques, and limitations of each sensor type is crucial for accurate measurement and effective troubleshooting. For instance, I know that the selection of a sensor depends heavily on the application. A thermocouple might be preferred for high-temperature environments, while a capacitive sensor is more suitable for non-contact measurements.
Q 28. How familiar are you with Programmable Logic Controllers (PLCs)?
I’m very familiar with Programmable Logic Controllers (PLCs). I have experience programming PLCs using ladder logic, structured text, and function block diagrams. My skills encompass designing PLC programs for various industrial automation tasks, including process control, motion control, and supervisory control. I understand how PLCs interface with various sensors, actuators, and HMI (Human-Machine Interface) systems. Troubleshooting PLC programs involves systematic checks of the logic, input/output signals, and communication networks. For example, I can use diagnostic tools to monitor the status of I/O modules, identify faulty ladder logic rungs, and trace signal flow through the PLC program. My experience includes working with various PLC brands (e.g., Allen-Bradley, Siemens, etc.) and adapting to different programming environments.
Key Topics to Learn for Basic Electrical and Mechanical Troubleshooting Interview
- Basic Electrical Concepts: Understanding voltage, current, resistance, and Ohm’s Law. Practical application: Diagnosing simple circuit failures using a multimeter.
- Electrical Safety Procedures: Proper use of personal protective equipment (PPE) and lockout/tagout procedures. Practical application: Safe and effective troubleshooting of electrical systems in various settings.
- Basic Mechanical Principles: Understanding levers, pulleys, gears, and basic machine operations. Practical application: Identifying mechanical failures in simple machines and applying appropriate fixes.
- Troubleshooting Methodologies: Applying systematic approaches like the 5 Whys or fault trees to identify root causes of malfunctions. Practical application: Efficiently diagnosing problems in complex systems.
- Reading Schematics and Diagrams: Interpreting electrical and mechanical diagrams to understand system layouts and component interactions. Practical application: Using schematics to trace circuits and identify potential points of failure.
- Common Tools and Equipment: Familiarity with multimeters, oscilloscopes, torque wrenches, and other relevant tools. Practical application: Selecting and using the appropriate tools for specific troubleshooting tasks.
- Preventive Maintenance: Understanding the importance of regular maintenance to prevent breakdowns and extend equipment lifespan. Practical application: Developing and implementing preventative maintenance schedules.
- Problem Solving and Critical Thinking: Developing analytical skills to identify the root cause of a problem, rather than just addressing the symptoms. Practical application: Effectively diagnosing and resolving complex mechanical and electrical issues.
Next Steps
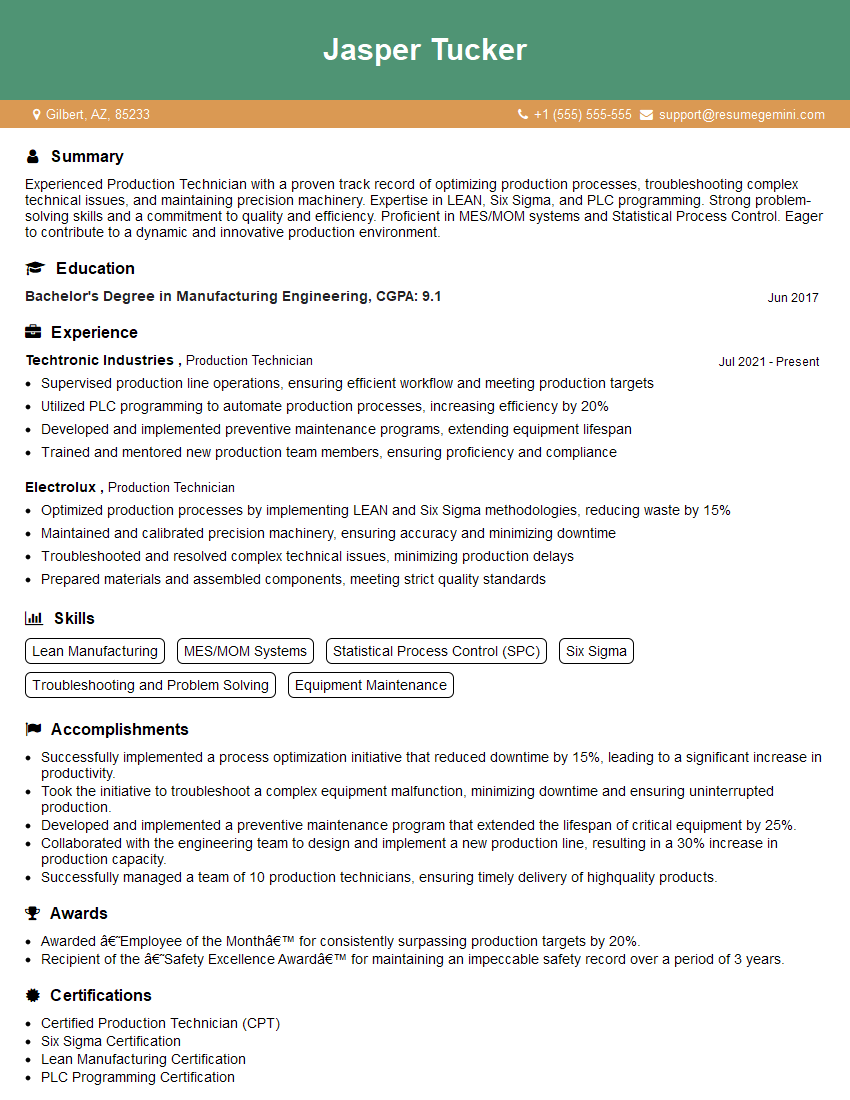
Mastering Basic Electrical and Mechanical Troubleshooting is crucial for career advancement in many technical fields. A strong understanding of these principles demonstrates valuable problem-solving skills and a commitment to safety, significantly increasing your employability. To maximize your job prospects, it’s essential to present your skills effectively. Creating an ATS-friendly resume is key to getting your application noticed. ResumeGemini is a trusted resource that can help you build a professional and impactful resume that highlights your abilities. Examples of resumes tailored to Basic Electrical and Mechanical Troubleshooting are available, showcasing how to present your skills effectively to potential employers. Take the next step towards your dream career – build a winning resume with ResumeGemini today!
Explore more articles
Users Rating of Our Blogs
Share Your Experience
We value your feedback! Please rate our content and share your thoughts (optional).
What Readers Say About Our Blog
Hello,
We found issues with your domain’s email setup that may be sending your messages to spam or blocking them completely. InboxShield Mini shows you how to fix it in minutes — no tech skills required.
Scan your domain now for details: https://inboxshield-mini.com/
— Adam @ InboxShield Mini
Reply STOP to unsubscribe
Hi, are you owner of interviewgemini.com? What if I told you I could help you find extra time in your schedule, reconnect with leads you didn’t even realize you missed, and bring in more “I want to work with you” conversations, without increasing your ad spend or hiring a full-time employee?
All with a flexible, budget-friendly service that could easily pay for itself. Sounds good?
Would it be nice to jump on a quick 10-minute call so I can show you exactly how we make this work?
Best,
Hapei
Marketing Director
Hey, I know you’re the owner of interviewgemini.com. I’ll be quick.
Fundraising for your business is tough and time-consuming. We make it easier by guaranteeing two private investor meetings each month, for six months. No demos, no pitch events – just direct introductions to active investors matched to your startup.
If youR17;re raising, this could help you build real momentum. Want me to send more info?
Hi, I represent an SEO company that specialises in getting you AI citations and higher rankings on Google. I’d like to offer you a 100% free SEO audit for your website. Would you be interested?
Hi, I represent an SEO company that specialises in getting you AI citations and higher rankings on Google. I’d like to offer you a 100% free SEO audit for your website. Would you be interested?
good
