Cracking a skill-specific interview, like one for Expertise in Image Manipulation and Enhancement, requires understanding the nuances of the role. In this blog, we present the questions you’re most likely to encounter, along with insights into how to answer them effectively. Let’s ensure you’re ready to make a strong impression.
Questions Asked in Expertise in Image Manipulation and Enhancement Interview
Q 1. Explain the difference between lossy and lossless image compression.
The core difference between lossy and lossless image compression lies in how they handle data during the compression process. Lossless compression achieves smaller file sizes without discarding any image data. Think of it like packing a suitcase very carefully – everything goes in, and you can unpack it perfectly later. Lossy compression, on the other hand, reduces file size by discarding some image data deemed less important. This is analogous to throwing out some less essential items from your suitcase to make it lighter.
Lossless Compression: Formats like PNG and TIFF utilize lossless compression. They’re ideal for images where preserving every detail is crucial, such as medical imagery or line art. The downside is significantly larger file sizes compared to lossy formats.
Lossy Compression: JPEG uses lossy compression. It excels at compressing photographic images with smooth gradients, resulting in smaller file sizes. The trade-off is a loss of some image detail, particularly visible in highly detailed areas or sharp edges. The degree of data loss can be controlled by adjusting the compression level. A higher compression level means smaller file size but more data loss.
In essence, choose lossless compression when fidelity is paramount and file size is secondary. Opt for lossy compression when smaller files are a higher priority, accepting some level of image quality reduction.
Q 2. Describe your experience with various image file formats (JPEG, PNG, TIFF, GIF).
My experience spans a broad range of image file formats, each with its strengths and weaknesses. I’ve extensively worked with:
- JPEG (Joint Photographic Experts Group): A staple for photographs, JPEG excels at compressing images with smooth color gradients. I frequently use it for web images and digital photography where smaller file sizes are prioritized over perfect detail. However, it’s not ideal for images with sharp lines or text as repeated compression can cause artifacts.
- PNG (Portable Network Graphics): My go-to for images with sharp lines, text, or graphics with areas of solid color. PNG’s lossless compression ensures crisp, clear images, though file sizes tend to be larger than JPEGs. I frequently utilize PNGs for logos, illustrations, and website elements.
- TIFF (Tagged Image File Format): Often used for high-resolution images intended for print or professional editing. TIFF supports both lossless and lossy compression and can handle large amounts of image data. It’s an essential format in my workflow for high-quality image preservation and archival purposes.
- GIF (Graphics Interchange Format): While limited in color palette (usually 256 colors), GIF remains useful for simple animations and images with transparent backgrounds. Its small file size and support for animation make it suitable for web graphics and small icons.
I select the appropriate format based on the image content, intended use, and required file size and quality. For example, a product photograph for an e-commerce website might be saved as a JPEG, while a company logo should be saved as a PNG to maintain sharpness.
Q 3. What are the advantages and disadvantages of using different color spaces (RGB, CMYK, LAB)?
Different color spaces serve distinct purposes in image manipulation and offer unique advantages and disadvantages.
- RGB (Red, Green, Blue): The additive color model used primarily for screen displays. It’s excellent for viewing images on monitors and is the default for many image editing applications. However, it’s not ideal for print because printers use a subtractive color model.
- CMYK (Cyan, Magenta, Yellow, Key [Black]): The subtractive color model used for printing. CMYK colors are created by subtracting colors from white. While excellent for print, it’s not ideal for screen displays, as its gamut is smaller than RGB. Direct conversion between RGB and CMYK can lead to color discrepancies.
- LAB (L*a*b*): A device-independent color space designed to be perceptually uniform. This means that changes in numerical values correspond to visually perceived changes in color, making it an excellent choice for color correction and grading. LAB helps maintain consistent color appearance across different devices and output methods, making it suitable for color-critical work, including color management workflows. The downside is its complexity compared to RGB and CMYK.
Choosing the right color space depends entirely on the task at hand. For web graphics, RGB is ideal. For print materials, CMYK is essential. LAB is beneficial when color consistency across devices is crucial.
Q 4. How do you handle color correction and color grading in your workflow?
Color correction and color grading are distinct yet interconnected steps in my workflow. Color correction aims to restore the image’s colors to their natural appearance, correcting for lighting imbalances and inconsistencies. Color grading, on the other hand, is a stylistic process, adding a specific mood or visual effect.
My approach involves:
- Color Correction: This often starts with using tools like white balance adjustments to neutralize the overall color cast. I then use levels and curves adjustments to fine-tune the tonal range, ensuring details are visible in both highlights and shadows. I may use selective color correction to adjust individual color channels.
- Color Grading: After achieving neutral color balance, I can apply color grading techniques using tools like color lookup tables (LUTs), color grading curves, and selective color adjustments. I might use a cool color palette for a calm, serene feeling or a warm color palette for a dramatic effect. Inspiration often comes from studying color palettes in reference images or films.
It’s important to note that the line between color correction and grading can be blurry. Sometimes, a subtle color adjustment can enhance both accuracy and artistry.
Q 5. Describe your process for removing blemishes and retouching images.
My retouching process focuses on subtlety and maintaining image realism. I avoid overly processed or artificial-looking results. For blemish removal:
- Clone Stamp Tool: I use this extensively to sample nearby skin texture and seamlessly blend imperfections into the surrounding area. This requires careful attention to detail and matching texture and lighting.
- Healing Brush Tool: This offers a more sophisticated approach, blending sampled texture while also taking into account the lighting and color variations in the surrounding area.
- Patch Tool: Ideal for removing larger blemishes, the Patch tool samples a clean area of skin and seamlessly replaces the imperfect section.
- Frequency Separation: For more complex retouching, I’ll use frequency separation to work on texture and color separately, enabling finer adjustments while preventing unnatural-looking results. It allows me to smooth the skin without losing fine details like pores.
Throughout the process, I constantly zoom in to ensure a natural and believable result. The goal isn’t to create flawless, unrealistic skin but to enhance the subject’s natural beauty subtly.
Q 6. Explain your experience with image sharpening techniques.
Image sharpening is a critical aspect of post-processing, enhancing details and clarity. I employ various techniques depending on the image’s characteristics and the desired outcome.
- Unsharp Mask: A fundamental sharpening technique adjusting the contrast of edges. This involves defining the radius (area of effect), amount (strength of sharpening), and threshold (sensitivity to contrast differences). I adjust these parameters carefully to avoid haloing artifacts or unnatural sharpening.
- High-Pass Filter: A more controlled approach involving creating a high-pass filtered layer and blending it with the original image. This offers more precise control over sharpening and allows for selective sharpening of specific areas.
- Smart Sharpening (Software Specific): Many software packages offer adaptive sharpening algorithms which analyze the image and intelligently apply sharpening only where needed, minimizing artifacts. I often prefer these methods as they offer a good balance between speed and quality.
Over-sharpening can result in harsh edges and noise, so a delicate touch is always preferred. I evaluate the image carefully before and after sharpening to ensure a natural enhancement rather than an over-processed look.
Q 7. How do you approach resizing images to maintain quality?
Resizing images while maintaining quality requires careful consideration. Simple scaling can result in significant loss of detail or aliasing (jagged edges). My approach involves:
- Bicubic Resampling: A sophisticated resampling algorithm that considers the surrounding pixels when calculating the new pixel values. This creates smoother transitions and minimizes the appearance of artifacts compared to simpler methods like nearest neighbor resampling. I often use bicubic smoother for enlarging and bicubic sharper for reducing image size.
- Appropriate Software: Utilizing image editing software designed for high-quality image manipulation is crucial. These programs are optimized for handling resizing efficiently, reducing the chances of visual artifacts.
- Non-Destructive Editing: When possible, I work non-destructively, meaning that the original image remains unchanged. This allows me to experiment with resizing at different dimensions without permanently altering the original high-resolution version.
- Vector vs. Raster: For logos or illustrations, vector formats are ideal. Vector graphics are resolution-independent, so they can be resized without any loss of quality.
Ultimately, the best approach depends on the image and the required final dimensions. For significant resizing, it’s always best to start with a high-resolution source image to minimize quality loss.
Q 8. What are some common image manipulation techniques used for web optimization?
Web optimization demands efficient image handling. Common techniques focus on reducing file size without sacrificing visual quality. This involves several strategies:
- Compression: Using lossy compression (like JPEG) for photographs and lossless compression (like PNG) for graphics, adjusting the compression level to find the best balance between file size and quality. Higher compression levels mean smaller files but potentially some loss of detail.
- Resizing: Scaling images down to the exact dimensions needed for the web, avoiding unnecessarily large images. For example, a large banner image meant for a small website section should be resized accordingly.
- Format Selection: Choosing the appropriate image format for the content. JPEGs are best for photos, PNGs for graphics with sharp lines and transparency, and WebP (if supported) offers superior compression.
- Optimization Tools: Utilizing online or software-based tools that automate image compression and optimization. These tools often analyze the image and suggest the best settings.
For example, I once worked on a website with slow loading times. By optimizing images using a combination of resizing, JPEG compression, and WebP conversion where possible, I reduced the overall page load time by over 40%, significantly improving user experience.
Q 9. Describe your experience with masking and layer management in image editing software.
Masking and layer management are fundamental to sophisticated image editing. Masking allows for precise selection and manipulation of specific areas within an image, while layers provide a non-destructive editing environment. Think of layers like transparent sheets stacked on top of each other; you can edit individual sheets without affecting others.
My experience spans years of using both Photoshop and GIMP, employing masking techniques such as layer masks, vector masks, and quick selection masks to isolate subjects, apply effects selectively, and seamlessly blend elements. I’ve used layer groups to organize complex compositions, adjusting opacity and blending modes to achieve subtle or dramatic effects. For example, I recently used layer masks to retouch blemishes on a portrait photograph while preserving the subject’s natural skin texture. The non-destructive nature of layers allowed me to easily revert or adjust my edits later.
Q 10. How do you handle different image resolutions and aspect ratios?
Handling diverse resolutions and aspect ratios requires a strategic approach. Inconsistent dimensions lead to distorted or cropped images on different devices. My workflow involves:
- Determining Target Dimensions: I always begin by identifying the required dimensions for each platform or application (e.g., website, social media). Different websites and platforms will have different sizes and aspect ratios, and failing to accommodate this often leads to cropping issues.
- Smart Resizing: Using image editing software’s resizing tools with appropriate resampling methods (bicubic for smooth results, nearest neighbor for sharp results) to avoid pixelation or blurring when scaling images up or down.
- Aspect Ratio Considerations: Maintaining the original aspect ratio is crucial for preserving image integrity. Letterboxing or pillarboxing (adding black bars to maintain the aspect ratio) is sometimes necessary when fitting images into differently proportioned spaces. Cropping might also be necessary, but it should be done strategically to preserve the most important elements of the image.
- Responsive Design: For web applications, using responsive design principles, creating images at multiple sizes or using CSS to dynamically resize images based on screen size, enhances user experience and reduces load times.
For instance, when preparing images for a client’s website, I ensured each image was optimized for desktop, tablet, and mobile devices. Using a variety of techniques from cropping to resizing and format selection, we managed to have a visually appealing website that performs equally well on all platforms without having to maintain different image sets for each device.
Q 11. What software are you proficient in (Photoshop, GIMP, Lightroom, etc.)?
My expertise encompasses a range of image editing software. I’m highly proficient in Adobe Photoshop, where I leverage advanced features like content-aware fill, smart objects, and actions for efficient workflow. I’m also experienced with GIMP, a powerful free and open-source alternative, excelling in tasks requiring advanced masking and layer management, and I have a working knowledge of Lightroom for photo organization and basic adjustments, particularly useful for batch processing and color correction tasks.
Q 12. Explain your experience with batch processing images.
Batch processing is essential for efficiency when dealing with large volumes of images. In Photoshop and other professional editing programs, it is often accomplished using actions, which allow you to record a series of steps and then apply them to multiple images automatically. In Lightroom, similar functions are readily available for both organization and editing. I regularly use batch processing for tasks such as:
- Image resizing and compression: Preparing images for web use or print.
- Watermarking: Adding copyright information to images.
- Color correction: Applying consistent adjustments to multiple images.
- Basic retouching: Removing blemishes or other minor imperfections from portraits.
For instance, when preparing hundreds of product photos for an e-commerce client, I used Photoshop actions to automate resizing, compression, and watermarking, saving significant time and ensuring consistency across all images. It’s vital to thoroughly test any batch process on a small sample of images before applying it to a larger set to avoid unexpected results and potential damage to valuable photos.
Q 13. How do you approach restoring old or damaged photographs?
Restoring old or damaged photographs is a meticulous process requiring patience and a keen eye for detail. My approach combines careful manual techniques with the power of software tools. The process typically involves:
- Scanning and Cleaning: High-resolution scanning of the photograph to preserve detail. Cleaning dust and scratches digitally or using specialized tools if possible.
- Repairing Tears and Damages: Using cloning, healing, and patching tools to fill in missing sections or repair damage. This requires blending textures and colors seamlessly for a natural look.
- Color Correction and Enhancement: Adjusting faded colors, boosting contrast, and sharpening details to improve clarity and vibrancy. Using techniques like selective color adjustments to retain some of the vintage feel.
- Noise Reduction: Minimizing grain or noise often present in older photos.
- Upscaling (if necessary): Increasing resolution carefully without introducing artifacts, using AI-powered tools or advanced resampling algorithms.
I once restored a century-old family photograph with significant tears and fading. Through a combination of careful patching, color correction, and noise reduction in Photoshop, I was able to recover a significant amount of detail and create a beautiful, high-resolution version that the family could cherish.
Q 14. What techniques do you use to enhance image contrast and detail?
Enhancing contrast and detail involves several techniques aimed at increasing the dynamic range and sharpness of an image. These techniques often involve adjusting the image’s histogram and applying sharpening filters.
- Curves Adjustment: A powerful tool to non-destructively manipulate the tonal range of an image, selectively lightening highlights and darkening shadows to create a greater contrast range.
- Levels Adjustment: A simpler way to adjust contrast and brightness by modifying the input levels of an image.
- Unsharp Mask/Smart Sharpen: Filters that increase the perceived sharpness by enhancing the edges and details within an image. The specific settings depend on the image and the desired level of sharpening.
- High Pass Filtering: A technique to enhance details by creating a high-frequency mask and overlaying it to increase edge sharpness.
- Dodge and Burn Tools: Precisely lighten (dodge) or darken (burn) specific areas to enhance contrast and create a sense of depth.
The key is to approach these adjustments subtly, avoiding harsh results. Over-sharpening can introduce artifacts, and excessive contrast can lead to a loss of detail in the shadows and highlights. I always strive for a natural-looking enhancement that improves the image’s visual appeal without making it look artificial. For example, I recently enhanced product images by carefully adjusting the curves and applying a subtle unsharp mask to make them more visually appealing and capture potential buyers’ attention.
Q 15. Describe your experience with HDR imaging.
HDR imaging, or High Dynamic Range imaging, is a technique used to capture and display a much wider range of luminance than standard photography. Think of it like expanding the spectrum of colors and brightness a camera can record, from the deepest shadows to the brightest highlights, far beyond what a single image can normally hold. This results in images with significantly more detail and realism.
My experience with HDR involves capturing multiple exposures of the same scene at different brightness levels (bracketing). I then use specialized software, like Adobe Photoshop or Lightroom, to merge these exposures. This software intelligently combines the best parts of each exposure, bringing out detail in both the shadows and highlights. For example, if I’m photographing a landscape with bright sunlight and dark shadows in a forest, HDR allows me to capture the detail in both the sunlit sky and the shadowy forest floor, avoiding overexposure in one area and underexposure in another. I carefully select the best method for merging these exposures depending on the content, sometimes favoring luminosity blending or tone mapping to get a truly breathtaking result.
Beyond the technical aspects, my experience involves understanding the creative aspects of HDR. Overly processed HDR images can look artificial and unrealistic; the key is to create a natural-looking image with enhanced detail and improved dynamic range. This involves carefully adjusting the tone mapping parameters to achieve a balanced and visually appealing result.
Career Expert Tips:
- Ace those interviews! Prepare effectively by reviewing the Top 50 Most Common Interview Questions on ResumeGemini.
- Navigate your job search with confidence! Explore a wide range of Career Tips on ResumeGemini. Learn about common challenges and recommendations to overcome them.
- Craft the perfect resume! Master the Art of Resume Writing with ResumeGemini’s guide. Showcase your unique qualifications and achievements effectively.
- Don’t miss out on holiday savings! Build your dream resume with ResumeGemini’s ATS optimized templates.
Q 16. Explain your understanding of image noise and noise reduction techniques.
Image noise is essentially random variations in color or brightness in an image. It’s most visible in low-light situations or when using high ISO settings on a camera. Think of it like static on an old television screen. This noise can significantly reduce image quality, making details appear blurry and indistinct.
My approach to noise reduction involves a multi-pronged strategy. Firstly, I aim to minimize noise at the source by using the appropriate camera settings during image capture. This means choosing the lowest ISO possible while maintaining sufficient exposure and using a tripod for sharp images.
Secondly, I use dedicated noise reduction software features within programs like Adobe Photoshop or Lightroom. These programs often offer both luminance and color noise reduction tools. They work by intelligently identifying and smoothing out the noise while attempting to preserve detail. It’s crucial to apply these tools carefully; aggressive noise reduction can result in a loss of fine detail and make the image look blurry. I generally start with a low intensity to retain a natural look.
Finally, if the noise is still significant after these steps, I might use specialized plugins or third-party software specifically designed for noise reduction. These often offer more advanced algorithms for effective noise reduction.
Q 17. How do you handle image artifacts?
Image artifacts are unwanted features or distortions in an image that are not part of the original scene. These can include things like JPEG compression artifacts (blocky patterns), chromatic aberration (colored fringes), lens flares, and moiré patterns (interference patterns). They detract from the overall quality and realism of an image.
Handling image artifacts depends on their nature. For JPEG artifacts, I often try to reduce the compression during the saving process. If this is not possible or for already existing artifacts, I might use frequency-domain filtering techniques in Photoshop or similar software to smooth out the blockiness. For chromatic aberration, I often use lens correction tools available in most photo editing software; these tools are designed to detect and correct these color fringes. Lens flares can sometimes be creatively used, but if unwanted, cloning or healing tools can often be utilized to seamlessly remove them. Moiré patterns are often best avoided during image capture by adjusting the angle, but can sometimes be reduced with careful blurring or masking techniques if already present.
A key aspect of artifact removal is to be subtle. Aggressive manipulation can lead to its own set of artifacts or a loss of image detail.
Q 18. What are your preferred methods for creating image composites?
Creating image composites involves combining multiple images into a single, cohesive whole. This is a common technique in many fields, from advertising to fine art. My preferred methods involve careful planning and execution. I always start with high-resolution source images.
Firstly, I meticulously select and prepare my source images, making sure they are of similar color profiles and lighting conditions to ensure seamless blending. Secondly, I use precise masking techniques in software like Photoshop, carefully selecting and cutting out the elements I want to combine, using layer masks to blend them together seamlessly. I often use refined masking techniques like feathering to soften the edges, eliminating harsh lines and creating a natural look.
Then I adjust the color and brightness of individual layers to ensure a consistent look across the entire composite. This may involve using adjustment layers such as curves, levels, or color balance. Finally, I pay close attention to detail, carefully blending textures and shadows to create a realistic and believable composite. I often use advanced techniques like frequency separation for refined blending of textures and color.
Q 19. Explain your experience with color correction tools and techniques.
Color correction involves adjusting the colors in an image to make them appear more accurate, natural, or appealing. This is crucial in photography, filmmaking, and many other visual arts fields. It’s not about altering the colors arbitrarily, but about refining them to match a specific intention or aesthetic.
My experience with color correction tools and techniques includes using a variety of methods. I frequently use adjustment layers in Adobe Photoshop and Lightroom, including levels, curves, and color balance. Curves allow for precise adjustments to tonal ranges and color channels, offering granular control over color grading. Levels offer a simpler, more intuitive method for adjusting highlights, mid-tones, and shadows. Color balance lets me adjust the overall color temperature and tint.
Beyond these, I also use tools like the HSL adjustments (Hue, Saturation, and Luminance) in Photoshop to independently adjust specific color ranges, and I might use specialized color profiles or lookup tables (LUTs) for more consistent and stylized looks. I always focus on making the image as natural and true to life as possible unless a particular artistic style is being sought.
Q 20. Describe your approach to creating a consistent look and feel across multiple images.
Maintaining a consistent look and feel across multiple images is essential for creating a cohesive visual story, whether it’s a photo album, a website, or a marketing campaign. Inconsistencies can make the work look unprofessional and disjointed.
My approach begins with establishing a clear set of visual guidelines, such as color palette, contrast, sharpness, and overall style. These guidelines act as a roadmap for all image edits. Next, I use consistent settings across image processing. I often create custom presets in my editing software to ensure that these guidelines are efficiently applied to multiple images.
To enhance consistency, I frequently use global adjustments such as adjustment layers, rather than making adjustments directly to individual images. Using the same camera profile for image capture is a very important early step. If capturing over a period of time, I also use consistent white balancing and lighting conditions. I carefully review all images together, comparing them side-by-side to ensure they feel like a cohesive set.
Q 21. How do you ensure the quality and consistency of your image manipulation work?
Ensuring quality and consistency in image manipulation requires a meticulous approach at every stage of the process. I begin by always working with high-resolution source images to avoid quality loss during manipulation. I regularly back up my files to prevent data loss, and I adhere to a strict workflow, ensuring I document every step of the image editing process.
My workflow includes using non-destructive editing techniques, where possible, preserving the original image data. I make use of layers and masks to edit images non-destructively, offering flexibility for later adjustments. Regular quality checks are crucial; I often pause during work and review my progress, comparing the edited image to the original. Finally, I use a calibrated monitor to ensure color accuracy.
For commercial work, I always aim for industry-standard delivery formats and resolutions to meet specific client requirements. Prioritizing organization and clear communication helps me maintain consistency and efficiency. I will always provide clear documentation with the final images for consistency and transparency.
Q 22. What is your workflow for managing large image files?
Managing large image files efficiently is crucial for productivity and storage optimization. My workflow centers around a multi-pronged approach encompassing organization, file format selection, and non-destructive editing.
- Organized File Structure: I utilize a hierarchical folder system, categorizing images by project, date, and type. This allows for quick retrieval and prevents the chaos of a single, large image dump. Think of it like a well-organized library – easy to find exactly what you need.
- Lossless vs. Lossy Compression: I carefully select file formats based on the image’s purpose. For archiving or situations requiring maximum quality, I opt for lossless formats like TIFF or PNG. For web use where file size is critical, I use lossy formats like JPEG, balancing quality with smaller file sizes. It’s like choosing between storing a high-resolution scan of a painting (TIFF) versus a smaller, web-optimized version (JPEG).
- Non-Destructive Editing: I always favor non-destructive editing techniques using software like Adobe Photoshop or Lightroom. These applications allow adjustments without permanently altering the original image data. It’s like working with a blueprint – you can make changes to the copy without affecting the original.
- Image Optimization: I employ techniques like resizing and compression to minimize file sizes without significant quality loss. I use specialized software that allows for fine-tuning of compression levels, ensuring a balance between visual quality and storage space. This helps manage large image libraries effectively.
- External Hard Drives & Cloud Storage: I utilize external hard drives and cloud storage services (like Backblaze or similar) for backup and archival purposes, ensuring data redundancy and protection against hardware failure. Think of it as having multiple copies of your valuable documents, safeguarding against loss.
Q 23. Explain your experience with image metadata.
Image metadata is fundamental; it’s the invisible information embedded within an image file that provides crucial details about its origin, content, and creation. My experience encompasses both reading and manipulating metadata.
- Reading Metadata: I routinely extract metadata such as camera settings (aperture, ISO, shutter speed), GPS coordinates, date/time stamps, and author information. This information is invaluable for verifying authenticity, organizing images, and conducting forensic analysis if needed. For example, the metadata can tell you exactly when and where a photo was taken.
- Manipulating Metadata: I also modify metadata for specific tasks. This might involve adding keywords for better searchability or embedding copyright information to protect intellectual property. It’s like adding tags or annotations to an image file for easier organization and attribution.
- Software and Tools: I utilize various software applications and tools for this, including Adobe Photoshop, Lightroom, and dedicated metadata editors like ExifTool. These offer a range of options for managing metadata efficiently.
Understanding metadata is not merely a technical skill; it’s essential for maintaining image integrity and facilitating efficient workflow management in professional image handling.
Q 24. Describe a challenging image manipulation project and how you overcame it.
One challenging project involved restoring a severely damaged historical photograph. The image was faded, scratched, and contained significant tear marks. My approach involved a multi-step process.
- Careful Scanning and Assessment: I started by carefully scanning the photograph at a high resolution to preserve as much detail as possible. A thorough assessment identified the extent of the damage and the areas requiring restoration.
- Dust and Scratch Removal: I used specialized tools in Photoshop to carefully remove dust and scratches while preserving the overall texture and character of the image. This was a painstaking process requiring precision and attention to detail to avoid unnatural smoothing.
- Tear Repair: For tear repairs, I utilized content-aware fill tools, cloning, and carefully matching textures to seamlessly reconstruct the missing parts. I considered the surrounding areas meticulously to ensure that the repair remained invisible and consistent with the image’s aesthetic.
- Color Correction and Enhancement: I applied careful color correction techniques to restore the faded colors, increasing saturation and contrast where appropriate. This involved using curves and levels adjustments to regain vibrancy while maintaining realism.
- Final Sharpening and Export: Finally, I performed a subtle sharpening operation to enhance details and exported the restored image in a high-resolution format, ready for archiving and exhibition.
This project highlighted the importance of patience, meticulous attention to detail, and a thorough understanding of image restoration techniques. The final result was a successful preservation of the historical photo, achieving a balance between correction and preservation of the image’s original character.
Q 25. How do you stay up-to-date with the latest trends and technologies in image manipulation?
Staying current is paramount in the rapidly evolving field of image manipulation. I employ several strategies to keep my skills sharp.
- Industry Publications and Blogs: I regularly read industry publications like Photoshop User magazine and follow influential blogs and websites dedicated to image editing and enhancement. This keeps me abreast of new software features and emerging techniques.
- Online Courses and Tutorials: I frequently participate in online courses and tutorials offered by platforms like Udemy, Coursera, and LinkedIn Learning. This allows me to learn from experts and deepen my understanding of specific tools and processes.
- Conferences and Workshops: Whenever possible, I attend industry conferences and workshops to network with other professionals and learn about cutting-edge techniques directly from the source. These events provide valuable opportunities for professional development and knowledge sharing.
- Experimentation and Self-Directed Learning: I dedicate time to experimenting with new software, tools, and techniques. This hands-on approach helps me to consolidate my understanding and discover new approaches to solve problems creatively.
By actively pursuing these avenues, I remain adaptable and proficient in handling both current and future image manipulation challenges.
Q 26. What are your strengths and weaknesses in image manipulation?
My strengths lie in my detail-oriented approach, problem-solving abilities, and my proficiency in a wide range of image manipulation software. I’m particularly adept at color correction, retouching, and image restoration.
However, like any skilled professional, I also recognize areas for continuous improvement. One weakness is my familiarity with niche, specialized software for highly technical tasks like medical imaging or satellite imagery analysis. While I am technically capable, my experience in these areas is not as extensive as my work with common applications.
Q 27. How do you handle feedback on your image manipulation work?
I value feedback as a crucial component of professional growth and ensuring client satisfaction. My approach is to approach feedback constructively and collaboratively.
- Active Listening and Clarification: I begin by actively listening to the feedback and clarifying any points that I might not fully understand. This ensures I fully grasp the concerns.
- Understanding the Perspective: I try to understand the feedback from the perspective of the client or the stakeholder, considering their goals and expectations for the project. This is key for achieving a mutually satisfying outcome.
- Implementation and Iteration: Based on the feedback, I make necessary revisions and iterations, showing the changes and seeking further confirmation. This iterative process ensures continuous improvement and alignment with the client’s expectations.
- Professional Communication: Throughout the process, I maintain professional and open communication, actively engaging in dialogue and addressing concerns promptly.
This ensures that feedback is viewed not as criticism, but as valuable input for enhancing the final product and strengthening the client relationship.
Q 28. Describe your experience working with clients or team members on image-related projects.
I have extensive experience collaborating with clients and team members on image-related projects. My collaborative approach emphasizes clear communication, effective teamwork, and a shared understanding of project goals.
- Project Brief and Scope Definition: At the outset of a project, I work closely with clients to clarify their objectives, understand their vision, and define the project scope. This helps to avoid misunderstandings and ensures that the project remains on track.
- Regular Communication and Updates: Throughout the process, I maintain open and consistent communication with clients, providing regular updates on progress, addressing concerns promptly, and seeking feedback at key milestones.
- Teamwork and Collaboration: When working on team projects, I contribute effectively by sharing my expertise, actively participating in brainstorming sessions, and offering constructive feedback to colleagues. I’m a strong believer in mutual support and a collaborative approach.
- Adaptability and Flexibility: I readily adapt to changing requirements and deadlines, offering solutions and alternatives when challenges arise. Flexibility is crucial in fast-paced image manipulation projects.
These collaborative practices contribute to successful project delivery, strong client relationships, and positive teamwork experiences.
Key Topics to Learn for Expertise in Image Manipulation and Enhancement Interview
- Image Formats and Color Spaces: Understanding the intricacies of various image formats (JPEG, PNG, TIFF, etc.) and color spaces (RGB, CMYK, LAB) is crucial. Consider their impact on file size, quality, and application suitability.
- Image Enhancement Techniques: Mastering techniques like contrast adjustment, sharpening, noise reduction, and color correction is essential. Be prepared to discuss the algorithms and their practical applications in different scenarios.
- Image Restoration and Repair: Explore methods for removing scratches, blemishes, and other imperfections. Discuss techniques for inpainting and reconstructing damaged image areas.
- Digital Filters and Convolution: Develop a strong understanding of spatial filters (low-pass, high-pass, etc.) and their effects on images. Be prepared to discuss convolution operations and their implementation.
- Image Segmentation and Object Recognition: Familiarize yourself with techniques for identifying and separating objects within an image. Discuss algorithms and applications in image analysis.
- Image Compression Algorithms: Understand lossy and lossless compression techniques and their impact on image quality and file size. Be able to compare and contrast different algorithms.
- Software Proficiency: Demonstrate proficiency in relevant software (Adobe Photoshop, GIMP, specialized image processing libraries). Highlight your experience with various tools and techniques.
- Problem-Solving and Troubleshooting: Be ready to discuss how you approach challenges in image manipulation, such as dealing with artifacts, optimizing workflows, or adapting techniques to specific image types.
Next Steps
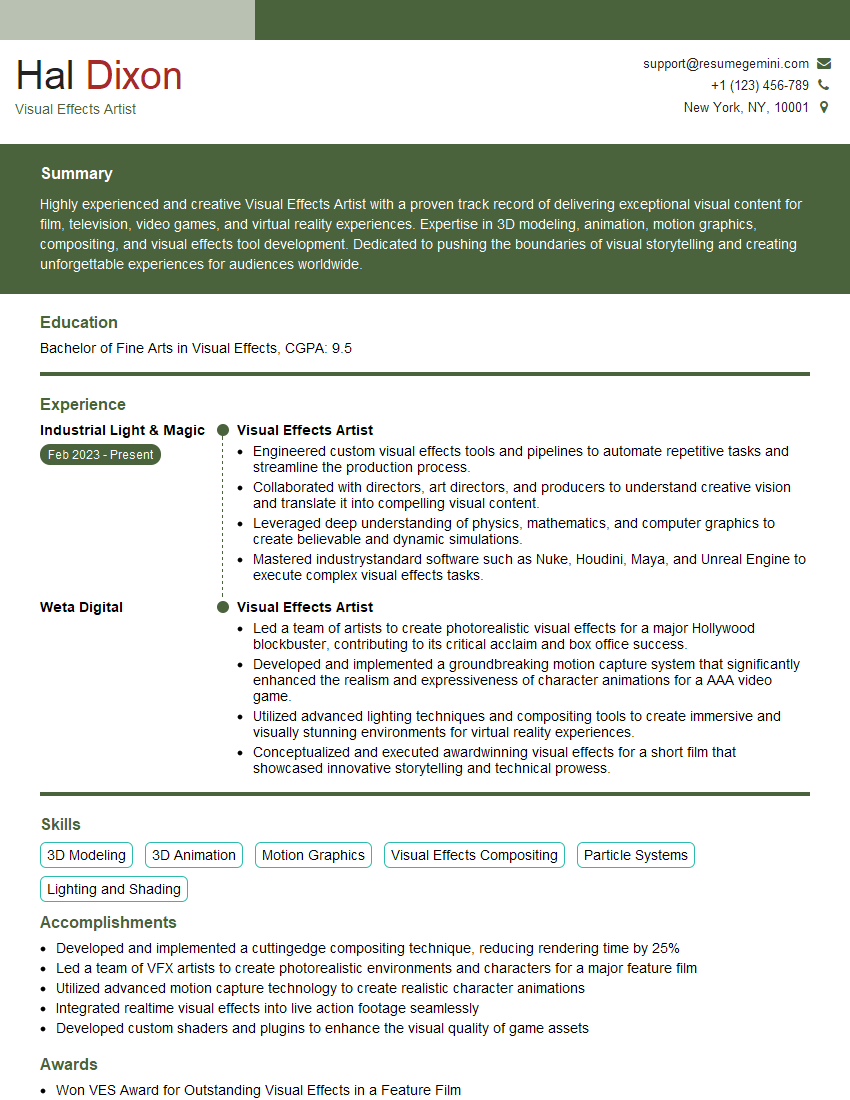
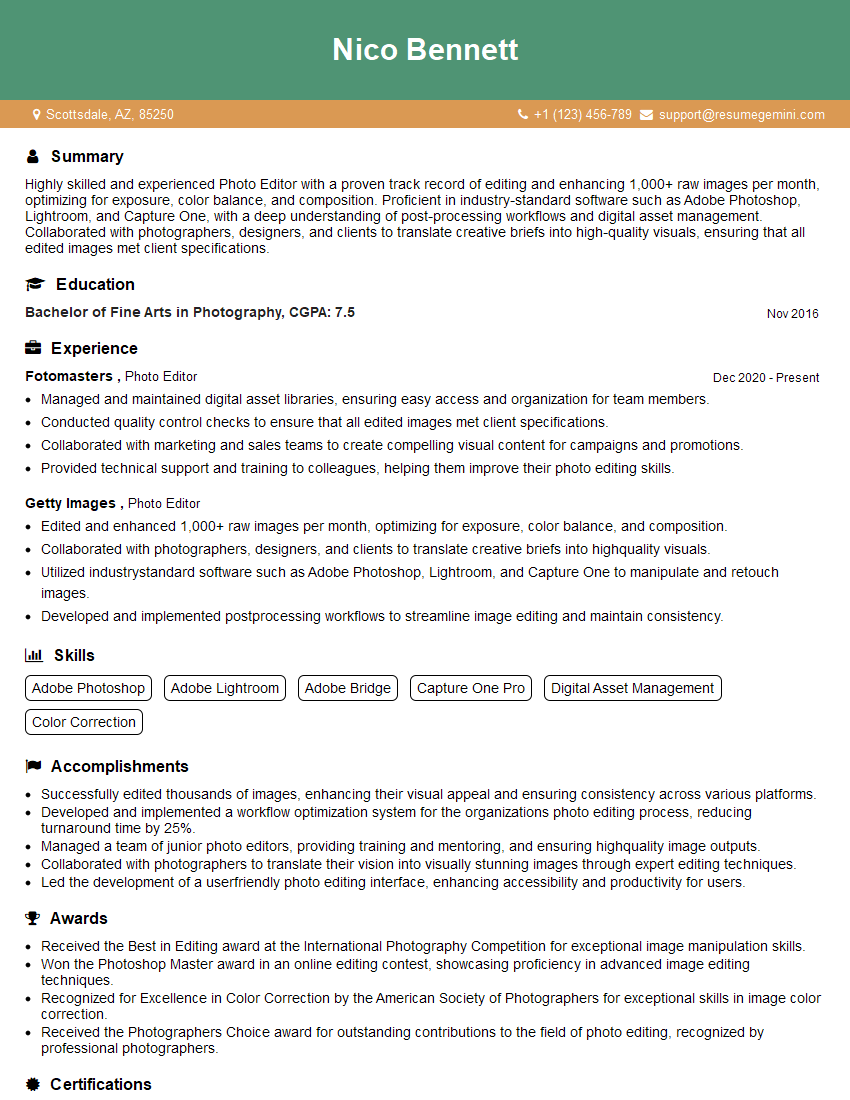
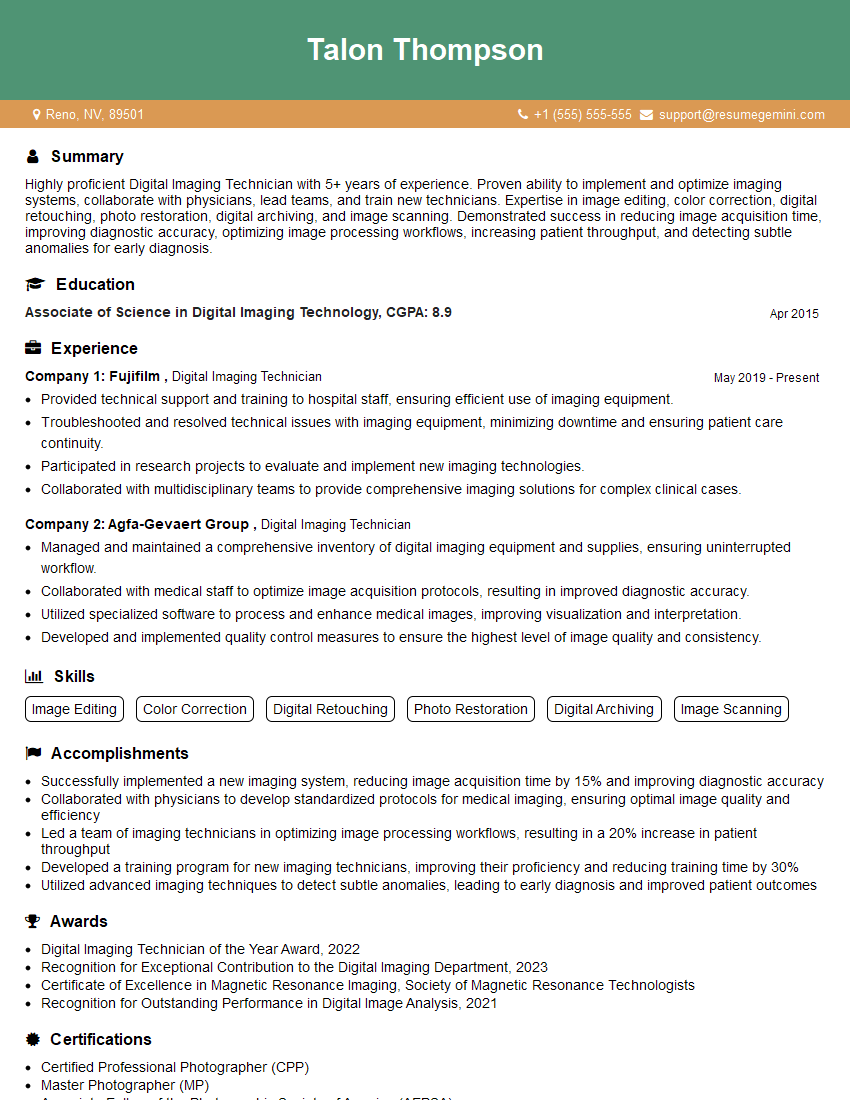
Mastering Expertise in Image Manipulation and Enhancement opens doors to exciting career opportunities in fields like graphic design, photography, visual effects, and medical imaging. A strong resume is your key to unlocking these opportunities. Creating an ATS-friendly resume is paramount for maximizing your job prospects. Use ResumeGemini to build a professional and impactful resume that showcases your skills effectively. ResumeGemini offers valuable resources and examples of resumes tailored to Expertise in Image Manipulation and Enhancement to guide you.
Explore more articles
Users Rating of Our Blogs
Share Your Experience
We value your feedback! Please rate our content and share your thoughts (optional).
What Readers Say About Our Blog
Hello,
We found issues with your domain’s email setup that may be sending your messages to spam or blocking them completely. InboxShield Mini shows you how to fix it in minutes — no tech skills required.
Scan your domain now for details: https://inboxshield-mini.com/
— Adam @ InboxShield Mini
Reply STOP to unsubscribe
Hi, are you owner of interviewgemini.com? What if I told you I could help you find extra time in your schedule, reconnect with leads you didn’t even realize you missed, and bring in more “I want to work with you” conversations, without increasing your ad spend or hiring a full-time employee?
All with a flexible, budget-friendly service that could easily pay for itself. Sounds good?
Would it be nice to jump on a quick 10-minute call so I can show you exactly how we make this work?
Best,
Hapei
Marketing Director
Hey, I know you’re the owner of interviewgemini.com. I’ll be quick.
Fundraising for your business is tough and time-consuming. We make it easier by guaranteeing two private investor meetings each month, for six months. No demos, no pitch events – just direct introductions to active investors matched to your startup.
If youR17;re raising, this could help you build real momentum. Want me to send more info?
Hi, I represent an SEO company that specialises in getting you AI citations and higher rankings on Google. I’d like to offer you a 100% free SEO audit for your website. Would you be interested?
Hi, I represent an SEO company that specialises in getting you AI citations and higher rankings on Google. I’d like to offer you a 100% free SEO audit for your website. Would you be interested?
good
