Every successful interview starts with knowing what to expect. In this blog, we’ll take you through the top Cylinder Calibration interview questions, breaking them down with expert tips to help you deliver impactful answers. Step into your next interview fully prepared and ready to succeed.
Questions Asked in Cylinder Calibration Interview
Q 1. Explain the principle of cylinder calibration.
Cylinder calibration is the process of verifying the accuracy of a pressure or volume measuring device against a known standard. Imagine a kitchen scale – you wouldn’t trust it to accurately measure ingredients without occasionally checking it against known weights. Similarly, pressure cylinders, used in various industries from manufacturing to healthcare, require regular calibration to ensure reliable readings. The principle involves comparing the cylinder’s reading to a traceable standard, quantifying any deviation, and documenting the results. This ensures the cylinder consistently provides accurate measurements, preventing errors and safety hazards.
Q 2. Describe the different types of cylinders used in calibration.
Several types of cylinders are used and require calibration depending on their application:
- Pressure Cylinders: These are used to generate and regulate pressure in various systems, from hydraulic presses to gas chromatography. They are often calibrated against deadweight testers.
- Volume Cylinders (graduated cylinders): These are used for measuring volumes of liquids and are calibrated using precise volumetric standards.
- Gas Cylinders: These store compressed gases and while not directly calibrated for pressure, the valve and pressure relief systems are critically important for safety and can be tested and calibrated through pressure testing and safety checks.
- Bourdon Tube Pressure Gauges: These are common pressure measuring devices incorporated into many systems. Calibration involves comparing their readings to a standard.
The specific type of cylinder dictates the calibration method and standards used.
Q 3. What are the common calibration standards used for pressure cylinders?
Common calibration standards for pressure cylinders include:
- Deadweight Testers: These are highly accurate devices that use the weight of known masses to generate precise pressures, serving as the primary standard.
- Calibration Weights: These precisely calibrated weights are used in conjunction with deadweight testers to generate traceable pressure points.
- Digital Pressure Calibrators: These provide a secondary standard, often traceable to national standards organizations. They are typically used for routine calibration tasks and verification.
- National Standards: National metrology institutes (like NIST in the US) maintain and disseminate primary standards, ensuring traceability across all calibration processes.
The choice of standard depends on the required accuracy and the application of the cylinder. For high-precision work, a deadweight tester is crucial; for routine checks, a digital calibrator might suffice.
Q 4. How do you ensure traceability in cylinder calibration?
Traceability in cylinder calibration means establishing an unbroken chain of comparisons between the cylinder’s readings, the calibration equipment, and national or international standards. This ensures that the calibration results are reliable and comparable across different laboratories and locations. It’s like a family tree for your measurements, showing how each calibration step is linked to a higher authority.
To ensure traceability:
- Calibration Certificates: Each calibration step needs a certificate from a recognized and accredited calibration lab, confirming the equipment’s accuracy and traceability to national standards.
- Documented Procedures: Detailed records of calibration procedures, including equipment used, calibration points, and results, are crucial.
- Regular Audits: Periodic audits of the calibration process ensure adherence to standards and maintain traceability.
Q 5. What is the importance of calibration certificates?
Calibration certificates are legal documents providing proof that a cylinder has been calibrated to a known standard. They are essential for:
- Ensuring Accuracy: They verify the cylinder’s measurement accuracy, reducing uncertainties and errors.
- Meeting Regulatory Requirements: Many industries have regulations mandating calibrated equipment, ensuring product quality and safety. Certificates provide the necessary documentation to meet these requirements.
- Quality Control: They are integral parts of a quality management system, demonstrating commitment to accuracy and precision.
- Legal Compliance: In case of disputes or audits, certificates offer proof of calibration, safeguarding against potential legal issues.
In short, certificates are not just pieces of paper; they are crucial for maintaining accuracy, meeting regulations, and ensuring the reliability of any measurements taken using the calibrated equipment.
Q 6. Explain the process of calibrating a pressure cylinder using a deadweight tester.
Calibrating a pressure cylinder using a deadweight tester involves applying known pressures through carefully calibrated weights and comparing them to the cylinder’s reading. Here’s a step-by-step process:
- Prepare the equipment: Ensure the deadweight tester and pressure cylinder are clean and functioning properly.
- Set up the system: Connect the deadweight tester to the pressure cylinder through a suitable pressure line.
- Apply weights: Add weights incrementally to the deadweight tester, generating precise pressure steps.
- Record readings: At each weight increment, record both the deadweight tester’s pressure reading and the pressure cylinder’s reading.
- Analyze the data: Compare the cylinder’s readings with the deadweight tester’s readings. Calculate the deviations and uncertainties.
- Generate a certificate: Prepare a calibration certificate documenting the results, including deviations, uncertainties, traceability information, and equipment used.
This rigorous procedure ensures accurate and traceable calibration of the pressure cylinder.
Q 7. Describe the procedure for calibrating a gas cylinder.
Calibrating a gas cylinder focuses on verifying its safety and functionality, not necessarily its volume measurement directly. The procedure typically involves:
- Visual inspection: Check for any damage, corrosion, or leaks on the cylinder and its valve.
- Pressure testing: The cylinder is subjected to a hydrostatic pressure test using a calibrated pressure gauge, exceeding the cylinder’s operating pressure to verify its structural integrity. This is a critical safety check.
- Valve inspection and testing: Ensure proper functioning of the valve, checking for leaks and correct operation. This may include leak testing with a soap solution.
- Pressure relief device testing: Verify the pressure relief device functions correctly, relieving pressure at the designed setpoint.
- Documentation: Record all inspection and testing results, including dates, pressures, and any observations. These records serve as proof of testing.
Unlike pressure cylinder calibration that focuses on precision measurements, gas cylinder calibration prioritizes safety. Calibration in this context is more about ensuring the container remains safe for use and that all components perform as designed.
Q 8. What are the potential sources of error in cylinder calibration?
Cylinder calibration, while aiming for precision, is susceptible to various error sources. These can broadly be categorized into systematic errors and random errors. Systematic errors are consistent and repeatable, arising from flaws in the equipment or the calibration process itself. Random errors are unpredictable and fluctuate around a mean value. Let’s explore some key examples:
- Equipment limitations: The accuracy of the pressure gauges, volume measuring devices (e.g., piston provers), and temperature sensors directly impacts the calibration results. An improperly calibrated pressure gauge, for instance, will consistently introduce a bias.
- Environmental factors: Temperature and pressure fluctuations in the environment during calibration can significantly affect the cylinder’s measured volume and pressure. These variations can be minimized but never fully eliminated.
- Operator error: Incorrect reading of instruments, improper handling of the cylinder, or failure to follow the established procedure can lead to significant errors. This emphasizes the importance of well-trained personnel.
- Leakage: Leaks in the cylinder or the calibration setup will lead to inaccurate measurements. This is particularly critical for high-pressure cylinders.
- Calibration standard deviations: The reference standards used for calibration also possess inherent uncertainties. This uncertainty propagates to the calibrated cylinder.
Understanding these sources is crucial for effective error mitigation.
Q 9. How do you identify and mitigate these errors?
Identifying and mitigating errors in cylinder calibration requires a multi-pronged approach. It involves a combination of careful planning, meticulous execution, and thorough analysis.
- Pre-calibration checks: Before starting, thoroughly inspect all equipment for damage or malfunction. Calibrate all instruments (pressure gauges, thermometers) against traceable standards.
- Environmental control: Conduct calibration in a stable environment, minimizing temperature and pressure fluctuations. Consider using a climate-controlled chamber for optimal conditions. Record environmental parameters during calibration.
- Leak testing: Always perform leak checks on the cylinder and the calibration setup before and during the process. This is vital for high-pressure applications.
- Multiple measurements: Taking multiple readings and calculating the average helps to minimize the impact of random errors. Statistical analysis of the data can reveal outliers.
- Calibration traceability: Ensure that all reference standards used are traceable to national or international standards. This allows for verification and validation of the calibration process.
- Data analysis and error correction: After the calibration, analyze the data carefully. Identify and correct any systematic errors using appropriate statistical methods. Consider using software packages designed for calibration data analysis.
Remember, a well-documented calibration process, including detailed records of all measurements and environmental conditions, is essential for identifying and tracing errors.
Q 10. What are the safety precautions to be taken during cylinder calibration?
Safety is paramount during cylinder calibration, especially when dealing with high-pressure cylinders. A series of precautions must be taken to prevent accidents. Here are some key guidelines:
- Proper training: All personnel involved must receive adequate training on safe handling procedures for high-pressure cylinders and calibration equipment.
- Personal protective equipment (PPE): Always use appropriate PPE, including safety glasses, gloves, and protective clothing, depending on the pressure and the substances involved.
- Containment: Conduct calibration in a well-ventilated area or a designated safety enclosure. This helps to contain any potential leaks or releases.
- Emergency procedures: Develop and practice emergency procedures in case of leaks, equipment failure, or other incidents. This includes having readily accessible emergency shut-off valves and emergency response plans.
- Pressure relief: Ensure that pressure relief devices (e.g., pressure relief valves) are properly functioning and set to the appropriate pressure limits.
- Regular inspections: Regularly inspect the cylinder and the calibration setup for signs of wear, damage, or corrosion.
Remember, safety should never be compromised. Always prioritize safety over speed or efficiency.
Q 11. Explain the concept of uncertainty in measurement.
Uncertainty in measurement refers to the range of values within which the true value of a measurement is likely to lie. It acknowledges that every measurement has an inherent level of imprecision. It’s not simply about random errors; it incorporates all sources of uncertainty, including systematic errors, instrument limitations, and environmental factors. Think of it as a margin of error, expressed quantitatively. A smaller uncertainty indicates higher confidence in the measurement result.
For instance, if we measure a cylinder’s volume as 10.00 ± 0.05 liters, the uncertainty is ±0.05 liters. This means we are confident that the true volume lies somewhere between 9.95 and 10.05 liters.
Q 12. How do you calculate the uncertainty in cylinder calibration?
Calculating uncertainty in cylinder calibration involves a combination of statistical methods and consideration of all potential sources of error. It is generally a complex process.
- Identify all sources of uncertainty: This includes uncertainties associated with each measurement instrument (pressure gauge, thermometer, volume measuring device), environmental factors (temperature, pressure), and the calibration standard itself. Each source of uncertainty should be quantified, for example, using manufacturer specifications or from calibration certificates.
- Quantify uncertainties: For each identified source, determine its associated uncertainty (standard deviation, or expanded uncertainty). This can be expressed as a standard uncertainty (u) or an expanded uncertainty (U).
- Combine uncertainties: Use appropriate methods (e.g., root-sum-of-squares – RSS) to combine the individual uncertainties into a combined standard uncertainty (uc). This accounts for the combined effect of all uncertainty sources.
- Calculate expanded uncertainty: Multiply the combined standard uncertainty (uc) by a coverage factor (k), usually 2 for a 95% confidence level, to obtain the expanded uncertainty (U).
The final result of the cylinder calibration is then reported as the measured value ± expanded uncertainty. Specialized software packages are often used to streamline this complex calculation process.
Q 13. What are the different types of calibration intervals?
Calibration intervals determine how frequently a cylinder needs recalibration to maintain its accuracy. The intervals depend on various factors, and there isn’t a one-size-fits-all answer. Different types of intervals exist:
- Time-based intervals: These are fixed intervals, for example, annual calibration, or calibration every six months. Simple to manage, but may not be optimal if the cylinder sees infrequent use.
- Usage-based intervals: Calibration is scheduled based on the cylinder’s usage. For instance, if the cylinder is used extensively, it may require more frequent calibration.
- Condition-based intervals: Calibration is triggered by specific events, such as a significant change in the cylinder’s operating conditions or after a repair. Requires more proactive monitoring.
Q 14. How do you determine the appropriate calibration interval for a cylinder?
Determining the appropriate calibration interval requires careful consideration of several factors:
- Cylinder type and application: High-pressure cylinders or those used in critical applications generally require more frequent calibration. The nature of the gas stored also influences the interval.
- Usage frequency and intensity: Frequently used cylinders are more likely to experience wear and tear, necessitating shorter intervals. Harsh operating conditions also accelerate degradation.
- Past calibration history: Reviewing past calibration records can reveal trends and help in predicting future performance. This can be used to adjust the interval based on observed drift or changes.
- Regulatory requirements: Industry regulations or standards might specify mandatory calibration intervals for particular types of cylinders and applications.
- Risk assessment: A thorough risk assessment should be conducted to identify the potential consequences of calibration errors. Critical applications demand stricter intervals to reduce risks.
A risk-based approach, combined with historical data and regulatory requirements, is usually the most effective way to determine the appropriate calibration interval.
Q 15. What is the role of a calibration laboratory?
A calibration laboratory plays a crucial role in ensuring the accuracy and reliability of measuring instruments. Think of it as a doctor for your instruments – it checks their health and makes sure they’re providing accurate readings. These labs use standardized methods and traceable references to compare the instrument’s performance against known standards. This ensures that measurements taken with calibrated instruments are consistent and trustworthy across different locations and time periods. This is vital in many industries, from manufacturing and pharmaceuticals to environmental monitoring and research, where accurate measurements are essential for quality control, safety, and compliance.
Career Expert Tips:
- Ace those interviews! Prepare effectively by reviewing the Top 50 Most Common Interview Questions on ResumeGemini.
- Navigate your job search with confidence! Explore a wide range of Career Tips on ResumeGemini. Learn about common challenges and recommendations to overcome them.
- Craft the perfect resume! Master the Art of Resume Writing with ResumeGemini’s guide. Showcase your unique qualifications and achievements effectively.
- Don’t miss out on holiday savings! Build your dream resume with ResumeGemini’s ATS optimized templates.
Q 16. What are the accreditation standards for calibration laboratories (e.g., ISO/IEC 17025)?
Accreditation standards for calibration laboratories, like ISO/IEC 17025, are essential for demonstrating competence and ensuring the reliability of their services. ISO/IEC 17025 outlines the general requirements for the competence of testing and calibration laboratories. Meeting this standard assures clients that the lab operates under a robust quality management system, uses validated methods, employs competent personnel, and maintains accurate records. It also ensures traceability to national or international standards, so you can trust the results provided. Think of it as a gold standard badge, proving the lab’s credibility. Other relevant standards may also apply depending on the specific type of cylinder calibration being performed and the relevant industry regulations.
Q 17. Explain the difference between calibration and verification.
Calibration and verification are closely related but distinct processes. Calibration involves adjusting a measuring instrument to match a known standard, essentially correcting any inaccuracies. It’s like adjusting a watch to match an atomic clock for perfect timekeeping. Verification, on the other hand, simply checks if an instrument is performing within its specified tolerances. It doesn’t involve adjustment. It’s like checking the watch to see if it’s running within an acceptable timeframe of a known standard, without changing the watch itself. If the watch is slow but still within tolerance, it’s verified, but not calibrated. A cylinder might be verified to ensure its pressure readings are within a certain acceptable range. If it is outside this range, it will require calibration to bring it back within specification.
Q 18. Describe the process of maintaining calibration records.
Maintaining accurate and readily accessible calibration records is critical. These records serve as evidence of the instrument’s performance history and compliance with regulations. A robust system should include:
- Calibration certificate: This documents the results of each calibration event, including date, deviations from standards, and any adjustments made.
- Identification information: Unique identifier for the cylinder (serial number, etc.).
- Calibration interval: The frequency of calibrations based on usage and manufacturer recommendations.
- Traceability: Linking the calibration to national or international standards.
- Corrective actions: Notes on any repairs or adjustments made to the instrument.
- Responsible personnel: Names of those performing the calibration and review.
These records are typically stored electronically and managed through a calibration management software, ensuring easy access and audit trails. It’s essential to follow a structured system to ensure data integrity and facilitate traceability.
Q 19. How do you handle out-of-tolerance cylinders?
Handling out-of-tolerance cylinders requires a careful and documented procedure. First, the cause of the out-of-tolerance condition needs to be investigated. This may involve inspecting for physical damage, leaks, or other issues. Once the cause is determined, the appropriate action is taken. This could involve:
- Repair: If a repairable issue is found, it should be addressed by a qualified technician.
- Calibration: If the issue can be corrected through adjustments (within the cylinder’s design specifications), the cylinder should be recalibrated.
- Rejection/Retirement: If the cylinder cannot be repaired or calibrated to meet specifications, it should be marked as out-of-service and potentially retired, ensuring it’s not used for accurate measurements.
All actions taken, including investigations, repairs, and recalibration results, must be thoroughly documented to maintain the integrity of the calibration records and ensure traceability.
Q 20. What are the different methods for pressure measurement?
Several methods exist for pressure measurement, each with its own advantages and limitations. The choice of method depends on the pressure range, accuracy required, and application. Some common methods include:
- Bourdon tube pressure gauges: These are commonly used for their simplicity and robustness, relying on the elastic deformation of a curved tube.
- Diaphragm pressure gauges: Suitable for lower pressure measurements and often used in corrosive environments.
- Strain gauge pressure transducers: Offer high accuracy and are widely used for electronic pressure measurement and data acquisition.
- Piezoresistive pressure sensors: Another type of electronic sensor known for its accuracy and responsiveness.
- Deadweight testers: Used for precision calibration of pressure gauges, providing highly accurate reference pressures.
Each method has specific calibration requirements and procedures to ensure accuracy.
Q 21. What are the different methods for gas measurement?
Gas measurement methods vary depending on the gas type, desired properties, and application. Common techniques include:
- Volumetric methods: Measuring gas volume using calibrated containers, often employed for gas flow measurement.
- Gravimetric methods: Determining gas mass using highly accurate balances, providing precise density measurements.
- Gas chromatography (GC): A powerful technique for analyzing the composition of gas mixtures, identifying different components and quantifying their concentrations.
- Mass spectrometry (MS): Provides highly detailed information about the mass-to-charge ratio of gas molecules, allowing for identification and quantification of different species.
- Thermal conductivity detectors (TCD): Used in GC and other gas analysis techniques, measuring the thermal conductivity of gases to detect their presence and concentration.
For cylinder calibration specifically, methods like volumetric techniques, combined with pressure and temperature measurements, are critical for determining the precise amount of gas contained in a cylinder. Gas purity is typically assessed through techniques like GC or MS to verify it meets the required standards.
Q 22. What software or tools do you use for cylinder calibration?
Cylinder calibration relies on a suite of software and tools, depending on the specific application and the level of automation. For basic calibrations, we often use dedicated handheld devices that interface directly with the cylinder’s pressure sensor. These devices typically have built-in software for data acquisition, analysis, and report generation. For more complex or high-volume calibrations, we might employ sophisticated automated systems. These systems include automated pressure controllers, high-precision pressure transducers, and specialized software capable of controlling the entire calibration process, managing data, and generating comprehensive reports compliant with industry standards.
Examples of software I’ve utilized include LabVIEW for custom data acquisition and analysis, and dedicated calibration software packages like those offered by manufacturers of pressure and volume measurement equipment. Tools range from simple pressure gauges for cross-referencing to advanced laser interferometers for extremely precise volume measurements in specific applications.
Q 23. How do you troubleshoot common problems encountered during cylinder calibration?
Troubleshooting cylinder calibration problems involves a systematic approach. It begins with reviewing the calibration procedure and ensuring all steps were followed correctly. This includes checking the calibration equipment for proper functioning and verifying the accuracy of reference standards. Common issues include inconsistent pressure readings, drift in readings over time, or failure to meet specified accuracy limits.
- Inconsistent Readings: This often points to issues with the pressure sensor itself (e.g., debris or damage), leaks in the system, or incorrect connections. We’d check for leaks using soap solution, inspect the sensor for damage, and ensure all connections are secure.
- Drift: Drift usually indicates a problem with the sensor’s temperature compensation or a potential issue with the electronics. Checking the environmental conditions (temperature, humidity) and validating the sensor’s temperature compensation characteristics is crucial.
- Accuracy Failures: If the cylinder consistently falls outside of the acceptable tolerance, it may need repair or replacement. This could also be due to errors in the reference standard used or in the calibration procedure.
Using a flowchart or troubleshooting guide specific to the equipment and calibration process helps immensely in identifying the root cause quickly and efficiently.
Q 24. Describe your experience with different types of calibration equipment.
My experience spans various calibration equipment, ranging from simple deadweight testers for low-pressure applications to high-precision piston gauges for high-pressure calibrations. I’m familiar with automated calibration systems which enhance throughput and reduce human error. I’ve also used specialized equipment for specific applications, such as capacitance manometers for high-accuracy low-pressure measurements and specialized temperature controllers for maintaining consistent environmental conditions during calibration.
For instance, I’ve extensively used deadweight testers for calibrating pressure gauges in industrial settings. The precision and reliability of these devices are paramount. In contrast, when working with high-precision scientific instruments, I rely on capacitance manometers for their superior accuracy in lower pressure ranges. Each device presents its own set of challenges and strengths and my expertise lies in knowing which tool is appropriate for the job and how to optimize its use for accurate results.
Q 25. What are your skills in data analysis and interpretation related to calibration?
Data analysis and interpretation are fundamental to cylinder calibration. I possess strong skills in analyzing calibration data to identify trends, outliers, and potential sources of error. This often involves statistical analysis, including calculating mean, standard deviation, and uncertainty budgets. I use spreadsheets and dedicated statistical software to perform these analyses. I’m proficient in generating graphical representations of data (charts, graphs) to visually represent calibration results and facilitate communication of findings.
For example, I’ve used regression analysis to model the relationship between pressure and volume, identifying deviations from linearity and providing corrective adjustments. Understanding uncertainty analysis is critical; I routinely calculate uncertainty budgets to quantify the overall uncertainty associated with the calibration results, ensuring compliance with relevant standards.
Q 26. How do you ensure the accuracy of your calibration results?
Ensuring the accuracy of calibration results is paramount. This involves a multi-faceted approach:
- Traceability to National Standards: All calibration equipment and reference standards must be traceable to national or international standards, guaranteeing accuracy and comparability.
- Regular Equipment Calibration: Calibration equipment itself needs regular calibration to ensure its accuracy. We maintain a rigorous schedule for calibrating our equipment using certified reference standards.
- Environmental Control: Controlling environmental factors like temperature and humidity is essential, as these can significantly affect the accuracy of measurements.
- Proper Calibration Procedures: Strict adherence to standardized calibration procedures and meticulous documentation of each step are crucial.
- Quality Control Checks: We incorporate quality control checks throughout the process, including repeat measurements and cross-checks to identify and mitigate potential errors.
By implementing these measures, we minimize uncertainty and ensure the highest degree of accuracy and reliability in our calibration results.
Q 27. Describe a situation where you had to solve a complex calibration problem.
One challenging situation involved calibrating a high-pressure cylinder used in a specialized research application. The cylinder exhibited unusual pressure readings that fluctuated dramatically, defying our usual calibration procedures. We initially suspected a problem with the cylinder’s pressure sensor, but after rigorous testing, we ruled that out. Further investigation revealed a subtle leak in the cylinder’s valve assembly, undetectable by traditional leak detection methods. We addressed this by using a specialized helium leak detector, identifying the minute leak, and repairing the valve.
This situation highlighted the importance of a systematic and comprehensive approach to troubleshooting. It demonstrated that even seemingly minor issues can lead to significant deviations in calibration results, emphasizing the need for thorough diagnostics and a deep understanding of the system being calibrated.
Q 28. How do you stay updated on the latest developments in cylinder calibration technology?
Staying updated on advancements in cylinder calibration is crucial for maintaining proficiency. I achieve this through several methods:
- Professional Organizations: Active participation in professional organizations like the American Society of Mechanical Engineers (ASME) and attending their conferences and workshops keeps me abreast of the latest standards and technologies.
- Industry Publications: I regularly review leading industry journals and publications to stay informed about new calibration techniques, equipment, and software.
- Manufacturer Training: I attend training courses and workshops conducted by manufacturers of calibration equipment to gain hands-on experience with the latest technologies and best practices.
- Online Resources: I actively utilize online resources, including reputable technical websites and databases, to research new developments and advancements.
Continuous learning ensures I remain at the forefront of this dynamic field, enabling me to employ the most efficient and accurate calibration methodologies.
Key Topics to Learn for Cylinder Calibration Interview
- Calibration Methods: Understanding various calibration techniques, including gravimetric, volumetric, and pressure comparison methods, and their respective applications.
- Gas Laws and Thermodynamics: Applying principles of ideal gas law, Boyle’s Law, Charles’ Law, and other relevant thermodynamic concepts to cylinder calibration calculations and error analysis.
- Measurement Uncertainty and Error Analysis: Mastering the calculation and interpretation of measurement uncertainties, identifying potential sources of error, and implementing strategies for error minimization.
- Calibration Equipment and Instrumentation: Familiarizing yourself with the operation and maintenance of common calibration equipment, such as pressure gauges, mass flow meters, and analytical balances.
- Safety Procedures and Regulations: Demonstrating knowledge of safety protocols associated with handling high-pressure cylinders and various gases, and adherence to relevant industry regulations.
- Data Acquisition and Analysis: Proficiency in collecting, analyzing, and interpreting calibration data using appropriate software and statistical methods. Understanding the creation and interpretation of calibration certificates.
- Traceability and Standards: Understanding the concept of traceability to national and international standards and the importance of maintaining a traceable calibration chain.
- Troubleshooting and Problem-Solving: Demonstrating the ability to diagnose and resolve common issues encountered during cylinder calibration processes.
- Calibration Software and Databases: Familiarity with different calibration software packages and database management systems used in recording and tracking calibration data.
Next Steps
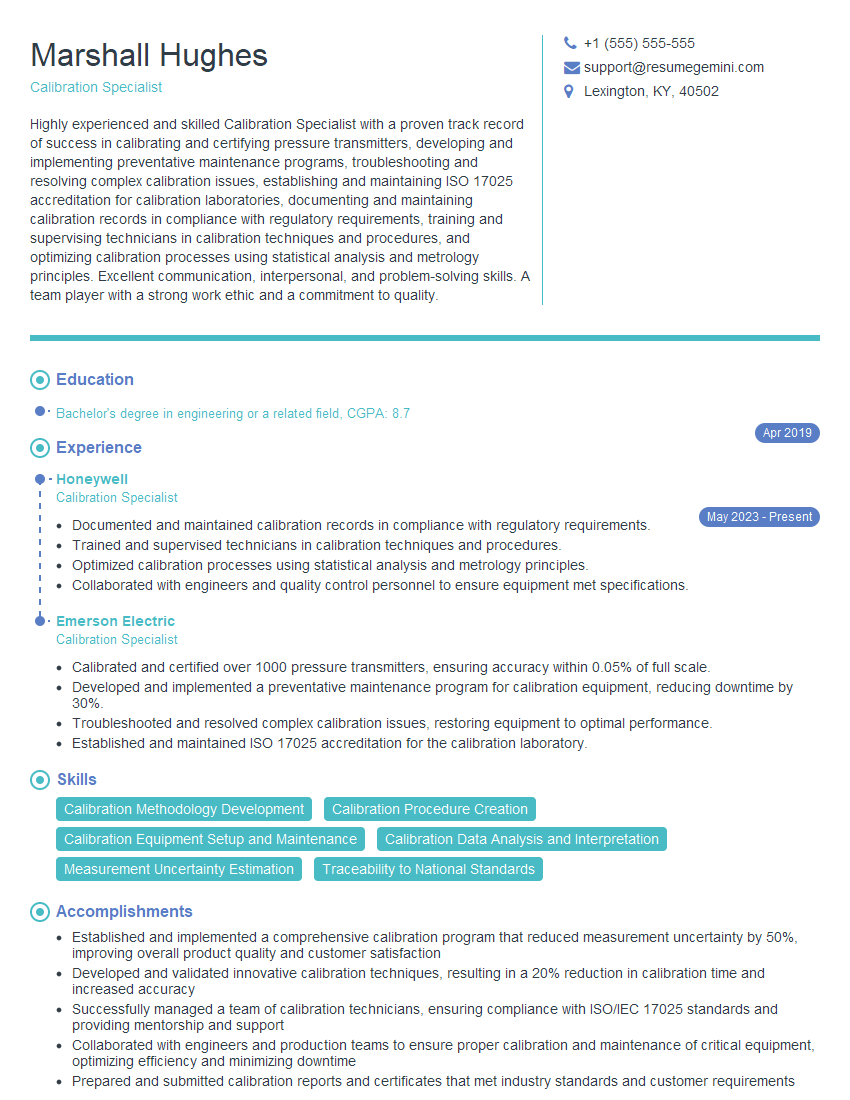
Mastering cylinder calibration opens doors to rewarding careers in various industries requiring precise gas measurements. A strong understanding of these principles is highly sought after, significantly enhancing your job prospects. To maximize your chances, creating a compelling and ATS-friendly resume is crucial. ResumeGemini is a trusted resource that can help you build a professional resume tailored to highlight your skills and experience in cylinder calibration. Examples of resumes specifically designed for cylinder calibration professionals are available to guide you. Invest time in crafting a strong resume—it’s your first impression and a key step towards securing your dream role.
Explore more articles
Users Rating of Our Blogs
Share Your Experience
We value your feedback! Please rate our content and share your thoughts (optional).
What Readers Say About Our Blog
Very informative content, great job.
good


