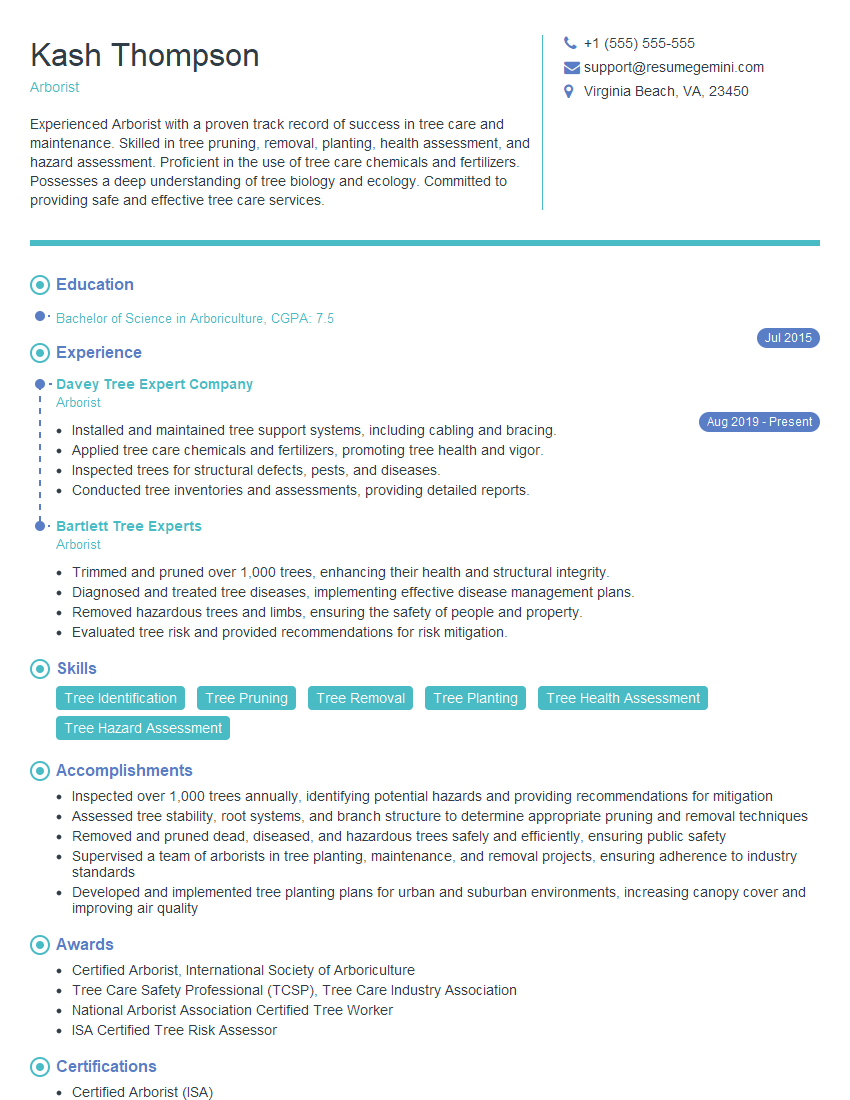
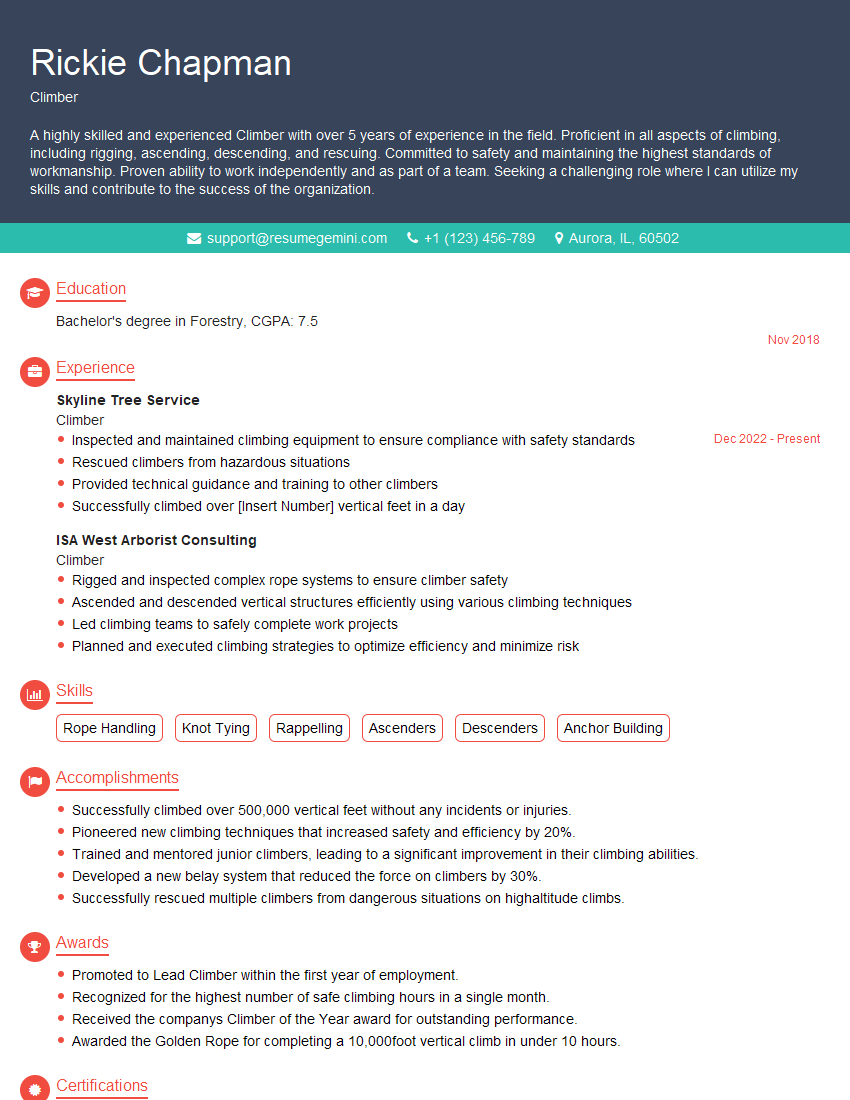
Preparation is the key to success in any interview. In this post, we’ll explore crucial Rope Splicing and Knot Tying interview questions and equip you with strategies to craft impactful answers. Whether you’re a beginner or a pro, these tips will elevate your preparation.
Questions Asked in Rope Splicing and Knot Tying Interview
Q 1. What are the three main types of rope fibers used in splicing?
The three main types of rope fibers used in splicing are natural fibers, synthetic fibers, and hybrid fibers. Each has unique properties influencing its suitability for different applications.
- Natural Fibers: These include materials like manila, sisal, and hemp. They are biodegradable, relatively inexpensive, and offer good grip, but they are susceptible to rotting and their strength degrades with prolonged exposure to water. Think of the classic sailing ship rigging – that was often manila.
- Synthetic Fibers: This category encompasses nylon, polyester, polypropylene, and polyethylene. Synthetic ropes boast high strength-to-weight ratios, resistance to rot and mildew, and durability. However, they can be less pliable than natural fibers and can suffer from UV degradation depending on the type. Modern climbing ropes are almost exclusively synthetic.
- Hybrid Fibers: These combine natural and synthetic fibers to leverage the benefits of both. For instance, a rope might have a synthetic core for strength and a natural fiber sheath for better grip. This approach is often seen in specialized applications where a balance of properties is critical.
Q 2. Explain the difference between a short splice and a long splice.
The difference between a short splice and a long splice lies primarily in their length and the resulting bulk. Both are used to seamlessly join two rope ends but offer trade-offs in terms of smoothness and strength.
- Short Splice: This is a more compact splice, ideal when minimizing bulk is important. It’s less bulky than a long splice but is slightly weaker due to the tighter tucking of strands. Think of it like a neatly sewn seam—compact but not as strong as a broader seam.
- Long Splice: This type of splice is longer and smoother than a short splice, making it suitable for applications requiring reduced friction and minimal wear and tear. While more time-consuming to create, it offers superior strength and reduced stress points compared to a short splice. Imagine it as a wider, more gradual seam that distributes stress better.
Q 3. Describe the process of making a basic eye splice.
Creating a basic eye splice involves carefully weaving the end of a rope back into itself to form a loop. Here’s a step-by-step process:
- Prepare the Rope End: Untwist the rope’s end for a few inches, separating the strands. The number of strands will depend on the rope type (3-strand, 8-strand, etc.).
- Form the Eye: Bend the rope into the desired eye shape and hold it securely.
- Tuck the Strands: Take one strand from the untwisted end and tuck it under one of the main rope strands, working it upwards and along the rope’s length. Repeat this for each strand.
- Continue Tucking: Continue tucking the strands along the rope, working your way along the length of the eye until the untwisted portion is completely tucked.
- Secure the Splice: Once all the strands are tucked, tightly tuck them in and work them together tightly. You may need to use a fid (a tool for working with rope) to help with this process.
- Trim and Finish: Trim any excess rope ends. Finally, you should tightly bind the finished eye splice.
This process ensures a strong, reliable loop at the rope’s end, useful for attaching to objects or creating a secure loop.
Q 4. How do you determine the appropriate rope diameter for a specific application?
Determining the appropriate rope diameter involves carefully considering the load, the intended application, and the type of rope being used. There isn’t a single formula, but a systematic approach is crucial.
- Load Capacity: The rope’s working load limit (WLL) – the maximum load it can safely support – is the primary factor. Consult the rope manufacturer’s specifications. Safety factors are crucial; never exceed the WLL.
- Application: Different applications demand different rope properties. For heavy lifting, you’ll need a thicker rope with a high breaking strength. A thinner, more flexible rope might be suitable for lighter applications, like guiding lines.
- Rope Type: The fiber type drastically affects strength and durability. Synthetic ropes generally have higher strength-to-weight ratios than natural fibers.
- Safety Factors: Always use safety factors to account for unforeseen events or variations in load. A typical safety factor is 5:1 or 6:1, meaning the rope’s breaking strength should be 5-6 times higher than the anticipated load. This prevents catastrophic failures.
Ultimately, careful assessment and understanding of the forces involved are key to selecting the correct rope diameter, ensuring both safety and efficacy.
Q 5. What are the safety precautions when working with ropes under tension?
Safety precautions when working with ropes under tension are paramount. Negligence can lead to severe injuries or fatalities.
- Protective Gear: Always wear appropriate personal protective equipment (PPE), including gloves, safety glasses, and sturdy footwear. Eye protection is especially vital, as snapped ropes can cause debris to fly.
- Proper Handling: Avoid sharp objects and rough surfaces that might abrade the rope, weakening it. Inspect the rope thoroughly for any signs of damage before use.
- Controlled Tensioning: Gradually apply tension using appropriate equipment, avoiding sudden jerks or shocks. Use load-rated equipment throughout the operation.
- Clear Communication: If working in a team, ensure clear communication and coordination to avoid accidental releases or mishaps.
- Emergency Procedures: Develop and practice a clear emergency plan to handle potential rope failures or other emergencies.
- Competence: Only trained and experienced individuals should handle ropes under tension. Proper training is essential for safe handling practices.
Remember: Safety is paramount. Never compromise on safety procedures, no matter how routine the task.
Q 6. What are the different types of knots used for securing loads?
Several knots are used for securing loads, each with its own advantages and disadvantages based on the load type and application. Here are a few examples:
- Bowline: Forms a fixed loop that won’t slip, excellent for creating a secure eye at the end of a rope.
- Clove Hitch: A quick and easy knot for attaching a rope to a post or ring, frequently used as a temporary fastening.
- Figure Eight Knot: A simple stopper knot used to prevent rope from running through a system, often used in climbing and arborist applications.
- Trucker’s Hitch: Useful for securing loads with mechanical advantage, allows for easy tightening and loosening.
- Sheet Bend: Joins two ropes of different diameters, commonly used for connecting two hawsers.
The choice of knot depends entirely on the specific situation. Incorrect knot selection can lead to load failure and accidents.
Q 7. Explain the difference between a bowline and a clove hitch.
The bowline and clove hitch are both commonly used knots, but their applications and characteristics differ significantly.
- Bowline: Creates a strong, fixed loop at the end of a rope. The loop will not tighten under load, making it reliable and safe. It’s easy to untie even after being under considerable tension. Think of it as a permanent, reliable loop.
- Clove Hitch: A simple, quick knot used to temporarily secure a rope around a post, ring, or other object. It is easily tied and untied, making it suitable for situations requiring frequent adjustments. It’s not as secure as a bowline and should not be relied upon for heavy loads or critical situations. Think of it as a temporary, adjustable fastening.
To summarize, the bowline is a strong, permanent loop, while the clove hitch is a simple and temporary fastening.
Q 8. Describe the process of making a figure-eight knot.
The figure-eight knot is a simple yet incredibly useful stopper knot, preventing a rope from running through a system. It’s easy to tie and relatively secure, making it a staple in various applications.
To tie it:
- Form a loop in the end of the rope.
- Bring the working end over and around the standing part (the main length of the rope) to form a second loop.
- Pass the working end through the first loop.
- Tighten the knot by pulling firmly on both the standing part and the working end.
Imagine you’re tying a bow, but instead of a neat bow, you create a figure-eight shape. This knot is excellent for attaching a rope to a ring or hook, or for creating a secure stop point when belaying in climbing.

Q 9. How do you identify and address a damaged or worn rope?
Identifying damaged rope requires careful observation. Look for fraying, broken fibers, cuts, abrasion, kinks, and unusual stiffness or softness. A rope that’s become significantly weaker should be replaced immediately.
Addressing damage depends on its severity:
- Minor damage (surface fraying): Carefully trim the frayed ends with a sharp knife, avoiding cutting into the rope’s core. You might then consider applying a sealant to prevent further fraying.
- Significant damage (cuts, abrasions): This requires more drastic action. If the damage compromises the rope’s strength, it must be discarded and replaced. Attempting to repair severely damaged rope is dangerous and ineffective.
Think of it like a chain; even a single weak link can compromise the entire chain’s strength. The same applies to ropes.
Q 10. What are the different methods for measuring rope strength?
Rope strength is measured using specialized testing equipment. Common methods include:
- Tensile strength testing: This involves clamping the rope securely at both ends and applying a gradually increasing force until the rope breaks. The force at breakage represents the rope’s tensile strength.
- Knot strength testing: This evaluates the strength of the rope when tied in various knots. The breaking strength with a knot is always lower than the rope’s inherent tensile strength.
- Impact strength testing: This assesses the rope’s ability to withstand sudden shocks or impacts.
Manufacturers usually provide strength specifications in their rope datasheets, which should be consulted before any high-load application. Different ropes made of various materials (e.g., nylon, polyester, polypropylene) have vastly different strength properties.
Q 11. What are some common causes of rope failure?
Rope failure can stem from several factors:
- Overloading: Exceeding the rope’s rated strength is the most common cause of failure.
- Abrasion: Continuous rubbing against rough surfaces can weaken and eventually sever the fibers.
- UV degradation: Prolonged exposure to sunlight can degrade the rope’s structure, reducing its strength and flexibility.
- Chemical degradation: Contact with certain chemicals can weaken the rope’s fibers.
- Improper knot tying: Poorly tied knots can create stress points leading to failure.
- Age and wear: Ropes degrade over time, even with proper care.
Always choose a rope with a safety factor well above the anticipated load.
Q 12. How do environmental factors affect rope lifespan and performance?
Environmental factors significantly impact rope lifespan and performance.
- Moisture: Excessive moisture can weaken ropes, leading to increased wear and susceptibility to microbial degradation. Some ropes are more resistant to water damage than others.
- Temperature: Extreme temperatures (both high and low) can affect the rope’s flexibility and strength. Heat can cause significant degradation, while extreme cold can make ropes brittle.
- UV radiation: Prolonged sun exposure weakens rope fibers, reducing their strength. This is particularly true for synthetic ropes.
- Saltwater: Saltwater is especially corrosive, accelerating degradation and weakening ropes much faster than freshwater.
Choosing the right rope material for the specific environment is crucial for longevity and safety.
Q 13. What is the proper way to store and maintain ropes?
Proper storage and maintenance extend rope life. Store ropes in a cool, dry, and dark place away from direct sunlight and chemicals.
- Coiling: Coil the ropes loosely to avoid kinking or stressing the fibers. Avoid sharp bends.
- Cleaning: Clean the ropes after use to remove dirt and debris that could cause abrasion. Air dry thoroughly before storing.
- Inspection: Regularly inspect the ropes for any signs of wear or damage before each use.
Think of it like taking care of your clothes; proper storage keeps them in good condition for longer.
Q 14. Explain the importance of proper rope inspection.
Proper rope inspection is paramount for safety and avoiding accidents. Regular inspections ensure early detection of damage, preventing catastrophic failures.
The inspection process should involve:
- Visual examination: Carefully examine the entire length of the rope, looking for fraying, cuts, abrasions, kinks, unusual stiffness or softness, and any signs of deterioration. Pay close attention to areas that are frequently used or have come into contact with abrasive surfaces.
- Feel test: Run your hands along the rope to detect any unusual stiffness or softness, which could indicate internal damage.
- Load testing (optional, but recommended for critical applications): Apply a small test load to check for any unexpected weakness or stretching.
Regular inspection—before every use—is a crucial step in safe rope handling and prevents accidents. It’s better to find small problems and replace or repair the rope before it fails under load.
Q 15. How would you troubleshoot a problem with a poorly tied knot?
Troubleshooting a poorly tied knot begins with careful observation. First, identify the type of knot and check for any obvious mistakes like loose strands, uneven tension, or incorrect placement of loops. A simple slip knot, for instance, might be too loose, making it prone to failure. A bowline, if incorrectly tied, might have a twisted loop that weakens it.
Next, try gently tightening the knot. If it tightens securely and feels firm, it might just need a slight adjustment. If it doesn’t, or if tightening causes it to deform further, it’s likely improperly tied and should be untied and re-tied. It’s crucial to use the correct technique for the specific knot being employed.
If you’re unsure, it’s always best to err on the side of caution and re-tie the knot. A failed knot can have serious consequences, particularly in climbing, sailing, or rigging.
For example, I once encountered a poorly tied clove hitch on a sailing vessel. The hitch was slipping, posing a significant risk to the mast’s stability. By carefully untying the knot and re-tying it, paying attention to the proper placement of the wraps and consistent tension, we were able to resolve the issue and prevent potential accidents.
Career Expert Tips:
- Ace those interviews! Prepare effectively by reviewing the Top 50 Most Common Interview Questions on ResumeGemini.
- Navigate your job search with confidence! Explore a wide range of Career Tips on ResumeGemini. Learn about common challenges and recommendations to overcome them.
- Craft the perfect resume! Master the Art of Resume Writing with ResumeGemini’s guide. Showcase your unique qualifications and achievements effectively.
- Don’t miss out on holiday savings! Build your dream resume with ResumeGemini’s ATS optimized templates.
Q 16. Describe the different types of rope terminations.
Rope terminations are crucial for preventing fraying and ensuring the rope can withstand the intended load. Several methods exist, each with its strengths and weaknesses:
- Whipping: This involves wrapping a fine cord tightly around the end of the rope to prevent unraveling. It’s simple and quick but offers limited strength.
- Seizing: A seizing uses multiple wraps of small diameter rope tightly bound around the main rope to create a secure bundle. It’s stronger than whipping and often used for temporarily securing a rope end.
- Splicing: Splicing involves interweaving the rope strands to create a seamless, strong termination. There are various splicing techniques (e.g., eye splice, short splice) offering enhanced load-bearing capacity.
- Knotting: Knots like the bowline or overhand knot can also be used as terminations, but their strength can vary considerably based on the knot’s type and execution.
- Metal Fittings: Using thimbles, shackles, or other metal fittings in conjunction with splices or knots is a common way to safely terminate rope, and can significantly increase load capacity and efficiency.
The choice of termination method depends on factors such as rope type, required strength, and the application. For example, a strong eye splice is preferred for a heavy-duty lifting application, whereas whipping suffices for a decorative rope end.
Q 17. What are the advantages and disadvantages of different types of rope?
Different ropes possess unique properties, influencing their suitability for various applications. Here’s a comparison of common rope types:
- Nylon: Strong, elastic, and relatively lightweight. Excellent for shock absorption but can stretch significantly under load. It’s highly resistant to abrasion.
- Polyester: Strong, less elastic than nylon, less prone to stretching, and relatively abrasion resistant. A good choice where minimal stretch is preferred.
- Polypropylene: Floats on water, inexpensive, and relatively strong. However, it’s susceptible to UV degradation and has poor abrasion resistance.
- Manila (Natural Fiber): Biodegradable, relatively strong, and easy to handle. However, it’s affected by moisture, susceptible to rot, and has lower strength than synthetic ropes.
Advantages & Disadvantages Summary:
| Rope Type | Advantages | Disadvantages |
|---|---|---|
| Nylon | High strength, elasticity, abrasion resistant | Stretches significantly under load |
| Polyester | Strong, low stretch, abrasion resistant | Less elastic than nylon |
| Polypropylene | Floats, inexpensive | UV degradation, poor abrasion resistance |
| Manila | Biodegradable, easy to handle | Affected by moisture, susceptible to rot, lower strength |
The choice of rope depends on the specific needs of the job. For example, nylon might be suitable for shock-absorbing applications like boat mooring, while polyester would be preferred for applications where minimal stretch is required, like hoisting loads.
Q 18. Explain the concept of working load limit (WLL).
The Working Load Limit (WLL) is the maximum load a rope or other lifting component should bear during normal operation. It’s a critical safety parameter determined through rigorous testing and represents the load a rope can handle safely without significant risk of failure. It’s crucial to never exceed the WLL, as exceeding it increases the likelihood of rope failure and potential injury or damage.
Imagine a rope with a WLL of 1000 kg. It means the rope can safely lift up to 1000 kg under normal operating conditions. Using this rope to lift a heavier load greatly increases the risk of failure, regardless of the rope appearing robust. The WLL is always clearly marked on the rope or its accompanying documentation.
Q 19. How do you calculate the safety factor for a rope system?
The safety factor is a crucial element in ensuring the safe operation of a rope system. It is calculated by dividing the rope’s breaking strength by its working load limit (WLL).
Safety Factor = Breaking Strength / Working Load Limit
For example, if a rope has a breaking strength of 5000 kg and a WLL of 1000 kg, the safety factor is 5 (5000 kg / 1000 kg = 5). A safety factor of 5 is commonly used in many applications, providing a considerable margin of safety. However, the appropriate safety factor varies depending on factors like the application’s risk level and the type of rope used. Higher risk applications often necessitate larger safety factors.
It’s important to consider that various factors affect a rope’s breaking strength, such as age, wear, exposure to UV light, and chemical exposure. Therefore, regular inspection and maintenance of ropes are essential. A rope showing signs of wear and tear should be replaced, even if it hasn’t reached its WLL.
Q 20. Describe the proper techniques for using a block and tackle system.
A block and tackle system uses multiple pulleys to mechanically advantage to lift or move heavy objects. Proper usage involves several key steps:
- Assess the load: Determine the weight of the object being lifted and ensure the system’s capacity (WLL) exceeds this weight, considering the safety factor.
- Set up the system: Securely attach the blocks and tackle to strong anchor points. Ensure the rope is properly seated in the sheaves (pulleys).
- Raise the load gradually: Avoid jerking or sudden movements, which can stress the system. Maintain a steady and controlled pull on the rope.
- Monitor the system: Throughout the lifting operation, constantly monitor the rope, blocks, and anchor points for any signs of damage or stress. Listen for any unusual noises.
- Lower the load gradually: Control the descent of the load to avoid any sudden drops that could damage the load or the equipment.
Example: A simple two-pulley block and tackle system provides a mechanical advantage of 2:1. This means that to lift a 100 kg load, you would only need to exert a force of approximately 50 kg on the rope. (In reality, some force is lost to friction).
Safety is paramount when using block and tackle systems. Always inspect the equipment before use and never exceed the WLL. Using appropriate PPE, such as gloves and safety glasses is also strongly recommended.
Q 21. What are the different types of hitches used in rigging?
Hitches are temporary knots used to attach a rope to an object. Several common hitches used in rigging include:
- Clove Hitch: A simple and versatile hitch used to secure a rope to a post, ring, or other object. It can be easily adjusted and quickly undone.
- Bowline: Forms a closed loop that won’t slip, making it ideal for attaching a rope to itself or another object. It’s crucial to tie it correctly; a improperly tied bowline can easily slip.
- Running Bowline: A variation of the bowline, that allows for quick attachment and detachment, often used in rescue situations.
- Rolling Hitch: Used to secure a rope to a cylindrical object, it tightens as the load increases. it’s often used in climbing.
- Timber Hitch: Often combined with a half hitch to secure a rope around a log or other large object for pulling or dragging, it is essential to understand the dynamics of load placement to prevent the knot from slipping.
The choice of hitch depends on the specific rigging task and the characteristics of the object being attached. It is paramount to always double-check the chosen hitch for security and proper placement before undertaking any rigging activity.
Q 22. How do you select the appropriate knot for a given task?
Selecting the right knot is crucial for safety and efficiency. It depends entirely on the specific task and the type of rope being used. Consider these factors:
- The load: How much weight will the knot need to support? A simple overhand knot is fine for light loads, but you’d need a stronger knot like a bowline or a figure eight for heavier loads.
- The material: Synthetic ropes behave differently than natural fibers (like manila or hemp). Some knots hold better in synthetic ropes than others.
- The application: Is the knot for climbing, tying down a load, securing a boat, or something else? Different applications demand different knot characteristics (e.g., ease of untying, resistance to slippage).
- The environment: Will the knot be exposed to water, abrasion, or extreme temperatures? This impacts the knot’s longevity and strength.
For example, a bowline is excellent for creating a fixed loop that won’t slip, ideal for attaching a rope to a ring or post. A clove hitch is quick and easy for temporarily securing a rope to a post, but isn’t as strong as a bowline under heavy loads. Always test your knots before relying on them for critical situations.
Q 23. Explain the importance of using the correct tools for splicing and knot tying.
The right tools are essential for creating strong, reliable knots and splices. Using improper tools can lead to damaged rope, inefficient work, and even accidents. Here’s why:
- Sharp knives/marlinespike: These tools are vital for cleanly cutting and preparing rope ends for splicing, preventing fraying and ensuring a smooth, strong finish. A dull knife can crush the fibers, weakening the rope.
- Fid: A fid, a tapered wooden or metal tool, helps open up the strands of rope during splicing, making it easier to work with and ensuring proper placement of strands.
- Mallet or hammer (for certain splices): Some splicing techniques, like eye splices, benefit from tapping to compact the rope fibers and ensure a tight fit.
- Measuring tapes and rulers: Precise measurements are vital for creating even and balanced splices.
Using a dull knife to cut rope will result in a ragged end, making it difficult to splice and potentially creating weak points. Similarly, attempting to force rope fibers apart without a fid can damage the rope.
Q 24. Describe the different types of rope-related equipment.
Rope-related equipment encompasses more than just the rope itself. It includes:
- Ropes: Various types, including natural fiber (hemp, manila, sisal) and synthetic (nylon, polyester, polypropylene), each with different strengths, elasticity, and resistance to water and UV light.
- Splicing tools: Knives, fids, mallets, marlinspikes, measuring tapes.
- Knot-tying tools: While many knots require only the rope, specialized tools can sometimes help (e.g., a hitch-tying tool for specific applications).
- Protection gear: Work gloves to protect your hands, eye protection to prevent injury from flying fibers during cutting.
- Storage equipment: Proper rope storage is critical. This includes bins, coils, and dry, clean environments to prolong the rope’s lifespan.
Understanding the properties of each piece of equipment and how it interacts with the rope is essential for efficient and safe work.
Q 25. How do you handle different rope materials, such as synthetic or natural fibers?
Handling different rope materials requires understanding their unique properties. Natural fiber ropes (e.g., manila) are strong but susceptible to rot and mildew if exposed to moisture. They tend to be more absorbent and less resistant to UV degradation. Synthetic ropes are generally stronger and more resistant to rot and UV degradation but can be affected by extreme heat. Nylon, for example, stretches more than polyester.
- Natural fibers: Require careful cleaning and drying after use to prevent damage. They should be stored in a dry place to prevent rot.
- Synthetic fibers: More resistant to damage, but can be weakened by prolonged exposure to extreme heat or certain chemicals. Check manufacturer’s specifications for best practices.
Always handle ropes gently to avoid unnecessary wear and tear. Avoid sharp bends that can weaken the fibers. This is crucial for both natural and synthetic ropes, ensuring they maintain their integrity and safety.
Q 26. What are the common safety regulations related to working with ropes?
Safety is paramount when working with ropes. Key regulations and practices include:
- Proper knot selection: Choosing the right knot for the job significantly reduces the risk of failure.
- Regular inspection: Inspect ropes for wear, damage, or fraying before each use. Damaged ropes should be discarded.
- Load limits: Never exceed the rope’s rated load capacity. Overloading can lead to failure and injury.
- Personal Protective Equipment (PPE): Always use appropriate PPE, including gloves and eye protection.
- Training and certification: Professional training in rope handling and knot tying is highly recommended, especially for high-risk activities.
- Safe work practices: Use proper techniques to avoid tangles, sharp bends, or other potential hazards.
Following these regulations minimizes the risk of injury and ensures the safe and effective use of ropes.
Q 27. Describe your experience with different types of rope splicing techniques.
My experience encompasses a wide range of rope splicing techniques, including:
- Eye splices: Creating a loop at the end of a rope, ideal for attaching to shackles or rings. I’m proficient in both short and long eye splices, adapting the technique depending on the rope diameter and application.
- Braid splices: Joining two ropes of similar diameter, creating a strong, seamless connection. Different braiding patterns can be used to optimize strength or aesthetics.
- Whipping: Preventing fraying at the ends of a rope, maintaining the integrity of the rope and preventing unraveling.
- Crown splices: Used to join three or more ropes together, frequently employed in more advanced applications.
I’m comfortable working with various rope materials and adapting my splicing techniques as needed. The choice of splice depends heavily on the load, rope material, and the intended application.
Q 28. Explain a time you had to troubleshoot a knot-related problem in a real-world scenario.
During a sailing trip, a critical halyard (the rope used to raise and lower the sail) developed a problem. The knot securing it to the sail had slipped, causing the sail to partially collapse during a strong wind gust. It was essential to quickly and safely fix this under pressure.
My immediate actions were:
- Assess the situation: I quickly determined the cause of the issue – the knot had been improperly tied and wasn’t strong enough for the load and wind conditions. The original knot was a simple overhand knot, which is not suitable for this high-stress application.
- Implement a solution: I replaced the overhand knot with a reliable bowline, ensuring it was properly seated and secured. The bowline provides a strong, reliable loop that won’t slip under load.
- Verify the repair: After securely tying the bowline, I carefully tested the halyard under tension to ensure the knot held firmly.
This experience reinforced the importance of using appropriate knots for specific applications and the necessity of thoroughly inspecting ropes and knots before use. A simple mistake in knot tying could have resulted in significant damage to the sail or even injury.
Key Topics to Learn for Rope Splicing and Knot Tying Interview
- Types of Rope: Understanding different rope materials (e.g., nylon, polypropylene, manila), their strengths, weaknesses, and appropriate applications.
- Basic Knots: Mastering essential knots like the bowline, clove hitch, figure eight, and their variations. Understanding their applications in various scenarios (e.g., securing loads, creating loops, joining ropes).
- Splicing Techniques: Familiarity with different splicing methods (e.g., eye splice, short splice, long splice) and their applications in creating loops, joining ropes permanently, and making rope ends durable.
- Safety Procedures: Understanding and adhering to safety protocols while handling ropes, including proper equipment usage and risk assessment.
- Practical Applications: Being able to describe real-world applications of rope splicing and knot tying in your chosen field (e.g., marine, construction, arboriculture, rescue). This demonstrates practical experience and understanding.
- Troubleshooting and Problem-Solving: Demonstrating the ability to identify and solve common problems encountered during rope work, such as frayed ropes, knot slippage, or inefficient techniques.
- Rope Care and Maintenance: Understanding proper rope storage, inspection, and maintenance practices to ensure longevity and safety.
- Advanced Knots and Splices: Depending on the seniority of the role, you might be asked about more complex knots and splicing techniques. Research advanced applications relevant to the specific job description.
Next Steps
Mastering rope splicing and knot tying is crucial for career advancement in many fields, demonstrating practical skills and a commitment to safety. A strong resume is your first step to showcasing these skills to potential employers. Creating an ATS-friendly resume is key to getting your application noticed. ResumeGemini can help you craft a professional and impactful resume that highlights your expertise in rope splicing and knot tying. Examples of resumes tailored to this specific skillset are available within ResumeGemini to help you get started. Take the time to build a compelling resume – it’s your first impression!
Explore more articles
Users Rating of Our Blogs
Share Your Experience
We value your feedback! Please rate our content and share your thoughts (optional).
What Readers Say About Our Blog
Hello,
We found issues with your domain’s email setup that may be sending your messages to spam or blocking them completely. InboxShield Mini shows you how to fix it in minutes — no tech skills required.
Scan your domain now for details: https://inboxshield-mini.com/
— Adam @ InboxShield Mini
Reply STOP to unsubscribe
Hi, are you owner of interviewgemini.com? What if I told you I could help you find extra time in your schedule, reconnect with leads you didn’t even realize you missed, and bring in more “I want to work with you” conversations, without increasing your ad spend or hiring a full-time employee?
All with a flexible, budget-friendly service that could easily pay for itself. Sounds good?
Would it be nice to jump on a quick 10-minute call so I can show you exactly how we make this work?
Best,
Hapei
Marketing Director
Hey, I know you’re the owner of interviewgemini.com. I’ll be quick.
Fundraising for your business is tough and time-consuming. We make it easier by guaranteeing two private investor meetings each month, for six months. No demos, no pitch events – just direct introductions to active investors matched to your startup.
If youR17;re raising, this could help you build real momentum. Want me to send more info?
Hi, I represent an SEO company that specialises in getting you AI citations and higher rankings on Google. I’d like to offer you a 100% free SEO audit for your website. Would you be interested?
Hi, I represent an SEO company that specialises in getting you AI citations and higher rankings on Google. I’d like to offer you a 100% free SEO audit for your website. Would you be interested?
good
