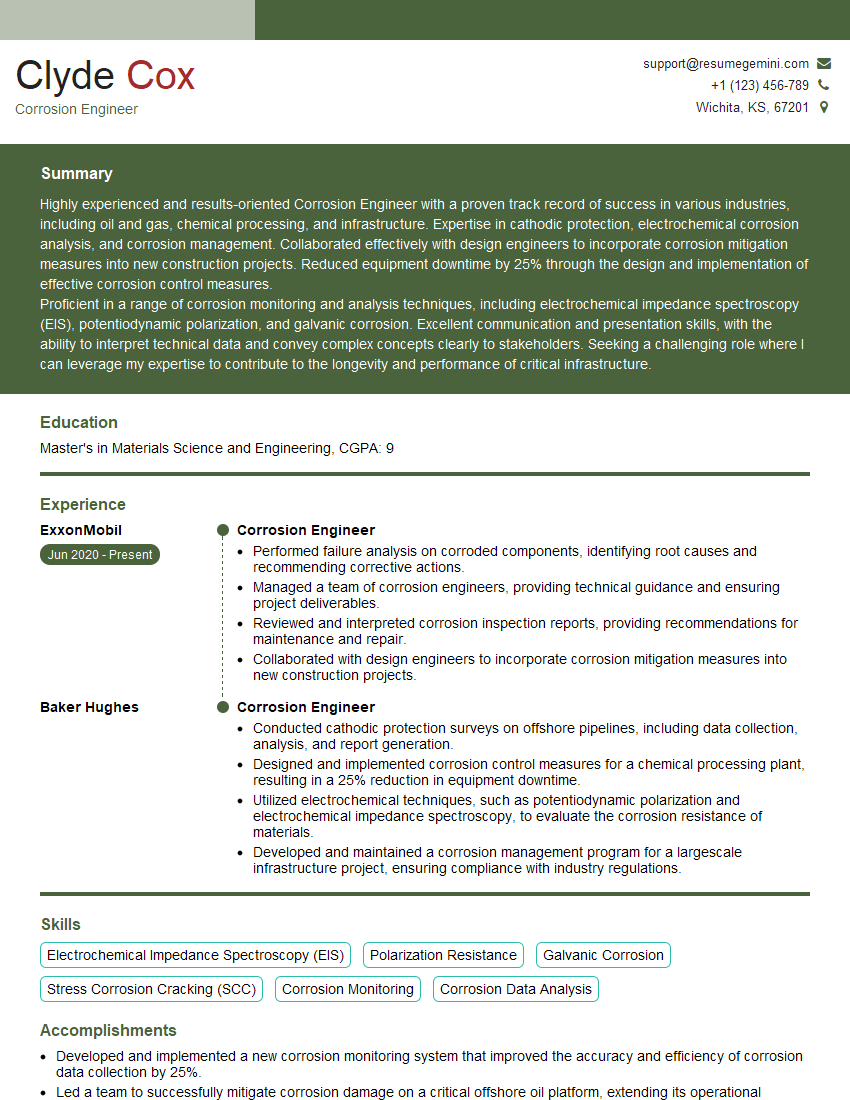
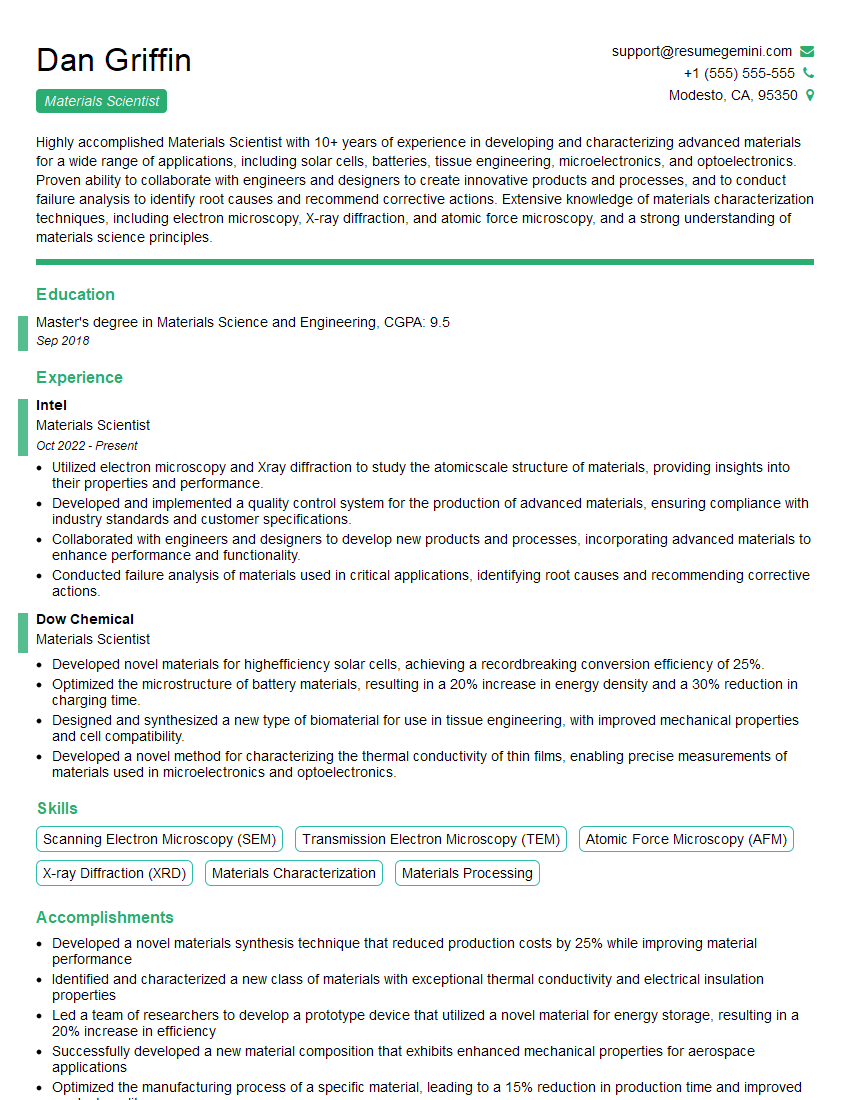
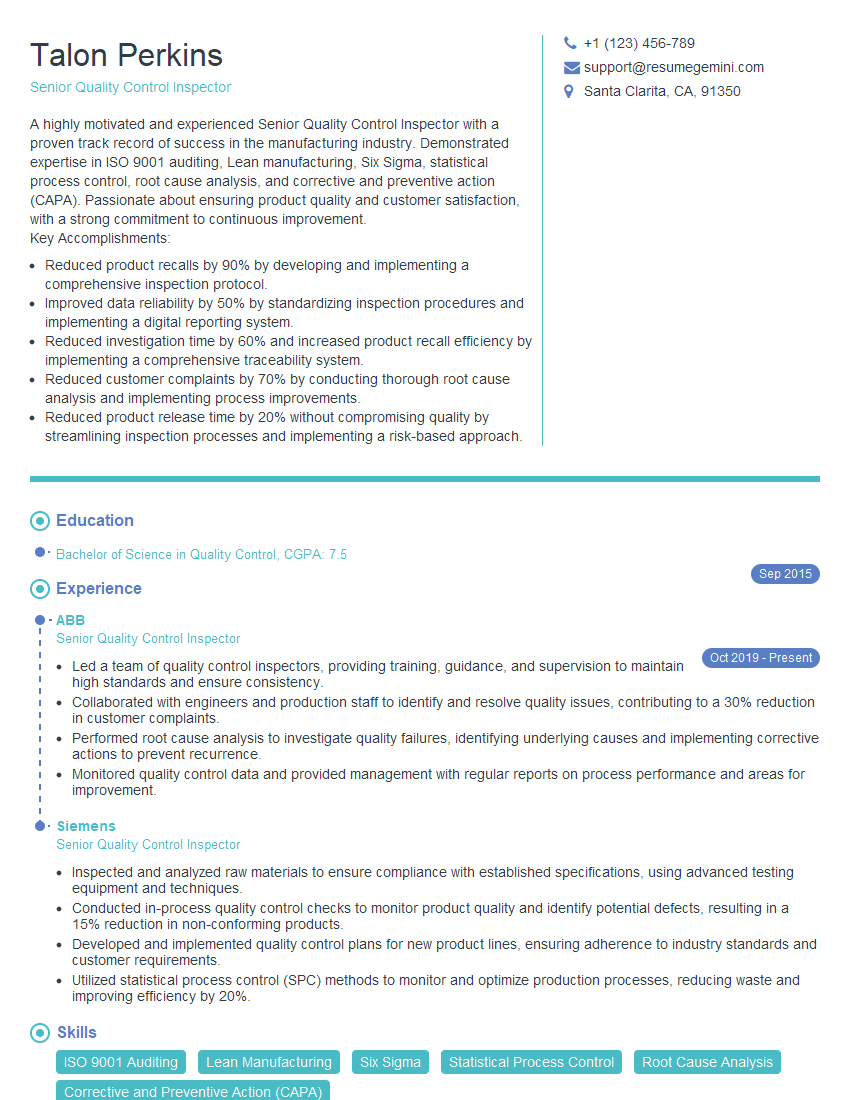
Feeling uncertain about what to expect in your upcoming interview? We’ve got you covered! This blog highlights the most important Material Testing and Certification interview questions and provides actionable advice to help you stand out as the ideal candidate. Let’s pave the way for your success.
Questions Asked in Material Testing and Certification Interview
Q 1. Explain the difference between destructive and non-destructive testing methods.
The core difference between destructive and non-destructive testing (NDT) lies in their effect on the material being tested. Destructive testing involves methods that damage or destroy the sample during the evaluation process, providing precise data but sacrificing the tested component. Non-destructive testing, on the other hand, employs techniques that don’t damage the material, allowing for repeated testing or examination of critical parts that cannot be replaced easily.
Think of it like this: destructive testing is like breaking open an egg to check its yolk; you get precise information about its condition, but you can’t use the egg afterward. NDT is like using a flashlight to inspect the egg’s shell for cracks – you gather information without compromising the egg itself.
- Destructive Testing Examples: Tensile testing, impact testing, hardness testing.
- Non-Destructive Testing Examples: Ultrasonic testing, radiographic testing, visual inspection.
Q 2. Describe your experience with tensile testing and the parameters you would measure.
Tensile testing is a cornerstone of materials characterization. My experience spans various materials, from metals and polymers to composites. The testing process involves applying a controlled tensile force to a standardized specimen until it fractures. During the test, I meticulously measure several critical parameters:
- Yield Strength: The stress at which the material begins to deform plastically.
- Tensile Strength: The maximum stress the material can withstand before failure.
- Elongation: The percentage increase in length of the specimen at fracture.
- Reduction in Area: The percentage decrease in the cross-sectional area at the point of fracture.
- Young’s Modulus (Elastic Modulus): A measure of the material’s stiffness or resistance to elastic deformation.
Precise measurement of these parameters is crucial for ensuring the material meets the required specifications and for understanding its behavior under load. For example, in a recent project involving high-strength steel, precise measurement of yield strength ensured the structural integrity of a critical component within a bridge.
Q 3. How do you determine the appropriate testing method for a given material?
Selecting the right testing method depends heavily on several factors: the material’s properties, the desired information, the cost, and the availability of equipment. There’s no one-size-fits-all answer.
My approach involves a systematic evaluation:
- Material Type and Properties: Is it a metal, polymer, composite, or ceramic? Its inherent characteristics dictate suitable tests. For example, a brittle material might require a different approach than a ductile one.
- Information Required: What specific properties need to be assessed? If you need precise yield strength, tensile testing is necessary. If you’re looking for internal flaws, NDT methods are more appropriate.
- Cost and Time Constraints: Destructive tests are often more expensive and time-consuming than NDT. Budget and project deadlines influence the selection.
- Availability of Equipment: Access to specific testing equipment determines which tests can be performed.
For instance, if I need to assess the integrity of a weld in a pressure vessel, I’d likely opt for ultrasonic testing (NDT) due to its sensitivity to internal flaws and non-destructive nature. However, if I need to determine the precise mechanical properties of a newly developed alloy, destructive tests such as tensile and hardness testing would be necessary.
Q 4. What are the common NDT methods and their applications?
Common NDT methods offer a powerful toolkit for evaluating materials without causing damage. Here are some key examples:
- Visual Inspection (VT): The simplest method, involving visual examination for surface defects. It’s often the first step in any NDT process. Example: Checking for cracks on a component’s surface.
- Liquid Penetrant Testing (LPT): Used to detect surface-breaking defects. A dye is applied, and excess is removed, revealing the defects when a developer is sprayed. Example: Detecting cracks in welds.
- Magnetic Particle Testing (MT): Detects surface and near-surface flaws in ferromagnetic materials. Magnetic particles are applied, and defects are revealed by particle accumulation. Example: Inspecting for cracks in a steel casting.
- Ultrasonic Testing (UT): Uses high-frequency sound waves to detect internal flaws. Example: Finding flaws within a thick metal plate.
- Radiographic Testing (RT): Uses X-rays or gamma rays to create an image of the internal structure of a material. Example: Inspecting welds for porosity.
- Eddy Current Testing (ECT): Uses electromagnetic induction to detect surface and subsurface flaws in conductive materials. Example: Inspecting for corrosion in aluminum tubing.
Q 5. Explain the principles of ultrasonic testing.
Ultrasonic testing leverages high-frequency sound waves (typically above the audible range) to assess the internal structure of materials. A transducer transmits ultrasonic waves into the material. These waves propagate through the material, reflecting off interfaces or discontinuities (like flaws or changes in material properties).
The reflected waves are detected by the same or a separate transducer. By analyzing the time of flight, amplitude, and other characteristics of the reflected waves, we can determine the location, size, and nature of internal flaws. Think of it like sonar used in ships, but instead of detecting fish, it finds flaws within materials.
Different techniques exist within UT, such as pulse-echo (where the same transducer transmits and receives) and through-transmission (where separate transducers are used). The choice depends on the material, the type of flaw being sought, and the geometry of the component.
Q 6. Describe your experience with interpreting tensile test data.
Interpreting tensile test data requires a thorough understanding of material science and engineering principles. I start by plotting the stress-strain curve, which provides a wealth of information. The shape of the curve reveals crucial properties of the material. I look for key points like the yield strength (the onset of plastic deformation), ultimate tensile strength (maximum stress), and fracture point. I then calculate other derived properties such as Young’s modulus, elongation, and reduction in area. These values are then compared against the specified material requirements.
For example, a brittle material would exhibit a steep stress-strain curve with little elongation before fracture, while a ductile material would show significant plastic deformation before failure. Deviations from expected values could suggest processing defects, material inconsistencies, or environmental factors influencing the test.
A thorough understanding of the testing procedure, including specimen preparation, machine calibration, and environmental conditions, is vital to accurately interpreting the data. Inconsistencies need investigation to ensure the results reflect the true material properties.
Q 7. How would you handle a discrepancy in test results?
Discrepancies in test results are common and require a systematic approach to resolve. My strategy involves a multi-step process:
- Repeat the Test: The first step is to repeat the test using the same procedure and equipment to verify if the discrepancy is due to experimental error. Multiple tests allow statistical analysis to verify whether the results are indeed consistent.
- Review the Procedure: Carefully examine every aspect of the testing procedure to identify potential sources of error, such as incorrect specimen preparation, improper machine calibration, or flawed test setup.
- Check the Equipment: Verify that all the equipment used in testing is properly calibrated and functioning correctly. Regular calibration and maintenance are crucial.
- Investigate Material Variations: Assess if the material itself is consistent across samples. Differences in composition or microstructure can lead to varying test results.
- Environmental Factors: Environmental conditions such as temperature and humidity can affect test results. Ensure the test environment is controlled and consistent.
- Consult with Experts: If the discrepancy persists, seek advice from experienced materials engineers or specialists to identify potential issues and provide expert opinions.
Documenting all steps, including any deviations from the standard procedure, is critical in troubleshooting and ensuring traceability in the investigation of discrepancies. Thorough documentation aids in avoiding future inconsistencies.
Q 8. What is the significance of material certifications?
Material certifications are essentially the ‘passport’ of a material, verifying its properties and confirming that it meets specified requirements. They provide critical assurance to engineers, manufacturers, and end-users that the material is fit for its intended purpose. Without certification, there’s a significant risk of using materials that don’t perform as expected, leading to potential failures and safety hazards. For instance, a steel beam used in a bridge construction needs a certificate demonstrating it possesses the required tensile strength and yield strength to safely support the load.
Think of it like buying a car – you wouldn’t buy a car without verifying its specifications and features. Similarly, material certification provides that essential verification for materials used in various applications, from aerospace components to medical implants.
- Traceability: Certifications enable tracing the material’s origin and manufacturing process, ensuring quality control throughout the supply chain.
- Legal Compliance: Many industries have regulations mandating material certifications for specific applications. Failure to comply can lead to legal penalties and project delays.
- Risk Mitigation: Certification reduces the risk of material-related failures, enhancing safety and reliability of the final product.
Q 9. Explain the importance of calibration in material testing.
Calibration in material testing is paramount for ensuring the accuracy and reliability of test results. It’s the process of comparing the readings of a testing instrument against a known standard to verify its accuracy. Imagine using a scale that consistently reads 10% heavier than actual weight – the data would be useless. Similarly, uncalibrated testing equipment leads to inaccurate results, potentially causing design flaws, safety concerns, and economic losses.
Calibration involves using traceable standards, usually certified by a national metrology institute. The process includes adjusting the equipment to match the standard and documenting the results. Regular calibration schedules are essential to maintain accuracy over time, as equipment can drift due to wear and tear or environmental factors. For example, a universal testing machine used to measure tensile strength needs regular calibration to maintain its accuracy in measuring force and displacement.
- Traceability: Calibration certificates should have traceability to national or international standards.
- Frequency: The calibration frequency depends on the type of equipment, usage intensity, and the criticality of the application.
- Documentation: Thorough documentation of the calibration process is vital for ensuring compliance and auditing purposes.
Q 10. How do you ensure the accuracy and reliability of your test results?
Ensuring the accuracy and reliability of test results is the cornerstone of my work. This involves a multi-faceted approach, starting with meticulous sample preparation and handling. I follow strict protocols to ensure representative samples are selected and handled correctly to avoid introducing bias. In addition to careful sample preparation, I also rely on the following:
- Equipment Calibration: As previously mentioned, regular calibration of all testing equipment is critical. We use certified standards and maintain comprehensive calibration records.
- Standard Operating Procedures (SOPs): We adhere to rigorously defined SOPs for each test method, ensuring consistency and repeatability across all tests.
- Quality Control Samples: We routinely include quality control samples within our test batches to monitor the consistency and accuracy of our results. This helps identify any potential drifts or anomalies in the testing process.
- Blind Testing: Periodically, blind tests are conducted, where samples are tested without prior knowledge of their properties. This helps identify any potential biases in the testing procedure.
- Data Analysis & Review: All test data undergoes rigorous analysis and review. Statistical methods are used to identify outliers and assess the overall accuracy and reliability of the results.
For instance, in a recent project involving the testing of concrete cylinders for compressive strength, we implemented blind testing to eliminate potential bias among our technicians, ensuring objective and unbiased results were obtained.
Q 11. Describe your experience with statistical process control (SPC).
Statistical Process Control (SPC) is an essential tool in material testing for monitoring and improving the quality and consistency of the processes. I have extensive experience using SPC charts, such as X-bar and R charts, to track key process parameters like tensile strength, elongation, or hardness. These charts allow for early detection of trends or variations that could indicate problems in the testing equipment, sample preparation, or the materials themselves.
For example, if the tensile strength measurements consistently drift upwards from the target value in an X-bar chart, it could signify a problem in calibration or sample selection. By implementing SPC, I can identify and address potential issues early on, preventing flawed products and wasted resources. This approach also allows us to demonstrate process capability and consistently meet quality standards.
Beyond basic charting, I utilize advanced statistical methods like analysis of variance (ANOVA) and regression analysis to investigate the sources of variability and understand the relationships between different process parameters and material properties. This data-driven approach allows me to continuously improve the efficiency and reliability of our material testing processes.
Q 12. What are the common standards and regulations related to material testing?
The field of material testing is governed by a multitude of standards and regulations, varying depending on the material, application, and geographical location. Some of the most prominent include:
- ASTM International (ASTM): A widely recognized organization that develops and publishes voluntary consensus standards for materials, products, systems, and services. ASTM standards are used globally across various industries.
- International Organization for Standardization (ISO): A worldwide federation of national standards bodies that develops international standards. ISO standards often cover broader aspects of quality management, testing methodologies, and environmental requirements.
- National Standards Bodies: Each country has its own national standards organization (e.g., ANSI in the USA, BSI in the UK) that adopts and adapts international standards, or develops specific national standards.
- Industry-Specific Regulations: Certain industries, such as aerospace and automotive, have stringent regulations and specific material requirements that often go beyond general standards. For instance, aerospace materials are subject to intense scrutiny and detailed documentation due to safety critical applications.
Compliance with these standards and regulations is crucial to ensure the safety, reliability, and quality of products. It’s also essential to keep abreast of any changes or updates to these standards to maintain compliance and best practices.
Q 13. Explain your familiarity with different material standards (e.g., ASTM, ISO).
I’m thoroughly familiar with a broad range of material standards, primarily focusing on ASTM and ISO standards. My experience includes working extensively with:
- ASTM standards for metals: This encompasses various specifications covering mechanical properties like tensile strength, yield strength, hardness, and impact resistance for different alloys (e.g., ASTM A36 for structural steel, ASTM B117 for salt spray testing).
- ASTM standards for plastics: I’m proficient in testing standards for determining mechanical properties of plastics, including tensile strength, flexural strength, and impact resistance (e.g., ASTM D638 for tensile properties, ASTM D790 for flexural properties).
- ISO standards for quality management: My experience also extends to ISO 9001, which is critical for managing quality systems in material testing laboratories and ensuring consistency and reliability of our processes.
- ISO standards for specific material testing methods: I’m familiar with a range of ISO standards that govern the methodology for various material tests, ensuring global consistency and comparability of results.
My understanding of these standards enables me to select the appropriate testing methods, interpret the results correctly, and ensure compliance with relevant regulations. I often refer to these standards when creating test plans and reports, ensuring accuracy and traceability in all our work. For example, understanding ASTM D638 allows me to select the appropriate test specimen dimensions and test parameters when assessing the tensile properties of a specific plastic material.
Q 14. How do you manage and analyze large datasets from material testing?
Managing and analyzing large datasets from material testing involves a combination of data management techniques and statistical analysis. I typically utilize database management systems (DBMS) such as MySQL or PostgreSQL to store and organize the vast amounts of data generated from various tests. This structured approach allows for efficient data retrieval and analysis. For instance, I might store data on material identification, test parameters, and results in a relational database, facilitating queries and reports.
Once the data is organized, I employ various statistical software packages (e.g., R, Python with libraries like Pandas and SciPy, Minitab) to perform analyses. This includes descriptive statistics (mean, standard deviation, etc.) to summarize the data, followed by inferential statistics (t-tests, ANOVA, regression analysis) to draw conclusions and make informed decisions. Data visualization techniques (histograms, scatter plots, box plots) are crucial for identifying patterns, outliers, and trends in the data. For example, using Python and its libraries I can analyze thousands of data points quickly and efficiently, providing insights that inform decision-making.
Furthermore, I’m proficient in using specialized software designed for material testing data analysis. These platforms often include features for managing, analyzing, and reporting test results in compliance with relevant standards and regulations. Ultimately, a combination of robust data management, statistical analysis, and appropriate software helps me to extract valuable insights from large datasets, enabling better decision-making and process improvement.
Q 15. What are the key factors influencing material properties?
Material properties, like strength, ductility, and hardness, are a complex interplay of several factors. Think of it like baking a cake – the final product’s quality depends on the ingredients (material composition), how they’re mixed (processing), and how it’s baked (heat treatment).
- Chemical Composition: The types and proportions of elements in a material drastically affect its properties. For instance, adding carbon to iron changes its properties from soft and ductile iron to hard and strong steel.
- Microstructure: This refers to the arrangement of grains and phases within the material. A fine-grained structure generally leads to higher strength compared to a coarse-grained one. Imagine a brick wall – smaller, tightly packed bricks (grains) make a stronger wall than large, loosely-laid bricks.
- Processing: Manufacturing techniques significantly influence the final product. For example, cold working a metal increases its strength but reduces its ductility. This is analogous to working clay – repeated kneading makes it stronger but more brittle.
- Temperature: Temperature affects the atomic and molecular movements within a material. Elevated temperatures can lead to weakening, creep, or even melting, while low temperatures can make materials brittle.
- External Factors: Environmental conditions like exposure to corrosive substances, radiation, or stress can degrade material properties over time. Think of rust on iron – it’s a classic example of environmental degradation.
Career Expert Tips:
- Ace those interviews! Prepare effectively by reviewing the Top 50 Most Common Interview Questions on ResumeGemini.
- Navigate your job search with confidence! Explore a wide range of Career Tips on ResumeGemini. Learn about common challenges and recommendations to overcome them.
- Craft the perfect resume! Master the Art of Resume Writing with ResumeGemini’s guide. Showcase your unique qualifications and achievements effectively.
- Don’t miss out on holiday savings! Build your dream resume with ResumeGemini’s ATS optimized templates.
Q 16. Explain your experience with failure analysis techniques.
My experience in failure analysis encompasses a wide range of techniques, from visual inspection to sophisticated microscopic analysis. I’ve worked on projects involving metals, polymers, and composites. My approach typically follows a structured methodology:
- Visual Inspection: A careful examination of the failed component, often looking for cracks, fractures, corrosion, or deformation. For example, I once identified a fatigue crack in a turbine blade simply by closely examining its surface.
- Microscopy: Using optical microscopy, scanning electron microscopy (SEM), and transmission electron microscopy (TEM) to analyze the microstructure of the failed material, revealing underlying defects or damage mechanisms. SEM, for instance, helps visualize the fracture surface at high magnification, revealing clues about the failure mode.
- Mechanical Testing: Conducting tensile, compression, hardness, or impact tests on samples from the failed component to determine the mechanical properties and compare them to the material specifications. This can identify if the material itself was faulty or if it failed due to exceeding its design limits.
- Chemical Analysis: Employing techniques like X-ray diffraction (XRD), energy-dispersive X-ray spectroscopy (EDS), and inductively coupled plasma mass spectrometry (ICP-MS) to identify the material’s composition and any potential contamination or chemical changes that might have contributed to failure. This is crucial for identifying corrosion or environmental degradation.
In one particular case, a seemingly simple fracture in a plastic component was traced back to micro-voids during the injection molding process, highlighted through SEM analysis. The report and subsequent corrective actions prevented similar failures.
Q 17. How would you identify the root cause of a material failure?
Identifying the root cause of material failure requires a systematic and investigative approach. It’s like solving a detective case – we need to collect evidence and analyze it meticulously. My approach involves:
- Gather Information: Collect all relevant data, including the failure history, operating conditions, design specifications, and any relevant maintenance records. This context provides crucial background.
- Visual Inspection and Documentation: Carefully document the failure site, taking detailed photographs and notes. This step often reveals obvious clues.
- Material Characterization: Use various testing methods, as described previously, to determine the material’s properties and identify any anomalies.
- Failure Mode Analysis: Identify the mechanism of failure, such as fatigue, creep, brittle fracture, or corrosion. This narrows down the potential causes.
- Root Cause Analysis: Based on the collected data and failure mode analysis, systematically eliminate possibilities until the primary cause is identified. Tools like Fishbone diagrams (Ishikawa diagrams) can be helpful for organizing information and pinpointing the root cause.
- Verification and Reporting: Verify the findings through additional testing or simulations and then compile a comprehensive report outlining the root cause, failure mechanism, and recommendations for corrective actions.
For example, in a case involving a cracked pressure vessel, we found that improper welding techniques, verified by metallurgical analysis, had created stress concentrations that ultimately led to the failure.
Q 18. Describe your experience with different types of material defects.
My experience spans various material defects, ranging from macroscopic flaws visible to the naked eye to microscopic imperfections revealed through advanced analytical techniques. These defects can significantly impact the performance and reliability of materials. Here are some key types:
- Surface Defects: Scratches, cracks, inclusions, pits, and other surface imperfections can weaken a material’s structural integrity and lead to premature failure. These are often visible during visual inspection.
- Internal Defects: Voids, porosity, cracks, and inclusions within the material’s bulk are more challenging to detect. Techniques like ultrasonic testing (UT) and radiography are used for their detection.
- Microstructural Defects: Imperfections at the microscopic level, such as grain boundary segregation, precipitates, or dislocations, can affect a material’s properties. Advanced microscopy techniques are essential for their identification.
- Processing Defects: Defects introduced during manufacturing, such as residual stresses, improper heat treatments, or incomplete melting, can affect the final product. This emphasizes the importance of quality control during production.
One project involved analyzing a batch of castings with internal porosity. We used radiography to visualize the defects and determined their origin was linked to improper mold preparation in the foundry.
Q 19. How do you ensure the safety and compliance in a material testing laboratory?
Ensuring safety and compliance in a material testing laboratory is paramount. It’s not just about following regulations, but also about creating a culture of safety that protects personnel and maintains data integrity. Key aspects include:
- Adherence to Safety Regulations: We strictly follow all relevant safety standards and regulations, such as OSHA guidelines in the US, or equivalent standards in other regions. This includes handling hazardous materials, operating machinery safely, and using appropriate personal protective equipment (PPE).
- Proper Equipment Calibration and Maintenance: Regularly calibrating and maintaining testing equipment ensures accurate and reliable results. This is crucial for maintaining the integrity of our data.
- Quality Control Procedures: Implementing robust quality control procedures throughout the testing process ensures accurate, precise, and reliable results. This involves using certified reference materials, maintaining detailed records, and performing regular audits.
- Personnel Training and Competency: All laboratory personnel undergo comprehensive training on safe laboratory practices, proper use of equipment, and data analysis. Competency assessments are essential to ensure skills are up-to-date.
- Emergency Preparedness: Having comprehensive emergency response plans and procedures in place is crucial. This includes protocols for handling spills, fires, and other emergencies.
Our laboratory has a strict safety protocol that includes regular safety inspections and training sessions, leading to a zero-accident record for the past five years.
Q 20. Explain your experience with report writing and documentation.
Report writing and documentation are critical parts of my work. A well-written report clearly communicates findings, methodologies, and conclusions in a manner that is easily understandable to both technical and non-technical audiences. My experience includes:
- Detailed Methodology Descriptions: I meticulously document the testing procedures followed, including equipment used, sample preparation methods, and any deviations from standard procedures. This allows reproducibility of the tests.
- Clear Data Presentation: I present the test results clearly, using tables, graphs, and images to visually represent complex data. This increases comprehension and readability.
- Comprehensive Analysis and Interpretation: I analyze the test data and interpret the results, drawing relevant conclusions and explaining their significance. This is where expertise is crucial.
- Concise and Accurate Conclusions and Recommendations: I provide clear, concise, and actionable conclusions and recommendations based on the analysis. This guides decisions on future actions.
- Compliance with Standards: I ensure that all reports adhere to relevant industry standards and reporting formats. Consistency and compliance are important factors.
I’ve developed a template for failure analysis reports that makes the process streamlined and ensures consistency across all projects. This template is also adaptable for specific needs.
Q 21. How would you communicate complex technical information to a non-technical audience?
Communicating complex technical information to a non-technical audience requires simplifying complex concepts and using clear, relatable language. I avoid jargon and use analogies to explain difficult ideas. Here’s my approach:
- Identify the Audience: Understanding their level of technical knowledge is crucial. This determines the level of simplification needed.
- Use Simple Language and Avoid Jargon: Replace technical terms with everyday language whenever possible, and define any essential terms that cannot be avoided.
- Visual Aids: Using charts, graphs, images, and diagrams makes technical information easier to grasp. A picture is truly worth a thousand words.
- Analogies and Real-world Examples: Relate technical concepts to everyday experiences or objects that the audience can readily understand. This increases comprehension.
- Focus on Key Takeaways: Highlight the most important conclusions and recommendations, making them clear and concise. Summarization is crucial.
For example, when explaining the concept of material fatigue to a board of directors, I might use the analogy of repeatedly bending a paperclip until it breaks – illustrating how repeated stress leads to failure.
Q 22. Describe your proficiency with material testing equipment.
My proficiency with material testing equipment spans a wide range, encompassing both traditional and advanced technologies. I’m highly experienced in operating and maintaining universal testing machines (UTMs) for tensile, compression, and flexural tests. I’m also adept at using hardness testers (Rockwell, Brinell, Vickers), impact testers (Charpy, Izod), and fatigue testing machines. Beyond these fundamental tools, I have extensive experience with specialized equipment such as scanning electron microscopes (SEMs) for microstructural analysis, X-ray diffraction (XRD) systems for phase identification, and thermal analysis instruments (Differential Scanning Calorimetry – DSC and Thermogravimetric Analysis – TGA) for studying material behavior at different temperatures. For example, in a recent project involving a new polymer composite, I utilized the SEM to identify the cause of unexpected brittleness, ultimately leading to a successful redesign. My experience extends to ensuring the proper calibration and maintenance of all equipment to guarantee accurate and reliable results, adhering strictly to industry standards and best practices.
Q 23. How do you stay updated with the latest advancements in material testing?
Staying current in the ever-evolving field of materials testing is crucial. I employ a multi-pronged approach. Firstly, I actively participate in professional organizations like ASTM International and ASM International, attending conferences and workshops to learn about the newest techniques and equipment. Secondly, I regularly read peer-reviewed journals and industry publications like Materials Today and Journal of Materials Science. Thirdly, I leverage online resources such as webinars and professional networking platforms like LinkedIn to access the latest research and industry trends. For instance, I recently learned about the application of AI and machine learning in automating data analysis and predictive modeling in materials testing, a development that significantly improves efficiency and accuracy. This continuous learning allows me to adapt quickly to new challenges and integrate the latest advancements into my work.
Q 24. What are your strengths and weaknesses as a material testing professional?
My strengths lie in my meticulous attention to detail, my analytical problem-solving abilities, and my capacity to effectively communicate complex technical information to both technical and non-technical audiences. I am adept at designing and executing comprehensive testing programs, analyzing data, and generating clear, concise reports. For example, in a previous role, I successfully identified a critical flaw in a supplier’s manufacturing process by meticulously analyzing the results from a series of fatigue tests, ultimately preventing a costly product recall. However, my weakness, which I am actively working to improve, is delegation. I sometimes find it challenging to entrust tasks to others due to my desire for precise control over the testing process. I am currently working on developing better delegation skills through targeted training and mentorship programs. This self-awareness ensures that I am continuously improving my professional capabilities.
Q 25. What are your salary expectations for this role?
My salary expectations for this role are commensurate with my experience, skills, and the market rate for similar positions. Considering my extensive experience in material testing, my proficiency with advanced equipment, and my proven track record of success, I am seeking a competitive compensation package reflecting my value to the organization. I am open to discussing specific figures once I have a better understanding of the full scope of responsibilities and benefits offered.
Q 26. Describe your experience with specific software used in materials testing.
My experience with materials testing software is extensive. I’m highly proficient in using data acquisition and analysis software such as TestWorks, Bluehill, and Instron’s Nexus software. These packages allow me to control the testing machines, collect raw data, and perform detailed analysis, including calculating material properties like tensile strength, yield strength, and modulus of elasticity. Furthermore, I have experience with image analysis software such as ImageJ for analyzing microstructures obtained from SEM images. My familiarity also extends to specialized software used for finite element analysis (FEA), which helps simulate material behavior under different loading conditions. For instance, in a recent project, I used FEA software to predict the failure modes of a specific component, which helped optimize its design for enhanced durability.
Q 27. Explain your understanding of material degradation and its impact.
Material degradation is the deterioration of a material’s properties over time due to various factors like environmental exposure, mechanical stress, and chemical reactions. This degradation can manifest in different ways, including corrosion, fatigue, creep, and oxidation. Understanding material degradation is crucial because it directly impacts the service life and reliability of engineered structures and components. For example, the corrosion of steel bridges due to exposure to salt water can compromise their structural integrity, potentially leading to catastrophic failures. The impact of material degradation can range from minor performance reductions to catastrophic failures, resulting in significant economic losses and safety hazards. My understanding encompasses identifying the mechanisms of degradation, predicting their rates, and implementing strategies to mitigate their effects. This includes selecting appropriate materials for specific applications, designing protective coatings, and implementing regular inspection and maintenance programs.
Key Topics to Learn for Material Testing and Certification Interview
- Mechanical Testing: Understanding tensile, compressive, shear, fatigue, and impact testing; interpreting stress-strain curves and relevant material properties like yield strength, ultimate tensile strength, and modulus of elasticity. Practical application: Analyzing the structural integrity of components under various loading conditions.
- Non-Destructive Testing (NDT): Familiarization with various NDT methods such as ultrasonic testing (UT), radiographic testing (RT), magnetic particle testing (MT), and liquid penetrant testing (PT); understanding their applications and limitations. Practical application: Detecting flaws and defects in materials without causing damage.
- Material Characterization: Knowledge of techniques for identifying material composition and microstructure, including microscopy (optical and electron), spectroscopy, and chemical analysis. Practical application: Ensuring materials meet specified requirements and standards.
- Material Standards and Codes: Familiarity with relevant industry standards and codes (e.g., ASTM, ASME) and their application in material selection and certification. Practical application: Ensuring compliance with regulations and specifications.
- Data Analysis and Reporting: Proficiency in analyzing test data, drawing conclusions, and preparing comprehensive reports. Practical application: Communicating findings clearly and effectively to stakeholders.
- Quality Control and Assurance: Understanding quality management systems (e.g., ISO 9001) and their role in ensuring consistent material quality and reliability. Practical application: Implementing and maintaining quality control procedures throughout the material testing process.
- Problem-Solving and Troubleshooting: Ability to identify and troubleshoot issues related to material testing and certification. Practical application: Developing effective solutions to challenges encountered during testing and analysis.
Next Steps
Mastering Material Testing and Certification opens doors to exciting career opportunities in diverse industries, offering excellent growth potential and competitive salaries. A strong resume is crucial for showcasing your skills and experience to potential employers. Creating an ATS-friendly resume is essential to ensure your application gets noticed by Applicant Tracking Systems. To build a professional and impactful resume, we recommend using ResumeGemini. ResumeGemini provides a user-friendly platform and offers examples of resumes tailored to Material Testing and Certification, helping you present your qualifications effectively and stand out from the competition.
Explore more articles
Users Rating of Our Blogs
Share Your Experience
We value your feedback! Please rate our content and share your thoughts (optional).
What Readers Say About Our Blog
Hello,
We found issues with your domain’s email setup that may be sending your messages to spam or blocking them completely. InboxShield Mini shows you how to fix it in minutes — no tech skills required.
Scan your domain now for details: https://inboxshield-mini.com/
— Adam @ InboxShield Mini
Reply STOP to unsubscribe
Hi, are you owner of interviewgemini.com? What if I told you I could help you find extra time in your schedule, reconnect with leads you didn’t even realize you missed, and bring in more “I want to work with you” conversations, without increasing your ad spend or hiring a full-time employee?
All with a flexible, budget-friendly service that could easily pay for itself. Sounds good?
Would it be nice to jump on a quick 10-minute call so I can show you exactly how we make this work?
Best,
Hapei
Marketing Director
Hey, I know you’re the owner of interviewgemini.com. I’ll be quick.
Fundraising for your business is tough and time-consuming. We make it easier by guaranteeing two private investor meetings each month, for six months. No demos, no pitch events – just direct introductions to active investors matched to your startup.
If youR17;re raising, this could help you build real momentum. Want me to send more info?
Hi, I represent an SEO company that specialises in getting you AI citations and higher rankings on Google. I’d like to offer you a 100% free SEO audit for your website. Would you be interested?
Hi, I represent an SEO company that specialises in getting you AI citations and higher rankings on Google. I’d like to offer you a 100% free SEO audit for your website. Would you be interested?
good
