Are you ready to stand out in your next interview? Understanding and preparing for Affinity Photo interview questions is a game-changer. In this blog, we’ve compiled key questions and expert advice to help you showcase your skills with confidence and precision. Let’s get started on your journey to acing the interview.
Questions Asked in Affinity Photo Interview
Q 1. Explain the difference between Affinity Photo’s ‘Layers’ and ‘Layer Masks’.
In Affinity Photo, layers and layer masks are fundamental tools for non-destructive editing. Think of a layer as a transparent sheet of acetate where you can place your images, text, or other elements. You can stack these sheets on top of each other, creating complex compositions.
A layer mask, on the other hand, acts like a stencil on top of a layer, revealing or concealing parts of that layer. It doesn’t alter the layer’s pixels directly; instead, it controls the layer’s visibility. This is crucial for non-destructive editing, meaning you can always go back and adjust the mask without permanently affecting the original layer content.
- Layers: Organize elements, adjust blending modes, opacity, and more. Example: You might have a layer for the background, one for the subject, and another for text overlays.
- Layer Masks: Control the visibility of parts of a layer. Example: To selectively remove a background from a subject, you would use a layer mask to hide the background pixels while keeping the subject visible.
Imagine painting a landscape: layers are like your individual brush strokes (trees, sky, mountains), while layer masks help you blend and refine these strokes without affecting the individual paint itself.
Q 2. How would you use Affinity Photo’s adjustment layers to correct color imbalances in a photograph?
Affinity Photo’s adjustment layers are a powerful way to correct color imbalances without affecting the original image pixels. These work similarly to layer masks, but instead of revealing/hiding pixels, they adjust the color and tone of the layers below. I typically use them for non-destructive color correction, allowing for easy adjustments and experimentation.
To correct color imbalances, I might add a ‘White Balance’ adjustment layer to fine-tune the temperature and tint. If there’s an overall color cast, I’d use a ‘Curves’ adjustment layer for precise control over color channels (red, green, blue). For more global adjustments, I might utilize a ‘Levels’ or ‘Hue/Saturation’ adjustment layer. By experimenting with these different adjustment layers, I find the best approach for correcting color balance in a photograph. For instance, if a photo has an overall orange tint, I might use a Curves adjustment layer to reduce the orange tones and add blue tones.
The beauty of this method is that the adjustments are non-destructive. I can always go back, adjust the settings on the adjustment layer, or even delete the adjustment layer completely without affecting the original image.
Q 3. Describe your experience using Affinity Photo’s selection tools (e.g., magnetic lasso, quick selection).
Affinity Photo’s selection tools are remarkably intuitive and efficient. I frequently use the magnetic lasso for selecting objects with well-defined edges, like hair or product outlines. The magnetic lasso intelligently snaps to edges as you move the cursor, making complex selections surprisingly easy. For quick selections of large, uniform areas, I lean on the quick selection tool; it’s particularly helpful for isolating subjects against contrasting backgrounds.
I find the refine selection tools crucial for achieving precise selections. They allow for edge adjustments and feathering, smoothing out imperfections and making the selection even cleaner. For intricate selections, combining multiple tools is often necessary. For example, I might use the quick selection for the majority, then switch to the magnetic lasso for the more complex details, and finish with the refine selection brush to clean up any rough edges. This layered approach helps to ensure accuracy and efficiency.
My experience shows that proficiency in these tools dramatically reduces the time spent on tedious manual selections, freeing up more time for creative work.
Q 4. How do you handle high-resolution images in Affinity Photo to optimize performance?
Handling high-resolution images in Affinity Photo efficiently requires strategic approaches. The key is to minimize the demand on RAM and processing power. I avoid working with the image at 100% zoom unless absolutely necessary. Instead, I zoom to a level that allows me to see the details while maintaining a smooth workflow.
Moreover, I utilize Affinity Photo’s ‘Proxy’ feature; this generates a smaller, lower-resolution version of the image that’s used for editing. This speeds up performance significantly, especially with very large files. Once the editing is complete, I simply export the final high-resolution image.
Another important technique is to use the ‘Save As’ feature frequently and save in the native .afphoto format. This allows for the storage of the project in a format that is optimized for Affinity Photo, preserving all edits in a non-destructive manner, and improving performance compared to other formats.
By incorporating these strategies, I can smoothly manage even the most demanding high-resolution images.
Q 5. What are the advantages of using Affinity Photo’s ‘Live Filters’ over standard adjustments?
Affinity Photo’s Live Filters offer a significant advantage over standard adjustments due to their non-destructive and dynamic nature. Standard adjustments are applied directly to the image layers, whereas Live Filters are applied as separate layers, allowing for editing and adjustment even after application.
This means that you can modify the filter’s settings at any time without affecting the original image or needing to undo changes. Think of it as having a slider on top of the image, allowing real-time manipulation of the effect. This is particularly useful for experimental editing, as you can try various filter combinations and effects without any risk to your original image.
Furthermore, the non-destructive nature of live filters makes them very efficient. If a live filter is no longer desired, it can simply be deleted or turned off without losing any image data.
This advantage translates to a much more fluid and efficient workflow, particularly beneficial in professional scenarios where multiple revisions and adjustments are often required.
Q 6. Explain how you would retouch a portrait in Affinity Photo, focusing on skin smoothing and blemish removal.
Retouching portraits in Affinity Photo to achieve smooth skin and blemish removal involves a combination of techniques. I generally start with careful selection using tools like the selection brush or the quick selection tool to isolate the skin area. Then, I utilize the ‘Inpainting’ tool for blemish removal; this cleverly replaces imperfections with surrounding skin texture, resulting in a natural look.
For skin smoothing, I often use a combination of frequency separation and/or subtle blurring. Frequency separation involves separating the image into high-frequency (detail) and low-frequency (tone) layers. I would smooth the low-frequency layer to achieve a smoother tone, then carefully blend it back with the high-frequency layer to preserve details and avoid a mask-like effect. The goal here is to create a soft, natural look that doesn’t appear overly processed.
Throughout the process, I pay close attention to detail, using the zoom tool extensively to ensure a precise and realistic retouch. The key is to achieve a natural enhancement rather than an unrealistic smoothing of the skin.
Q 7. How do you manage and organize layers effectively in a complex Affinity Photo project?
Managing layers in complex Affinity Photo projects requires a well-organized approach. I always begin by creating clear, descriptive layer names. This is crucial for maintaining overview and understanding the purpose of each layer at a glance. For example, instead of ‘Layer 1,’ I’d use ‘Background,’ ‘Subject,’ ‘Hair Highlights,’ and so on.
Next, I make extensive use of layer groups. These are containers for layers, allowing me to group related elements, like all layers associated with a specific subject or effect. I would label groups similarly to individual layers, making the organization even clearer.
Color-coding layers can also greatly enhance organization. Affinity Photo allows assigning different colors to layers and groups, providing a visual cue to their purpose. A consistent color-coding scheme can quickly make sense of complex projects.
Finally, I utilize Affinity Photo’s layer panel options to adjust the order of layers and groups, ensuring visibility and clarity. This structured approach ensures that complex projects remain manageable and understandable, facilitating smooth and efficient workflow.
Q 8. Describe your workflow for creating a professional-quality product mockup using Affinity Photo.
Creating a professional product mockup in Affinity Photo involves a multi-step process focusing on accurate representation and appealing aesthetics. My workflow typically begins with sourcing high-quality images of the product and its intended environment. I then carefully import these into Affinity Photo, ensuring proper resolution. Next, I use the powerful selection tools – like the Pen tool for precise selections or the Magnetic Selection tool for quicker selections – to isolate the product from its background. This is crucial for seamless integration into the mockup scene. I might use masking techniques for finer control, especially around complex edges. Once isolated, I utilize Affinity Photo’s powerful transformation tools, including perspective correction, to perfectly align the product within the mockup scene. Finally, I employ adjustment layers to fine-tune lighting, shadows, and color to ensure realistic integration and a professional finish. For example, if I’m creating a coffee mug mockup, I might use a layer mask to subtly add a realistic shadow under the mug to ground it in the scene. I’d also use color adjustments to ensure the mug color matches the brand’s established color palette.
The entire process emphasizes non-destructive editing, using adjustment layers and masks to retain maximum flexibility throughout. This allows for easy revisions and adjustments throughout the design process, without ever affecting the underlying image. I always strive to create a visually appealing mockup that accurately reflects the product’s qualities and features.
Q 9. What are your preferred methods for exporting images from Affinity Photo for web and print?
Exporting images from Affinity Photo for web and print requires careful consideration of resolution, file format, and color space. For web, I typically export using the PNG format for images with transparency or sharp details, or JPEG for photographs, using a quality setting around 80-90% to balance file size and quality. It’s important to ensure the image dimensions are appropriate for web use, typically optimized for screen resolutions. I always work in sRGB color space for web projects. For print, I export using the TIFF or PSD formats to preserve all layers and editing information, or high-quality JPEGs at a much higher resolution. This is essential for preserving fine details during printing. Crucially, I always ensure the image is in the correct color space – CMYK – for professional printing, along with appropriate resolution in DPI (dots per inch) as specified by the printer. I might use a higher quality JPEG setting (around 95%) for print. For large format prints, I ensure the file is sufficiently high resolution to avoid pixelation.
Q 10. How would you use Affinity Photo’s ‘Liquify’ tool for image manipulation?
Affinity Photo’s Liquify tool is a powerful non-destructive method for manipulating image distortion. It allows for precise control over shaping and warping elements within an image. Think of it like digital sculpting clay. I commonly use it for subtle adjustments to portraits, such as reshaping facial features or body parts, or for more dramatic effects like creating surreal or artistic imagery. The tool provides various brushes and options for controlling the intensity and area of effect. For example, I might use the ‘Forward Warp’ tool to subtly slim a person’s waist in a portrait photo. Or I might use the ‘Push’ tool to enlarge the eyes, making them appear more expressive. Always remember that moderation is key; overusing the Liquify tool can result in an unrealistic and unnatural-looking image. I always work in a non-destructive manner, using a duplicate layer to apply the Liquify adjustments, allowing me to easily revert to the original image if needed.
Q 11. Explain your experience with Affinity Photo’s brush engine and customization options.
Affinity Photo boasts a highly customizable brush engine. I find it exceptionally versatile and powerful. The engine allows for control over various brush parameters, including size, hardness, shape dynamics, and scattering. I often create custom brushes from scratch using the brush creation tool, allowing me to precisely tailor the characteristics of the brush to a specific task. This is especially beneficial for creating unique textures and effects, like custom watercolour brushes or textured chalk brushes. I’ve found the ability to import custom brush tips significantly expands the range of creative options. For example, I might create a custom brush that mimics the texture of linen fabric to add realistic detail to a woven tapestry. The ability to save and reuse custom brushes across projects significantly streamlines my workflow.
Q 12. How do you utilize Affinity Photo’s ‘Perspective’ tool for image correction?
The Perspective tool in Affinity Photo is invaluable for correcting distorted perspectives in images, often caused by shooting with a wide-angle lens or from an unusual angle. It’s particularly useful for architectural photography, product shots, or any situation where straight lines appear to converge incorrectly. This tool allows me to adjust vanishing points and manipulate image sections to rectify these distortions, resulting in a more accurate and professional-looking image. For example, a photo of a tall building might show converging vertical lines. Using the perspective tool, I can correct these lines, making the building appear straight and true to its actual form. This improves the image’s overall realism and visual appeal.
Q 13. Describe how you would create a custom brush in Affinity Photo.
Creating a custom brush in Affinity Photo is a straightforward process. Begin by selecting the Brush Tool and then accessing the Brush Studio. Here, you can design a brush from scratch, choosing the brush shape, and adjusting its properties like hardness, size, and spacing. The Brush Studio allows you to manipulate the brush’s profile, creating unique shapes and textures. You can also import custom brush tips in various formats. For instance, I might create a custom grass brush by importing a high-resolution image of a single grass blade and using it as the brush tip. By adjusting the spacing, scatter, and other parameters I can create a realistic looking patch of grass. Once satisfied, I save the custom brush for later reuse.
Q 14. How would you use Affinity Photo to remove unwanted objects from a photograph?
Removing unwanted objects from a photograph in Affinity Photo often involves a combination of techniques depending on the complexity of the object and the background. For simple objects against a uniform background, the Clone tool or Patch tool might suffice. For more complex situations, the Inpainting tool, coupled with careful masking, is a robust solution. This involves selecting the unwanted object, and using the tool to ‘intelligently’ fill in the selected area based on the surrounding pixels. In cases with intricate backgrounds, I might utilize layer masking in conjunction with the healing brush tool for a more precise and natural-looking result. In more complex scenarios, I may combine multiple selection techniques and healing tools to achieve the most natural and seamless object removal. The key is to blend the repaired area seamlessly with its surroundings, ensuring a natural-looking result without visible artifacts.
Q 15. How familiar are you with using color profiles and color management within Affinity Photo?
Color management in Affinity Photo is crucial for ensuring color accuracy across different devices and output methods. It involves working with color profiles, which are essentially descriptions of a specific color space. Affinity Photo supports various profiles like sRGB (for web), Adobe RGB (for print), and ProPhoto RGB (for a wider gamut). I’m very familiar with assigning and converting between profiles. For example, if I’m designing a print piece, I’ll work in Adobe RGB to utilize its wider color range. Then, before exporting for printing, I’ll ensure the correct CMYK profile is embedded. Mismatched profiles can lead to significant color shifts, so managing them diligently is essential for professional results.
Understanding color spaces is critical. I regularly use the ‘Document’ settings to select the appropriate color profile upon creating a new document, and I know how to convert between different profiles using the ‘Edit > Convert to Profile’ option, carefully choosing the appropriate rendering intent (Perceptual, Relative Colorimetric, etc.) depending on the intended output and how I want colors to be mapped.
I also make extensive use of soft-proofing – comparing the image with the selected profile to simulate what the final output would look like, which helps predict and prevent color problems.
Career Expert Tips:
- Ace those interviews! Prepare effectively by reviewing the Top 50 Most Common Interview Questions on ResumeGemini.
- Navigate your job search with confidence! Explore a wide range of Career Tips on ResumeGemini. Learn about common challenges and recommendations to overcome them.
- Craft the perfect resume! Master the Art of Resume Writing with ResumeGemini’s guide. Showcase your unique qualifications and achievements effectively.
- Don’t miss out on holiday savings! Build your dream resume with ResumeGemini’s ATS optimized templates.
Q 16. Explain your experience using Affinity Photo’s text tools and formatting options.
Affinity Photo’s text tools are robust and offer a wide array of formatting options, mirroring professional desktop publishing applications. I frequently utilize its features for logo design, creating website banners, and image editing projects needing text overlays.
Beyond basic text entry and font selection, I utilize advanced features such as kerning (adjusting the space between individual letter pairs), tracking (adjusting the space between all characters in a selection), and leading (adjusting the space between lines). I also regularly use the paragraph styles for maintaining consistency across multiple text blocks and applying formatting consistently and efficiently. This allows for quick adjustments across many text elements.
I’m proficient in using text boxes, text frames, and manipulating text on paths, allowing for creative text placements, particularly helpful in creating curved text effects or adapting text to unique shapes. For example, I recently used this functionality to create a logo design with text following a circular path. The ability to adjust the text flow within frames simplifies the process of creating multi-line text blocks with varying designs.
Q 17. How do you create and apply custom patterns and textures in Affinity Photo?
Creating and applying custom patterns and textures in Affinity Photo involves several techniques, depending on the desired complexity. For simple patterns, I might use the ‘Fill’ tool with the ‘Pattern’ option and design a small repeating tile within a new document. This tile will then seamlessly repeat when used as a fill.
For more complex textures, I often start by creating the texture itself using brushes, filters, or even importing images. For example, I might generate a realistic wood grain texture using various filters and brush techniques. Once created, I can save this texture as a pattern by exporting it as a PNG file (which may require optimizing the tiling to avoid obvious seams), and then importing this PNG as a new pattern via the ‘Fill’ tool’s pattern options.
Alternatively, I can create a seamless texture directly within Affinity Photo using layers, blending modes, and transformations. By carefully tiling layers and using masks, I can generate intricate patterns that perfectly repeat. This allows for non-destructive manipulation, so changes can be made without affecting the final outcome.
Q 18. Describe your process for designing a website banner using Affinity Photo.
My process for designing a website banner in Affinity Photo typically involves these steps: Firstly, I would determine the required dimensions of the banner based on the platform (e.g., Google Ads, social media posts). Secondly, I’d create a new document with those exact dimensions. Next, I’d gather any necessary assets such as images and text, ensuring high enough resolution for crisp results.
I would then begin composing the banner by carefully arranging the elements – often using layers and layer groups for better organization and non-destructive edits. I often start with a background image or color, then strategically position text and other visuals. I usually use adjustment layers (like brightness, contrast, or color balance) to fine-tune the visual appeal of the elements and create the desired atmosphere. Blend modes can be used to add more depth and visual interest, such as blending text elements into background images seamlessly.
Once satisfied with the design, I’d optimize the image for web by exporting as a PNG or JPG, depending on the level of detail required. PNGs are ideal for designs with sharp edges and transparent backgrounds, while JPGs provide better compression for photographic elements. Ensuring the file size is optimized for quick loading times is key here.
Q 19. How do you optimize images for various platforms (web, print, social media) in Affinity Photo?
Optimizing images for different platforms requires understanding the unique requirements of each. For web, I prioritize smaller file sizes to ensure fast loading times while maintaining acceptable visual quality. This often means saving as a compressed JPEG for photographs and a PNG for images with sharp lines and transparency. For print, I’ll use a higher resolution and a print-ready color profile like Adobe RGB or CMYK, depending on the printer’s specifications. Social media platforms usually have varying size and aspect ratio requirements, necessitating careful resizing and cropping to fit within their guidelines.
In Affinity Photo, I use the ‘Export Persona’ to fine-tune settings for each export. For web, I might reduce the resolution and adjust JPEG compression levels for a smaller file size. For print, I’d ensure high resolution and select the correct color profile. For social media, I’d resize the image and potentially add relevant filters to match the platform’s style or branding requirements. I often create several versions of the same image to cater to different platforms and sizes.
Q 20. What methods do you use for non-destructive editing in Affinity Photo?
Non-destructive editing in Affinity Photo is a cornerstone of my workflow. This approach ensures that original image data remains unaltered, allowing for adjustments and corrections without losing quality. I achieve this primarily through the use of adjustment layers, clipping masks, and layer masks.
Adjustment layers, like brightness/contrast or curves, affect the image below without permanently altering the pixels. This means I can change the settings anytime without affecting the original layer. Clipping masks restrict the effect of a layer (including adjustment layers) only to the layer directly below. This is handy for applying adjustments selectively to specific areas of an image. Layer masks provide pixel-level control, allowing me to selectively hide or reveal portions of a layer, maintaining the underlying layers intact. This allows for precise masking of complex elements.
By using these techniques in conjunction with layers and layer groups, I build a non-destructive edit history that’s easy to adjust, allowing for flexibility and experimentation without fear of ruining the original image. It’s like using a sketchbook—you can make changes without losing your initial work.
Q 21. Explain how you would use Affinity Photo’s blend modes to achieve a specific artistic effect.
Affinity Photo’s blend modes offer immense creative possibilities. They control how the pixels of a layer interact with the pixels of the layer below. I use them to achieve a vast array of artistic effects, from subtle enhancements to dramatic transformations. For instance, to create a vibrant, sun-drenched effect, I might place a layer with a bright, glowing texture over the image and select a blend mode like ‘Screen’ or ‘Add’. ‘Screen’ will lighten the underlying image, making it appear brighter, while ‘Add’ might result in a more intense, almost overexposed look, depending on the intensity of the overlay.
To achieve a more muted, vintage look, I might use ‘Multiply’ or ‘Color Burn’, which darken the underlying image. ‘Multiply’ is excellent for darkening colors without significantly altering their hues, while ‘Color Burn’ will interact more strongly with the image’s colors, creating a more intense darkening effect. I might also use ‘Overlay’ to blend colors more harmoniously, allowing both the top and bottom layers to influence the final color output.
Experimentation is key. The impact of a blend mode depends heavily on the layer’s content and opacity. For example, a low opacity ‘Soft Light’ blend mode might subtly enhance contrast, while a high opacity setting will result in a much more significant change. I often adjust the opacity of the layer to fine-tune the effect, allowing for precise control over the overall impact of the blend mode.
Q 22. How do you use Affinity Photo’s ‘Curves’ tool for precise color and tone adjustments?
Affinity Photo’s Curves tool is a powerful non-destructive way to adjust the tonal range and color balance of your images with pinpoint accuracy. Think of it like a graph where the x-axis represents input levels (e.g., shadows, midtones, highlights) and the y-axis represents output levels. By adjusting the curve, you control how each input level is mapped to an output level.
For precise color adjustments, you can use the RGB, Red, Green, Blue, or individual color channel curves. For instance, to boost the blues in a landscape photo, I’d select the Blue channel curve and add a point in the midtones, then pull it upwards. This selectively brightens the blues without affecting other colors.
For tonal adjustments, working with the RGB curve is ideal. To brighten a dark image, I might raise the entire curve slightly. To increase contrast, I would create an ‘S’ shaped curve, darkening shadows and brightening highlights. The beauty lies in the non-destructive nature – I can always adjust the curve later or even create a copy of the adjustment layer for experimentation.
I often use Curves in combination with other adjustment layers like Levels and Brightness/Contrast for a holistic approach to image enhancement. It allows for refined control that other tools can’t match.
Q 23. Describe your experience using Affinity Photo’s ‘Clone’ and ‘Heal’ tools.
The Clone and Heal tools in Affinity Photo are essential for retouching and blemish removal. The Clone tool essentially copies pixels from one area to another, effectively replicating a texture or pattern to cover up imperfections. The Heal tool is more sophisticated; it intelligently blends the copied pixels with the surrounding area, creating a more seamless and natural result.
I frequently use the Clone tool to remove distracting elements from a background or to replicate repeating patterns. For example, cloning grass to remove a stray footprint. The Heal tool is excellent for removing blemishes on portraits. Its intelligent blending minimizes the ‘cloned’ look, resulting in a more natural repair.
Both tools benefit from using a soft-edged brush and adjusting the opacity and blending modes. Experimenting with the sample size is crucial – a larger sample area is best for large imperfections, while a smaller sample is suitable for fine details.
One tip for effective use is to zoom in to the area requiring correction for detailed work and to use a low opacity to gradually blend the sampled area to avoid overly harsh patches. This builds up the correction naturally and makes editing easier. I always use a non-destructive approach, ensuring all edits are on a separate layer.
Q 24. How familiar are you with working with RAW files in Affinity Photo?
I’m very familiar with working with RAW files in Affinity Photo. RAW files contain significantly more image data than JPEGs, providing much greater flexibility during post-processing. Affinity Photo’s RAW engine provides extensive controls over aspects like white balance, exposure, highlights, shadows, and more. This allows for detailed adjustments without sacrificing image quality.
Processing RAW files in Affinity Photo usually begins with opening the file and using the built-in adjustments to correct exposure, white balance, and other aspects. For this I tend to utilise the Develop Persona where the raw file parameters can be easily modified. Then I’ll move to the Photo Persona where I can do further refinements like sharpening and detail enhancing. The ability to non-destructively adjust these parameters is particularly useful as I can always go back and tweak the settings if needed.
I often leverage the histogram to guide my adjustments in RAW files. It helps ensure I’m not clipping highlights (losing detail in bright areas) or blocking shadows (losing detail in dark areas).
Q 25. What are your preferred shortcuts in Affinity Photo for increased efficiency?
To increase efficiency, I heavily rely on keyboard shortcuts in Affinity Photo. Some of my favorites include:
Cmd/Ctrl + Z(Undo): Essential for mistakes!Cmd/Ctrl + J(Duplicate Layer): Non-destructive editing relies heavily on duplicating layers.Cmd/Ctrl + T(Free Transform): Quick resizing and rotation.Cmd/Ctrl + [andCmd/Ctrl + ](Layer Order): Easily adjust layer stacking order.V(Move Tool): Select and move objects.B(Brush Tool): Painting or retouching.M(Rectangle Marquee Tool): Selecting areas quickly.
I also customize my workspace with frequently used tools for quick access. Remember, mastering shortcuts significantly speeds up your workflow.
Q 26. Describe your troubleshooting skills when facing unexpected issues or crashes in Affinity Photo.
Troubleshooting Affinity Photo issues involves a systematic approach. First, I try the simplest solutions: closing and restarting the program, checking for updates, and ensuring sufficient system resources. If the problem persists, I look at the specifics of the issue. Is it a specific file? A specific function? Is my system overloaded?
If a specific file is causing issues, I might try opening it in a new Affinity Photo project or even converting it to a different format. If it’s a function related issue, I’ll test it with other similar files.
For crashes, checking the Affinity Photo log files (usually located in the Application Support folder) can reveal clues about the cause. If the problem persists, I might seek help from the Affinity Photo forums or support channels – the community is usually very helpful in resolving unexpected issues.
Preventive measures also help; saving frequently, working on copies of files, and regularly clearing the cache and temporary files help maintain the health of the application.
Q 27. Explain your understanding of Affinity Photo’s layers panel and its various options.
The Layers panel is the heart of Affinity Photo’s non-destructive editing workflow. It allows you to organize your image into multiple layers, each with its own adjustments, effects, and opacity. This allows for flexibility and precision in editing without affecting other parts of the image. Each layer is essentially its own independent image. This allows for complex edits, masking and composition.
Key options within the Layers panel include:
- Layer Visibility: The eye icon toggles a layer on or off.
- Opacity: Controls the transparency of a layer.
- Blending Modes: Alters how a layer interacts with the layers beneath it.
- Layer Masks: Allow you to selectively hide or reveal parts of a layer.
- Adjustment Layers: Non-destructive adjustments such as Curves, Levels and Colour Balance.
- Layer Groups: Organize layers into folders for better management.
Understanding and mastering the Layers panel is fundamental to efficient and effective image editing in Affinity Photo. It enables complex compositions and intricate retouching with ease.
Q 28. How do you approach complex image editing tasks requiring multiple steps and techniques in Affinity Photo?
Tackling complex image editing tasks in Affinity Photo requires a structured approach. I break down the task into smaller, manageable steps. This typically involves:
- Planning: Clearly defining the desired outcome and identifying the necessary steps.
- Layer Organization: Creating layers for different elements of the image to ensure non-destructive editing. This also ensures layers are clearly labeled for better organisation.
- Non-Destructive Editing: Utilizing adjustment layers and masks to ensure flexibility and the ability to undo changes easily. I will also make liberal use of layer groups to organise the layers effectively.
- Progressive Refinement: Working iteratively, making small adjustments and evaluating the results at each step. Regular saving is crucial.
- Testing and Iteration: I regularly check the image’s progress against the original plan, adjusting the process as needed.
- Reference Images: Using reference images can help to achieve a particular style or effect.
This structured approach ensures I maintain a clear workflow, minimizing errors and maximizing efficiency. For instance, when compositing images, I create separate layers for each image element, adjusting their blend modes, opacity, and masking to achieve a natural blend. The planning phase is crucial to success.
Key Topics to Learn for Affinity Photo Interview
- Image Editing Fundamentals: Mastering selection tools (e.g., Lasso, Pen, Magic Wand), layer management, blending modes, and adjustment layers.
- Practical Application: Demonstrate proficiency in retouching images, correcting color imbalances, and enhancing image sharpness. Be ready to discuss specific workflows you’ve used.
- RAW Processing: Understand the advantages of working with RAW files and how to utilize Affinity Photo’s RAW processing capabilities for optimal image quality.
- Non-Destructive Editing: Explain the importance of non-destructive workflows and how to leverage Affinity Photo’s features to maintain image integrity.
- Advanced Techniques: Be prepared to discuss your experience with masking, using filters effectively, and creating custom brushes.
- File Formats & Exporting: Understand the nuances of various image file formats (JPEG, PNG, TIFF, etc.) and how to optimize images for different applications.
- Workflow Efficiency: Discuss strategies for streamlining your workflow in Affinity Photo to maximize productivity and minimize time spent on tasks.
- Problem-Solving: Be ready to discuss how you approach troubleshooting common image editing challenges and how you find solutions.
- Perspective Correction & Transformation Tools: Demonstrate understanding and practical application of these tools for image manipulation and correction.
- Text & Typography: Showcase your ability to work with text layers, apply styles, and create visually appealing typography within the software.
Next Steps
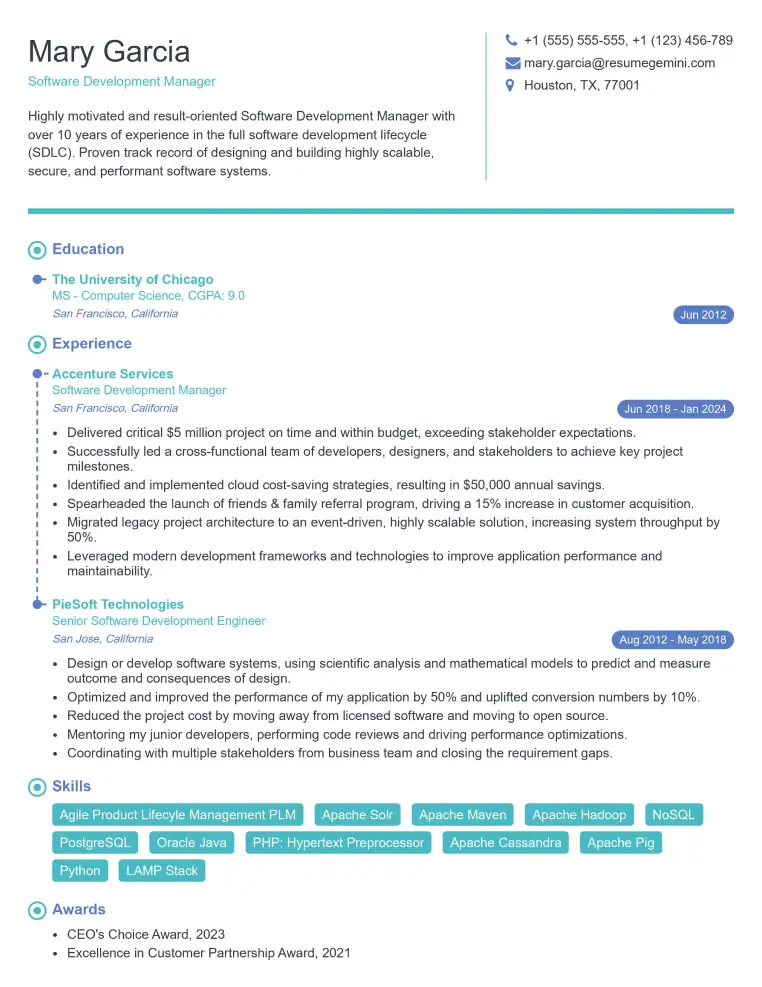
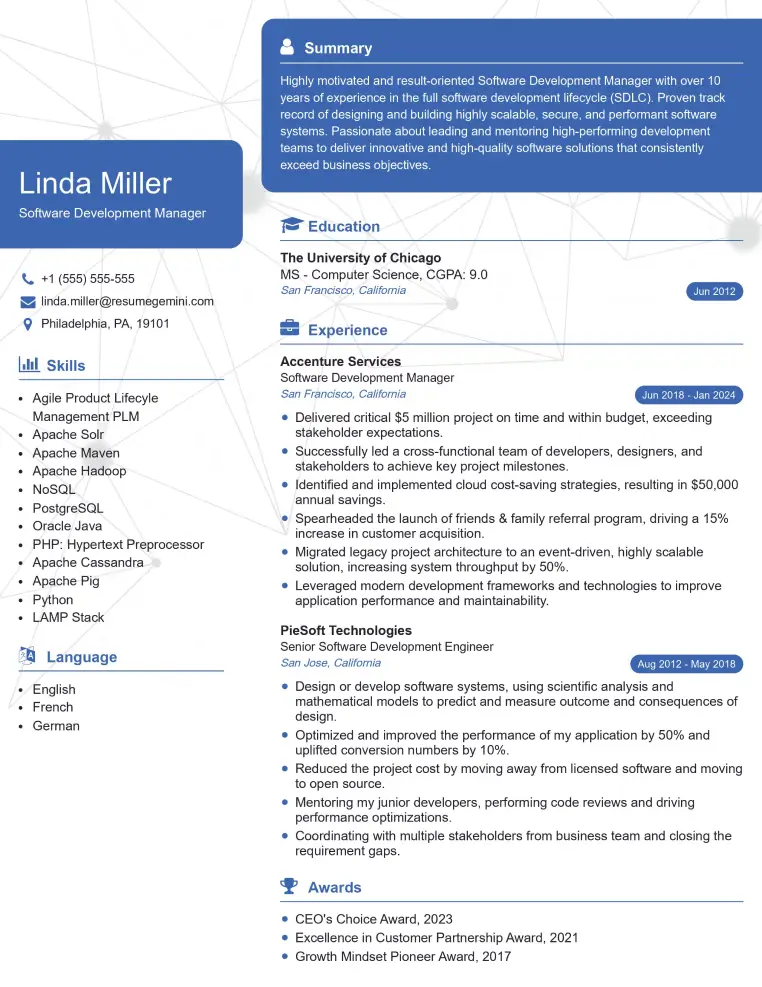
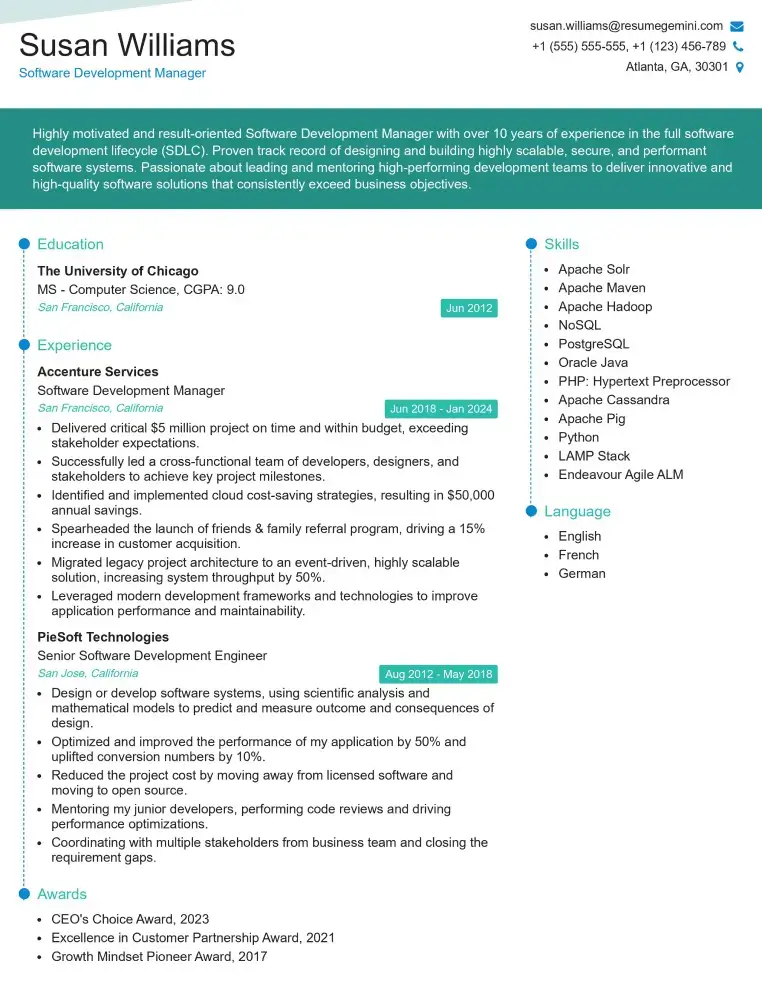
Mastering Affinity Photo significantly enhances your value to employers in design, photography, and related fields, opening doors to exciting career opportunities. To maximize your chances of landing your dream job, crafting a strong, ATS-friendly resume is crucial. ResumeGemini is a trusted resource that can help you build a professional resume tailored to highlight your Affinity Photo skills. Examples of resumes tailored to Affinity Photo positions are available to guide you. Take the next step towards a successful career – build your best resume with ResumeGemini.
Explore more articles
Users Rating of Our Blogs
Share Your Experience
We value your feedback! Please rate our content and share your thoughts (optional).
What Readers Say About Our Blog
Hi I am a troller at The aquatic interview center and I suddenly went so fast in Roblox and it was gone when I reset.
Hi,
Business owners spend hours every week worrying about their website—or avoiding it because it feels overwhelming.
We’d like to take that off your plate:
$69/month. Everything handled.
Our team will:
Design a custom website—or completely overhaul your current one
Take care of hosting as an option
Handle edits and improvements—up to 60 minutes of work included every month
No setup fees, no annual commitments. Just a site that makes a strong first impression.
Find out if it’s right for you:
https://websolutionsgenius.com/awardwinningwebsites
Hello,
we currently offer a complimentary backlink and URL indexing test for search engine optimization professionals.
You can get complimentary indexing credits to test how link discovery works in practice.
No credit card is required and there is no recurring fee.
You can find details here:
https://wikipedia-backlinks.com/indexing/
Regards
NICE RESPONSE TO Q & A
hi
The aim of this message is regarding an unclaimed deposit of a deceased nationale that bears the same name as you. You are not relate to him as there are millions of people answering the names across around the world. But i will use my position to influence the release of the deposit to you for our mutual benefit.
Respond for full details and how to claim the deposit. This is 100% risk free. Send hello to my email id: [email protected]
Luka Chachibaialuka
Hey interviewgemini.com, just wanted to follow up on my last email.
We just launched Call the Monster, an parenting app that lets you summon friendly ‘monsters’ kids actually listen to.
We’re also running a giveaway for everyone who downloads the app. Since it’s brand new, there aren’t many users yet, which means you’ve got a much better chance of winning some great prizes.
You can check it out here: https://bit.ly/callamonsterapp
Or follow us on Instagram: https://www.instagram.com/callamonsterapp
Thanks,
Ryan
CEO – Call the Monster App
Hey interviewgemini.com, I saw your website and love your approach.
I just want this to look like spam email, but want to share something important to you. We just launched Call the Monster, a parenting app that lets you summon friendly ‘monsters’ kids actually listen to.
Parents are loving it for calming chaos before bedtime. Thought you might want to try it: https://bit.ly/callamonsterapp or just follow our fun monster lore on Instagram: https://www.instagram.com/callamonsterapp
Thanks,
Ryan
CEO – Call A Monster APP
To the interviewgemini.com Owner.
Dear interviewgemini.com Webmaster!
Hi interviewgemini.com Webmaster!
Dear interviewgemini.com Webmaster!
excellent
Hello,
We found issues with your domain’s email setup that may be sending your messages to spam or blocking them completely. InboxShield Mini shows you how to fix it in minutes — no tech skills required.
Scan your domain now for details: https://inboxshield-mini.com/
— Adam @ InboxShield Mini
Reply STOP to unsubscribe
Hi, are you owner of interviewgemini.com? What if I told you I could help you find extra time in your schedule, reconnect with leads you didn’t even realize you missed, and bring in more “I want to work with you” conversations, without increasing your ad spend or hiring a full-time employee?
All with a flexible, budget-friendly service that could easily pay for itself. Sounds good?
Would it be nice to jump on a quick 10-minute call so I can show you exactly how we make this work?
Best,
Hapei
Marketing Director
Hey, I know you’re the owner of interviewgemini.com. I’ll be quick.
Fundraising for your business is tough and time-consuming. We make it easier by guaranteeing two private investor meetings each month, for six months. No demos, no pitch events – just direct introductions to active investors matched to your startup.
If youR17;re raising, this could help you build real momentum. Want me to send more info?
Hi, I represent an SEO company that specialises in getting you AI citations and higher rankings on Google. I’d like to offer you a 100% free SEO audit for your website. Would you be interested?
Hi, I represent an SEO company that specialises in getting you AI citations and higher rankings on Google. I’d like to offer you a 100% free SEO audit for your website. Would you be interested?
good
