Preparation is the key to success in any interview. In this post, we’ll explore crucial Contouring and Highlighting interview questions and equip you with strategies to craft impactful answers. Whether you’re a beginner or a pro, these tips will elevate your preparation.
Questions Asked in Contouring and Highlighting Interview
Q 1. Explain the principles of contouring and highlighting.
Contouring and highlighting are makeup techniques used to sculpt and enhance facial features by playing with light and shadow. Highlighting involves applying a lighter shade to areas you want to emphasize, making them appear more prominent and lifted. Contouring uses a darker shade to create shadows, minimizing or receding certain areas, thus defining the bone structure. Think of it like a painter using light and shadow to create dimension on a canvas – your face is the canvas!
The principle is based on how light interacts with different shades. Lighter shades reflect light, drawing attention to those areas, while darker shades absorb light, making them appear less prominent. This manipulation of light and shadow creates the illusion of a more defined and balanced facial structure.
Q 2. What are the different types of contouring products available?
Contouring and highlighting products come in various forms, each with its own unique application and finish:
- Cream Contour and Highlight: These offer buildable coverage and a more natural, dewy finish. They’re excellent for dry skin and blend seamlessly.
- Powder Contour and Highlight: These provide a more matte finish and are great for setting cream products or for oily skin. They offer more precise application.
- Stick Contour and Highlight: These are convenient for on-the-go application and offer a blend of cream and powder textures, often with a blendable finish.
- Liquid Contour and Highlight: These are lightweight and blend effortlessly, often providing a luminous finish, ideal for achieving a natural, no-makeup look.
- Contour and Highlight Palettes: These palettes offer a selection of shades catering to different skin tones and preferences, offering convenient all-in-one solutions.
Q 3. Describe the techniques for applying contour and highlight for different face shapes (oval, round, square, heart).
Contouring and highlighting techniques vary depending on the face shape. The goal is to balance proportions and create the illusion of a more oval-shaped face, generally considered the ideal.
- Oval Face: This shape requires minimal contouring. Focus on highlighting the center of the forehead, bridge of the nose, and chin.
- Round Face: Contour the temples, sides of the forehead, and jawline to create the illusion of a longer face. Highlight the center of the forehead, bridge of the nose, and chin to elongate.
- Square Face: Contour the jawline to soften the harsh angles. Highlight the center of the forehead, bridge of the nose, and chin to emphasize the center of the face.
- Heart Face: Contour the forehead temples and jawline to balance the wider forehead. Highlight the center of the chin and bridge of the nose to emphasize those areas.
Remember to always blend seamlessly to avoid harsh lines!
Q 4. How do you choose the right shades of contour and highlight for various skin tones?
Choosing the right contour and highlight shades is crucial for a natural look. The key is to select shades that complement your skin tone rather than clash with it.
- Fair Skin: Opt for light to medium beige or taupe for contour and a peachy, champagne, or light pink for highlight.
- Medium Skin: Choose a medium brown or bronze for contour and a golden or bronze-toned highlight.
- Deep Skin: Use a deep brown or chocolate shade for contour and a rich gold or bronze for highlight.
Always test the shades on your jawline in natural light to ensure they blend seamlessly with your complexion. Avoid shades that are too ashy or orange.
Q 5. What are the key differences between cream and powder contour and highlight products?
Cream and powder contour and highlight products differ primarily in their texture, finish, and application methods.
- Cream Contour & Highlight: Offers a dewy, natural finish, best for dry skin. It’s buildable and blends easily, but requires setting with powder for longevity.
- Powder Contour & Highlight: Provides a matte finish, ideal for oily skin. It’s often more precise and long-lasting but can appear cakey if not blended well.
The choice depends on your skin type and desired look. Cream is great for a natural, everyday look while powder is suitable for a more defined, polished finish.
Q 6. How do you blend contour and highlight seamlessly for a natural look?
Seamless blending is essential for a natural contour and highlight. Use a suitable blending tool like a makeup sponge or brush, depending on your product type. Start with small amounts of product and build gradually. Use gentle, circular or back-and-forth motions to diffuse the edges and avoid harsh lines.
For cream products, blend immediately before they set. For powder products, use a large, fluffy brush for initial blending and a smaller brush for precise areas. The goal is to create a gradual transition between the contour, highlight, and your natural skin tone. Buffing is key to achieving a flawless finish.
Q 7. Explain the importance of proper lighting when applying contour and highlight.
Proper lighting is crucial for accurate application. Natural, soft light is best for seeing your skin’s true tone and preventing over-application or uneven blending. Avoid harsh overhead lighting which can distort your perception of shades and lead to a heavy-handed application. Applying makeup near a window, ideally with soft diffused daylight, allows for the most accurate and natural-looking results. Artificial lighting can be used but should be soft and balanced.
Q 8. Describe your preferred tools and techniques for applying contour and highlight.
My preferred tools and techniques for contouring and highlighting are centered around achieving a natural, sculpted look. I start by selecting products with a creamy texture, offering easy blendability. For contour, I favor a cream contour stick or a sculpting palette with shades that are only a few shades darker than the client’s skin tone. This avoids a harsh, unnatural look. I prefer using a densely packed brush for cream products and a fluffy brush for powder contour if needed, to seamlessly blend the product into the skin. For highlighting, I often reach for a liquid or cream highlighter for a luminous effect. This provides a natural glow, especially when paired with cream contour. Again, blending is key, using a damp sponge or a fluffy brush for a natural, effortless result. I typically begin by applying contour to the hollows of the cheeks, along the hairline, and jawline. Highlight goes onto the high points of the face—cheekbones, bridge of the nose, cupid’s bow, and center of the forehead. Always blend, blend, blend! I might set the cream products with a light dusting of powder to ensure longevity, but only if needed.
- Tools: Cream contour stick, angled brush, fluffy blending brush, damp sponge, powder contour, highlighting palette, fan brush
- Techniques: Applying contour in a downwards motion to follow the natural shadows of the face; blending in circular motions for cream products; using a stippling motion for powder products; focusing on seamless integration to avoid harsh lines.
Q 9. How do you address common contouring and highlighting mistakes?
Addressing common contouring and highlighting mistakes involves understanding the root cause. Often, it boils down to product selection, application technique, and blending. For example, using a contour that’s too dark or orange can create a muddy appearance. Similarly, using too much highlight can make the skin look greasy or unnatural. To fix this, I’d assess what is creating the issue and adjust. If the contour is too harsh, I carefully blend with a clean brush or damp sponge. If there’s too much highlight, I might blot excess product with a tissue and then blend gently. If the contour color is wrong, I might use a slightly lighter shade or even layer a bit of foundation over it, then reapply the contour. In many cases, a bit of setting powder can help diffuse harsh lines and prevent the highlight from being too intense.
- Too much product: Blend, blend, blend! Use smaller amounts and build up gradually.
- Wrong color: Select contour shades a few shades darker than your skin tone and highlights that complement your skin’s undertones.
- Poor blending: Use appropriate brushes for each product and blend thoroughly in circular motions.
Q 10. What are the best practices for setting contour and highlight to ensure longevity?
Setting contour and highlight is crucial for longevity. After applying cream contour and highlight, I gently set them with a translucent setting powder, focusing on the areas where the products were applied most heavily. This prevents creasing and ensures the makeup lasts throughout the day. I prefer a light hand to avoid a cakey look. For very oily skin, a setting spray can offer extra staying power. Also, the choice of products matters: long-wearing formulas with higher pigment concentration will naturally last longer. For extra durability, I sometimes employ the ‘baking’ technique, applying a generous amount of powder to the areas where I have cream products, waiting for a few minutes, then brushing away the excess. This helps to set the makeup more effectively, but should be used with care to avoid a mask-like appearance.
- Setting powder: A translucent powder is ideal to avoid altering the contour’s color.
- Setting spray: Adds additional hold and prevents creasing.
- Product choice: Opt for long-wearing formulas designed for lasting power.
Q 11. How do you tailor your contouring and highlighting techniques to different makeup looks (e.g., natural, dramatic, smoky eye)?
Tailoring contour and highlight techniques to different makeup looks requires adjusting intensity and placement. For a natural look, I use subtle contour and a barely-there highlight, focusing on creating dimension without being noticeable. The contour shades are minimal, and the blending is extensive. For a dramatic look, I might opt for a more intense contour and a strong, noticeable highlight—placing the contour and highlight in areas that would normally be naturally highlighted, just amplifying that. For a smoky eye, the focus might shift more towards the eyes, so the contour could be a touch softer and the highlight less emphasized unless the smoky eye is very dramatic.
- Natural: Subtle contour and minimal highlight, emphasizing seamless blending.
- Dramatic: Intense contour and highlight, strong placement, defined lines.
- Smoky eye: Contour can be slightly softer depending on smoky eye intensity; highlight may be less intense unless the overall look is intense.
Q 12. What are some common mistakes beginners make when applying contour and highlight?
Beginners often make mistakes like using contour shades that are too dark or orange, leading to an unnatural, harsh look. Another common mistake is using too much product, resulting in a cakey or muddy appearance. Poor blending is a frequent issue, creating visible lines instead of a seamless transition. Many beginners forget the importance of blending beyond the initial application; it’s essential to check after a few minutes for settling, and then re-blend gently. Beginners might also neglect to consider their skin’s undertones when choosing contour and highlight shades, leading to an unflattering result.
- Too dark contour: Choose shades only a few shades darker than your skin tone.
- Too much product: Start with small amounts and build gradually.
- Poor blending: Practice smooth transitions between contour and highlight.
- Ignoring undertones: Match your products to your skin’s undertones for a natural finish.
Q 13. How do you adapt your contouring and highlighting techniques for different ages and skin types?
Adapting techniques for different ages and skin types is crucial for achieving a flattering result. For mature skin, I focus on enhancing natural features with softer contour and highlighting to avoid emphasizing wrinkles. I avoid harsh lines and use cream products that provide hydration and radiance without settling into lines. For younger skin, the contouring can be bolder and more defined. Oily skin benefits from powder contour and highlight, ensuring better longevity. Dry skin thrives with cream-based products that add moisture and prevent the makeup from clinging to dry patches. I might use a hydrating primer as a base to ensure proper product adherence and overall improved look. It’s critical to adjust the techniques to the needs of each individual skin type and condition, always keeping in mind that the goal is to enhance natural beauty.
- Mature skin: Softer contour and highlight, emphasis on blending.
- Younger skin: Bolder contour and highlight, more defined lines.
- Oily skin: Powder products for better staying power.
- Dry skin: Cream-based products for hydration and to prevent clinging.
Q 14. Describe your experience with using different brands of contour and highlight products.
I have extensive experience working with various brands of contour and highlight products. My go-to’s often depend on a client’s preferences and budget. Some of the brands I consistently recommend are known for their blendability and pigmentation. However, what works exceptionally well for one client’s skin type and undertones may not work for another. For example, I find cream products from one brand perform better on dry skin than another brand’s powder contour. I always prioritize choosing products that are high quality and well-suited to the individual client’s needs, focusing on creating a flawless and natural finish rather than promoting a specific brand.
- Focus on quality and blendability.
- Consider skin type and undertones when selecting products.
- Prioritize client preference.
Q 15. How do you maintain hygiene and sanitation when applying makeup, specifically contour and highlight products?
Maintaining hygiene is paramount in makeup application. Before I begin any contouring or highlighting, I thoroughly wash and sanitize my hands. I use disposable sponges and brushes whenever possible, or I meticulously clean and disinfect reusable tools with a brush cleaner specifically designed for makeup brushes after each use. Product contamination is a serious concern, so I always use clean spatulas to transfer product from its container to my palette to avoid directly dipping my brushes into the product itself. This prevents cross-contamination between clients and ensures the longevity of the products. For powder products, I use separate brushes, ensuring I never double-dip. Finally, I ensure my workstation is clean and organized, using disposable wipes to regularly clean any surfaces that might come into contact with products.
Career Expert Tips:
- Ace those interviews! Prepare effectively by reviewing the Top 50 Most Common Interview Questions on ResumeGemini.
- Navigate your job search with confidence! Explore a wide range of Career Tips on ResumeGemini. Learn about common challenges and recommendations to overcome them.
- Craft the perfect resume! Master the Art of Resume Writing with ResumeGemini’s guide. Showcase your unique qualifications and achievements effectively.
- Don’t miss out on holiday savings! Build your dream resume with ResumeGemini’s ATS optimized templates.
Q 16. What is your understanding of color theory and how it applies to contouring and highlighting?
Color theory is the foundation of effective contouring and highlighting. It’s all about understanding how colors interact to create depth, dimension, and the illusion of shape. Contouring uses shades darker than the client’s skin tone to recede areas, making them appear smaller or further back. These are typically cool-toned browns or greys, chosen to complement the client’s undertones. Highlighting, on the other hand, uses shades lighter than the client’s skin tone to bring areas forward, making them appear larger or more prominent. These are often warm-toned creams or golds, again chosen to complement their undertones. Understanding the color wheel is critical; for example, using a shade opposite on the color wheel from a client’s redness will help to neutralize that redness before applying contour and highlight. A good understanding of undertones – cool, warm, or neutral – is crucial for selecting the appropriate contour and highlight shades that blend seamlessly with the client’s skin tone, preventing a muddy or unnatural look. I often use a color mixing technique to make the most suitable shade.
Q 17. Explain your approach to client consultation regarding contour and highlight.
My client consultation is a collaborative process. I begin by asking about their desired outcome: Are they looking for a natural, everyday look, or something more dramatic for a special occasion? I assess their facial features, identifying areas that can be enhanced with contouring and highlighting to create a balanced and harmonious look. I consider their bone structure, identifying the high points of their cheekbones, the hollows of their temples, and the line of their jaw. I take into account their skin tone, undertones, and preferences for makeup styles. I present different options, explaining how contour and highlight placement can achieve different effects – for example, how subtly contouring the jawline can create a more defined look while highlighting the cupid’s bow of the lips can create a fuller lip illusion. We discuss their lifestyle and the longevity they require from their makeup. I always obtain the client’s explicit consent before proceeding to the application.
Q 18. How do you ensure client satisfaction with your contouring and highlighting work?
Ensuring client satisfaction is my top priority. Throughout the application, I maintain open communication, checking in with the client to ensure they’re happy with the progress. I explain the process as I go, answering any questions they may have. Once the application is complete, I provide them with a mirror and allow ample time for them to examine the result in different lighting conditions. I show them application techniques for touch-ups and also recommend products they can use to maintain the look. I encourage them to express any concerns or requests for adjustments at this stage. I also gather feedback to continuously improve my services and skills. A follow-up message after the service also helps to address any lingering concerns or give additional tips.
Q 19. Describe a situation where you had to troubleshoot a contouring or highlighting challenge.
I once had a client with very prominent, naturally defined cheekbones. She wanted a more sculpted look, but applying contour in the typical way simply made her cheekbones seem even more exaggerated and harsh. The solution involved using a highlighting technique to soften the harshness. Instead of deeply contouring the hollows of her cheeks, I used a light, creamy highlighter to add a gentle glow to the area, blurring the harsh lines of her natural cheekbones. I then strategically applied a light layer of contour along the perimeter of her face to maintain some definition without creating unnecessary shadow. By shifting focus from the contour to the highlighter, I managed to create a more natural, subtle, and balanced look. This instance taught me the importance of adapting techniques to individual facial features rather than rigidly following a template.
Q 20. What are some creative ways to use contour and highlight to enhance facial features?
Contour and highlight can be used creatively to achieve a variety of looks beyond basic face shaping. For example, a subtle contour along the sides of the nose can make it appear slimmer, while highlighting the bridge can add definition. Highlighting the inner corners of the eyes can make them look brighter and wider. A strategic application of highlight on the brow bone can lift the eyebrows and open up the eyes. Contouring along the hairline can create the illusion of a smaller forehead. On top of this, we can experiment with different color contouring such as purple to neutralize yellow tones on the face. And also by highlighting parts of the face with glittery highlighters, an eye catching look can be created. The possibilities are endless, and it’s about understanding the underlying principles of light and shadow and creatively adapting techniques to each individual client.
Q 21. How do you stay up-to-date with the latest trends in contouring and highlighting?
Staying up-to-date in this dynamic field requires continuous learning. I regularly follow industry influencers and makeup artists on social media platforms. I attend workshops and masterclasses to learn new techniques and product applications. I subscribe to professional makeup magazines and read articles in beauty publications to stay abreast of the latest trends and techniques. Experimenting with new products and techniques is crucial, and I always prioritize continuing education to ensure that my services remain current and in-line with the latest industry standards.
Q 22. What are the potential health and safety concerns related to makeup application, especially contouring and highlighting?
Contouring and highlighting, while enhancing beauty, do present some health and safety concerns. The primary risks stem from using products containing potentially irritating or allergenic ingredients. For example, some individuals may experience contact dermatitis from fragrances, preservatives, or certain pigments in makeup. Another concern is the hygiene practices surrounding makeup application. Sharing brushes or using contaminated products can lead to bacterial or fungal infections. Improper removal of makeup can clog pores, resulting in acne breakouts. Finally, overuse of certain products, especially those with harsh chemicals, can accelerate premature aging.
- Allergic Reactions: Always patch test new products on a small area of skin before full application to check for any reactions.
- Infections: Regularly clean makeup brushes and sponges with a mild cleanser. Avoid sharing makeup with others.
- Irritation: Choose products formulated for sensitive skin and avoid products with known irritants like strong fragrances.
- Premature Aging: Use products with antioxidants and SPF to protect the skin from environmental damage.
Q 23. How do you ensure proper product application to avoid skin irritation or allergic reactions?
Preventing skin irritation and allergic reactions begins with thorough client consultation. I always inquire about any known allergies or sensitivities before starting application. I prioritize products with minimal irritants and hypoallergenic formulations. A patch test, as mentioned earlier, is always recommended for new products or clients with sensitive skin. The application process itself must be gentle and precise, avoiding harsh rubbing or pulling. Proper cleansing of the skin before makeup application is crucial to remove dirt and oil that may exacerbate irritation. Finally, a thorough makeup removal routine at the end of the day is non-negotiable, preventing pore clogging and subsequent breakouts.
I educate my clients on proper product care and storage. This ensures the products are free from contamination and last longer.
Q 24. How do you handle difficult clients or those with specific requests regarding contouring and highlighting?
Handling difficult clients or those with specific requests requires patience, professionalism, and effective communication. I begin by actively listening to their concerns and requests, clarifying any misunderstandings. For example, a client might request a very dramatic contour that doesn’t suit their face shape. In such cases, I gently explain the effect of the requested look and suggest alternatives that achieve a similar result while complementing their features. I believe in collaboration. I present various options and explain the reasoning behind each suggestion, empowering the client to make informed choices. If a client insists on a look I believe will be unflattering, I’ll politely explain my reservations and offer alternative suggestions. My goal is to create a look that enhances their features while aligning with their vision.
Q 25. Explain your understanding of the role of skincare in makeup application, especially when using contour and highlight products.
Skincare plays a vital role in achieving flawless makeup application. A well-hydrated, healthy canvas allows for seamless blending and prevents makeup from settling into fine lines or dry patches. Before starting any makeup application, I ensure the client’s skin is cleansed, toned, and moisturized. This primes the skin for makeup application, allowing the contour and highlight products to blend effortlessly and look natural. A good skincare routine that addresses the client’s specific skin concerns (e.g., dryness, oiliness, acne) creates a better foundation for long-lasting and beautiful makeup.
For example, a client with dry skin will benefit from using a hydrating primer before contour and highlight. Similarly, a client with oily skin might need a mattifying primer to prevent the products from melting or looking heavy.
Q 26. Describe your experience working with different lighting conditions (natural, studio, etc.) and how it impacts your contouring and highlighting application.
Lighting significantly influences contouring and highlighting. Natural light provides a soft, diffused illumination ideal for achieving a natural and subtle look. However, the intensity and direction of natural light vary throughout the day. In contrast, studio lighting is highly controllable, allowing for precise placement of light and shadow. This is great for creating more dramatic or defined looks, but can be less forgiving if not carefully adjusted. I adapt my technique based on the available lighting. In natural light, I use lighter, more sheer products and focus on blending for a softer finish. Under studio lights, I might employ bolder products and use more precise application techniques to create defined shadows and highlights that translate well on camera or under the more intense light.
Q 27. How would you explain the concept of contouring and highlighting to a client who has never heard of it before?
I explain contouring and highlighting using a simple analogy: imagine sculpting a face with light and shadow. Contouring uses darker shades to create the illusion of depth and shadow, minimizing certain features. Highlighting uses lighter shades to accentuate and bring forward other features. Think of it like a painter adding shadows and highlights to a portrait to give it dimension. We use strategically placed darker shades along the hairline, under cheekbones, and along the jawline to create shadows that visually slim or define these areas. Lighter shades are placed on high points of the face, like the cheekbones, brow bone, and bridge of the nose, to add brightness and lift.
I show them before-and-after photos or even demonstrate the technique on a model to illustrate the results effectively.
Q 28. What are your salary expectations?
My salary expectations are commensurate with my experience and expertise in the field of makeup artistry, specifically contouring and highlighting. I am confident in my ability to deliver high-quality services and contribute significantly to any organization. I am open to discussing a competitive salary range based on the specific details of the role and benefits package.
Key Topics to Learn for Your Contouring and Highlighting Interview
- Understanding Face Shapes and Features: Analyze different face shapes and understand how contouring and highlighting techniques adapt to enhance individual features. Consider the impact of bone structure and lighting.
- Product Selection and Application: Discuss the various types of contouring and highlighting products (creams, powders, sticks) and their suitability for different skin types and desired effects. Explain proper blending techniques for a seamless finish.
- Color Theory and Shade Selection: Explain the principles of color theory as they relate to contouring and highlighting. Discuss how to choose the right shades to create depth, dimension, and a natural-looking enhancement.
- Highlighting Techniques for Different Features: Detail specific techniques for highlighting features like cheekbones, brow bones, and the cupid’s bow. Explain how to create a natural lift and glow.
- Contouring Techniques for Different Face Shapes: Explain how to strategically contour to minimize or enhance specific facial features based on the individual’s face shape (e.g., round, square, oval).
- Advanced Techniques (Optional): Discuss more advanced techniques such as strobing, draping, or using different tools (brushes, sponges). This shows a deeper understanding of the craft.
- Troubleshooting Common Issues: Be prepared to discuss common problems encountered during contouring and highlighting (e.g., muddy appearance, harsh lines) and explain how to avoid or correct them.
- Hygiene and Sanitation Practices: Demonstrate your awareness of proper hygiene practices for applying makeup, including tool sanitation and preventing cross-contamination.
Next Steps: Unlock Your Career Potential
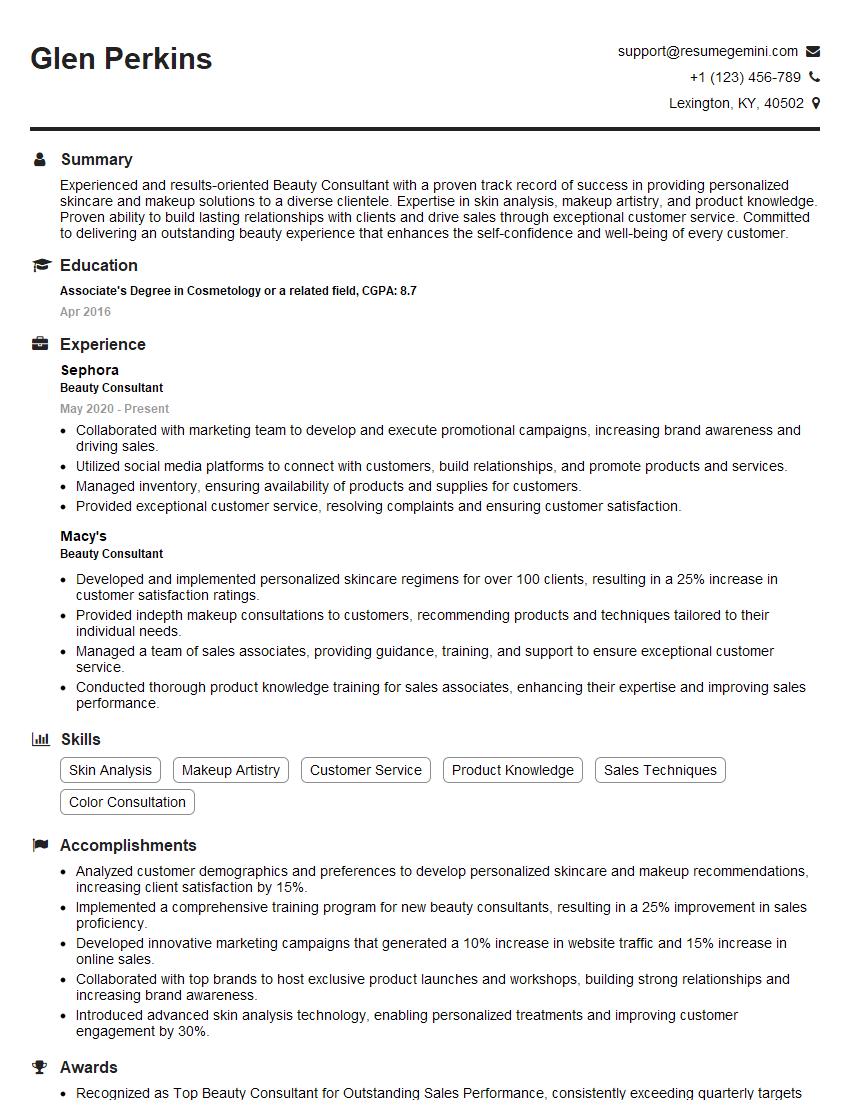
Mastering contouring and highlighting is a valuable skill that opens doors to exciting opportunities in the beauty industry. To maximize your job prospects, crafting a strong, ATS-friendly resume is crucial. This ensures your application gets noticed by recruiters. ResumeGemini is a trusted resource to help you build a professional and impactful resume that highlights your skills and experience effectively. Take advantage of the examples of resumes tailored to Contouring and Highlighting professionals available to refine your application and increase your chances of landing your dream job. Make your skills shine!
Explore more articles
Users Rating of Our Blogs
Share Your Experience
We value your feedback! Please rate our content and share your thoughts (optional).
What Readers Say About Our Blog
Hello,
We found issues with your domain’s email setup that may be sending your messages to spam or blocking them completely. InboxShield Mini shows you how to fix it in minutes — no tech skills required.
Scan your domain now for details: https://inboxshield-mini.com/
— Adam @ InboxShield Mini
Reply STOP to unsubscribe
Hi, are you owner of interviewgemini.com? What if I told you I could help you find extra time in your schedule, reconnect with leads you didn’t even realize you missed, and bring in more “I want to work with you” conversations, without increasing your ad spend or hiring a full-time employee?
All with a flexible, budget-friendly service that could easily pay for itself. Sounds good?
Would it be nice to jump on a quick 10-minute call so I can show you exactly how we make this work?
Best,
Hapei
Marketing Director
Hey, I know you’re the owner of interviewgemini.com. I’ll be quick.
Fundraising for your business is tough and time-consuming. We make it easier by guaranteeing two private investor meetings each month, for six months. No demos, no pitch events – just direct introductions to active investors matched to your startup.
If youR17;re raising, this could help you build real momentum. Want me to send more info?
Hi, I represent an SEO company that specialises in getting you AI citations and higher rankings on Google. I’d like to offer you a 100% free SEO audit for your website. Would you be interested?
Hi, I represent an SEO company that specialises in getting you AI citations and higher rankings on Google. I’d like to offer you a 100% free SEO audit for your website. Would you be interested?
good
