Cracking a skill-specific interview, like one for Defect Inspection and Characterization, requires understanding the nuances of the role. In this blog, we present the questions you’re most likely to encounter, along with insights into how to answer them effectively. Let’s ensure you’re ready to make a strong impression.
Questions Asked in Defect Inspection and Characterization Interview
Q 1. Explain the difference between destructive and non-destructive testing methods.
The core difference between destructive and non-destructive testing (NDT) lies in whether the testing process damages the material being inspected. Destructive testing involves techniques that permanently alter or destroy the sample to reveal its internal structure and properties. Non-destructive testing, on the other hand, examines the material without causing any damage, allowing for the sample to be used after testing.
- Destructive Testing: Examples include tensile testing (measuring a material’s strength by pulling it until it breaks), impact testing (assessing a material’s resistance to sudden impacts), and hardness testing (measuring a material’s resistance to indentation).
- Non-destructive Testing: Examples include ultrasonic testing (using sound waves to detect internal flaws), radiographic testing (using X-rays or gamma rays to create images of internal structures), and visual inspection (a simple yet effective method for detecting surface defects).
Choosing between destructive and non-destructive methods depends heavily on the application. If the material’s integrity is crucial and only a few samples are available, NDT methods are preferred. If the material can be sacrificed for complete characterization, destructive testing provides more detailed information.
Q 2. Describe your experience with various microscopy techniques (SEM, TEM, optical).
My experience encompasses a wide range of microscopy techniques, each offering unique insights into material defects. Optical microscopy is my go-to for initial assessments, providing a broad overview of surface features and larger defects at magnifications up to 1000x. Its ease of use and relatively low cost make it invaluable for quick assessments.
For higher resolution and detailed internal structure analysis, I frequently utilize Scanning Electron Microscopy (SEM). SEM allows for imaging surfaces with nanometer-scale resolution, enabling precise characterization of defect morphology, topography, and elemental composition using energy-dispersive X-ray spectroscopy (EDS). I’ve used this extensively to identify crack propagation patterns, analyze inclusions in alloys, and characterize surface coatings.
Transmission Electron Microscopy (TEM) provides the highest resolution of all three. It allows analysis of the internal crystal structure, dislocations, grain boundaries, and other fine details at atomic levels, crucial for understanding the root cause of many defects. I’ve employed TEM to investigate the formation mechanisms of nano-scale precipitates and study the impact of processing parameters on grain structure.
For example, in a recent project involving the failure analysis of a microelectronic component, optical microscopy initially revealed a crack. Subsequent SEM analysis provided detailed information on the crack path and surface roughness, while TEM analysis revealed the presence of microstructural defects that initiated the crack propagation.
Q 3. How do you identify and classify different types of defects?
Defect identification and classification involve a systematic approach combining visual inspection, microscopy, and other analytical techniques. Defects are typically classified based on their nature, geometry, and origin.
- Nature: This might include voids (empty spaces), inclusions (foreign materials embedded within the base material), cracks (fractures), porosity (a network of interconnected voids), or segregations (non-uniform distribution of elements).
- Geometry: This describes the shape and size of the defect; for instance, a crack might be described as planar, branched, or dendritic. Inclusions can be spherical, elongated, or irregular in shape.
- Origin: Understanding the root cause is crucial for implementing corrective actions. Defects can originate from processing flaws (e.g., incomplete mixing of constituents, improper heat treatment), material imperfections (e.g., impurities, non-uniform grain size), or external factors (e.g., corrosion, mechanical stress).
A detailed classification scheme might use a combination of these aspects. For instance, a defect might be classified as a ‘spherical, micron-sized oxide inclusion originating from inadequate purification of the raw material’. This detailed description provides valuable insights into the defect’s characteristics and origin.
Q 4. What are the common causes of material defects?
Material defects stem from a variety of sources, often intertwined and interacting.
- Processing Defects: These arise during manufacturing. Examples include:
- Inclusions: Foreign particles trapped during processing.
- Porosity: Voids formed due to gas entrapment or incomplete consolidation.
- Segregation: Uneven distribution of alloying elements.
- Cold shuts: Imperfect fusion of molten metal during casting.
- Material Defects: These are inherent to the material itself:
- Crystal defects: Dislocations, vacancies, grain boundaries.
- Impurities: Unwanted elements present in the material.
- Microcracks: Small internal fractures from stress concentrations.
- Environmental Factors: External conditions can cause defects:
- Corrosion: Chemical degradation of the material’s surface.
- Fatigue: Crack initiation and propagation due to cyclic loading.
- Wear: Material loss due to friction.
Understanding these common causes is essential for developing strategies to prevent defect formation during material processing and service life.
Q 5. Explain your experience with statistical process control (SPC).
Statistical Process Control (SPC) is a crucial tool in preventing defects. It involves using statistical methods to monitor and control manufacturing processes, aiming to reduce variability and improve product quality. My experience includes designing and implementing control charts (e.g., X-bar and R charts, p-charts, c-charts) to track key process parameters and identify deviations from acceptable limits.
I’ve used SPC to monitor parameters such as surface roughness, dimensional tolerances, and defect density in various manufacturing processes. By regularly collecting and analyzing data, we can identify trends and patterns that indicate potential problems before they lead to significant defects. Control charts provide a clear visual representation of process stability and help to pinpoint sources of variation. For example, an out-of-control point on a control chart might indicate a need for immediate corrective action, such as recalibrating equipment or adjusting process parameters.
Beyond control charts, I’ve used capability analysis to determine the ability of a process to meet specified requirements and designed experiments (DOE) to optimize process parameters and minimize defect rates. This data-driven approach is key to ensuring consistent and high-quality product output.
Q 6. How do you interpret and report your findings from defect analysis?
Interpreting and reporting findings from defect analysis requires a clear and concise approach. My reports typically follow a structured format, including:
- Introduction: Background information on the material, testing objectives, and methodology.
- Methods: Detailed description of the techniques used (e.g., microscopy, NDT methods, chemical analysis).
- Results: Presentation of findings, including images, graphs, and quantitative data (e.g., defect size, density, distribution).
- Discussion: Interpretation of the results, discussion of potential causes of defects, and comparison with industry standards.
- Conclusions: Summary of key findings and recommendations for process improvement or corrective actions.
- Appendix (Optional): Raw data, calibration certificates, and other supporting documentation.
Visual aids such as micrographs, cross-sections, and 3D reconstructions are essential to effectively communicate the nature and location of the defects. I always ensure that the report is clear, objective, and tailored to the intended audience (e.g., engineers, managers, clients). The ultimate goal is to provide actionable information that can lead to improved product quality and prevent future failures.
Q 7. Describe your experience using different non-destructive testing methods (e.g., ultrasonic testing, radiography).
My experience with non-destructive testing methods is extensive, encompassing ultrasonic testing (UT), radiographic testing (RT), and visual inspection. Each technique offers unique capabilities and is chosen depending on the material, type of defect being sought, and accessibility.
Ultrasonic Testing (UT) employs high-frequency sound waves to detect internal flaws. I’ve used this extensively to detect cracks, voids, and inclusions in metals and composites. The technique relies on the reflection of sound waves from discontinuities; the time of flight of these reflections provides information on the location and size of the flaws. Data is often presented as an A-scan (amplitude vs. time) or C-scan (two-dimensional representation of the flaws).
Radiographic Testing (RT) utilizes X-rays or gamma rays to create images of the internal structure. This is ideal for detecting volumetric defects such as porosity, inclusions, and cracks. RT provides a permanent record and is often used for inspecting welds, castings, and other components where internal integrity is critical. I’ve been involved in interpreting radiographs and identifying defect types and sizes based on their appearance on the film or digital image.
Visual inspection, although seemingly simple, plays a crucial role in defect identification. It’s the first step in any inspection process and can reveal surface defects such as scratches, cracks, corrosion, and dimensional variations. I often use specialized tools such as borescopes and magnifying glasses to assist with visual inspection, particularly in hard-to-reach areas.
The selection of the appropriate NDT method depends on factors such as the material’s properties, the size and type of defect expected, and the accessibility of the component.
Q 8. What software or tools are you proficient in for defect analysis and characterization?
My proficiency in defect analysis and characterization extends to several software and tools. For image analysis and 3D visualization, I’m highly skilled in using software like ImageJ, Avizo, and VGStudio MAX. These allow me to quantitatively analyze microstructures and identify defects through various techniques such as particle size analysis, porosity measurement, and 3D reconstruction from tomography data. I also have extensive experience with data analysis and statistical software packages like MATLAB and Python (with libraries like SciPy and Pandas) for handling large datasets, performing statistical analysis, and creating meaningful visualizations of defect data. Finally, I’m proficient in using specialized software for specific material characterization techniques, which I’ll elaborate on in the next answer.
For example, in a recent project involving the analysis of a composite material, I used ImageJ to quantify the distribution of voids within the material. By employing automated image processing techniques, I was able to quickly assess the overall porosity and identify regions with particularly high concentrations of defects. This information was then crucial for determining the material’s overall mechanical performance.
Q 9. How do you determine the root cause of a defect?
Determining the root cause of a defect is a systematic process involving several steps. It’s like detective work, meticulously tracing back from the effect (the defect) to the cause. It begins with a thorough description of the defect, its location, and associated features. I typically use a combination of techniques, including:
- Visual Inspection and Documentation: Careful observation of the defect, including its size, shape, location, and any surrounding features.
- Material Characterization: Employing various techniques (discussed in the next answer) like XRD, FTIR, SEM, or mechanical testing to understand the material’s properties at and around the defect site.
- Process Analysis: Examining the manufacturing or processing steps involved to identify potential points of failure or deviations from the specifications. This might involve reviewing process parameters, analyzing process logs, or even conducting process simulations.
- Statistical Analysis: Employing statistical methods to determine the correlation between process variables and the occurrence of the defect.
For instance, if I observe cracks in a weld, I would analyze the weld microstructure using microscopy, check the welding parameters (current, voltage, speed), and potentially investigate the base material properties. By systematically ruling out potential causes, I can pinpoint the root cause, whether it’s improper welding technique, a flawed material batch, or a design issue.
Q 10. Explain your experience with different types of material characterization techniques (e.g., XRD, FTIR, mechanical testing).
I have extensive experience with a range of material characterization techniques. My expertise includes:
- XRD (X-ray Diffraction): Used to identify crystalline phases present in a material, which can be crucial in identifying the presence of unwanted phases or structural defects. I’ve used XRD extensively to determine the degree of crystallinity in polymers and the phase composition of metallic alloys. For example, I once used XRD to analyze a ceramic component exhibiting unexpected brittleness. The XRD results revealed the presence of an undesirable secondary phase leading to the root cause analysis of that material failure.
- FTIR (Fourier Transform Infrared Spectroscopy): Employed to identify functional groups and chemical bonding within a material. This is invaluable in analyzing polymers, composites, and organic materials. In a recent project, FTIR helped me identify the degradation products in a polymer that had failed under stress, allowing us to understand the degradation mechanism.
- Mechanical Testing: This involves a range of tests, such as tensile testing, hardness testing, impact testing, and fatigue testing, to determine a material’s mechanical properties like strength, toughness, and ductility. I routinely perform these tests to characterize material responses to various loads and conditions, helping determine reasons for mechanical failures.
- SEM (Scanning Electron Microscopy): Used for high-resolution imaging of material surfaces and microstructures. This technique is invaluable for visualizing defects like cracks, voids, and inclusions. I often combine SEM with EDS (Energy-Dispersive X-ray Spectroscopy) for elemental analysis at the defect site.
The selection of the appropriate technique depends heavily on the type of material and the nature of the defect being investigated. A comprehensive approach often involves using a combination of techniques for a complete understanding.
Q 11. How do you prioritize defects based on their severity and potential impact?
Defect prioritization is crucial for efficient resource allocation and risk management. I use a structured approach that considers both severity and potential impact. Severity refers to the magnitude of the defect itself, while impact refers to the consequences of leaving the defect unaddressed. I typically employ a risk matrix, a table that plots severity against impact.
Severity can be categorized as critical, major, minor, or negligible. Impact factors to consider include safety risks, performance degradation, cost implications, and schedule delays. A high severity and high impact defect (e.g., a crack in a critical structural component) receives immediate attention, while a minor defect with low impact might be addressed later or even accepted as tolerable. This matrix approach allows for a clear and objective prioritization scheme that is easily understood and communicated across teams.
For example, a small cosmetic scratch on a plastic housing might be classified as minor with low impact, while a delamination in a composite aircraft part could be classified as critical with high impact, requiring immediate action and further investigation.
Q 12. Describe your experience with creating and maintaining quality control documentation.
Creating and maintaining quality control documentation is integral to my work. I’m experienced in developing and implementing quality control procedures and documentation, adhering to industry standards and best practices (e.g., ISO 9001). My documentation typically includes:
- Inspection Procedures: Detailed step-by-step instructions for performing inspections, specifying methods, acceptance criteria, and reporting requirements.
- Inspection Reports: Comprehensive reports documenting the results of inspections, including findings, measurements, images, and conclusions.
- Calibration Records: Documentation of the calibration and maintenance of all inspection equipment to ensure accuracy and reliability.
- Non-Conformance Reports (NCRs): Formal reports documenting any instances of non-compliance with specifications, including root cause analysis and corrective actions.
- Quality Control Charts: Graphical representations of quality control data over time, allowing for trend analysis and proactive identification of potential problems.
I’m proficient in using various software tools for creating and managing these documents, ensuring version control and easy accessibility for all relevant personnel. Proper documentation is crucial not only for tracking quality but also for regulatory compliance and potential legal protection.
Q 13. What are the limitations of the different defect detection methods?
Each defect detection method has its limitations. For example:
- Visual Inspection: Limited by human error, observer bias, and the ability to detect subsurface or very small defects.
- Non-Destructive Testing (NDT) Methods (e.g., Ultrasonic Testing, Radiography): Can be expensive, time-consuming, and require specialized equipment and training. They might also have limitations in detecting certain types of defects or in complex geometries.
- Destructive Testing: While providing detailed information, these methods require sample destruction, which might not always be feasible. They also are inherently incapable of assessing in-service defects in existing components without taking it out of operation.
- Microscopic Techniques (e.g., SEM): Require sample preparation, can be time-consuming, and might have limitations in analyzing large volumes of material.
Understanding these limitations is critical for selecting the most appropriate method and interpreting the results accurately. A combination of methods often provides the most comprehensive picture. For example, visual inspection might be used as an initial screening method, followed by more advanced NDT techniques for further investigation of suspected defects.
Q 14. How do you ensure the accuracy and reliability of your inspection results?
Ensuring accuracy and reliability is paramount. I achieve this through a multi-faceted approach:
- Equipment Calibration and Maintenance: Regularly calibrating all inspection equipment against traceable standards and maintaining meticulous records of calibration data. This is non-negotiable to ensure consistent accuracy.
- Standardized Procedures: Adhering to established inspection procedures and ensuring that all team members are properly trained and follow the same protocols to minimize variability and enhance reproducibility.
- Inter-Laboratory Comparisons: Participating in inter-laboratory comparisons or proficiency testing programs to evaluate the accuracy and consistency of our inspection results against other laboratories using the same methods.
- Statistical Process Control (SPC): Implementing SPC techniques to monitor the inspection process and detect any signs of drift or instability. Control charts help track the mean and variation in measurements, indicating if the process is in control or needs adjustment.
- Blind Sample Testing: Periodically incorporating blind samples into the inspection process to assess the objectivity and consistency of the inspectors.
By combining these strategies, I can ensure confidence in the accuracy and reliability of my inspection results, reducing uncertainty and providing credible data for decision-making.
Q 15. Describe a time you had to troubleshoot a complex defect issue.
One particularly challenging defect involved a recurring failure in a high-precision optical component. Initially, we suspected a manufacturing flaw, but visual inspection revealed nothing conclusive. The defect manifested as intermittent signal degradation, only appearing under specific operating conditions. Our troubleshooting involved a systematic approach.
- Step 1: Detailed Characterization: We meticulously documented each instance of the failure, noting environmental conditions (temperature, humidity), operational parameters (voltage, frequency), and the duration of the signal disruption. We utilized advanced microscopy techniques, including scanning electron microscopy (SEM) and energy-dispersive X-ray spectroscopy (EDS), to examine the component’s surface for any microscopic anomalies.
- Step 2: Controlled Experiments: We designed and conducted controlled experiments to isolate the cause. We systematically varied the operating parameters and environmental conditions while observing the component’s behavior. This helped us identify a correlation between high humidity and the signal degradation.
- Step 3: Root Cause Identification: The experiments revealed that moisture was causing a micro-short in a specific area of the component, confirmed by the EDS analysis which showed water residue. The root cause wasn’t a manufacturing defect but rather a design flaw that made it susceptible to humidity.
- Step 4: Solution Implementation: We collaborated with the design engineers to incorporate a hermetic sealing mechanism in the component’s design, effectively eliminating the moisture-related failures. This involved rigorous testing of the new design to confirm its robustness and performance under various conditions.
This experience highlighted the critical importance of detailed data collection, systematic experimentation, and cross-functional collaboration in complex defect analysis.
Career Expert Tips:
- Ace those interviews! Prepare effectively by reviewing the Top 50 Most Common Interview Questions on ResumeGemini.
- Navigate your job search with confidence! Explore a wide range of Career Tips on ResumeGemini. Learn about common challenges and recommendations to overcome them.
- Craft the perfect resume! Master the Art of Resume Writing with ResumeGemini’s guide. Showcase your unique qualifications and achievements effectively.
- Don’t miss out on holiday savings! Build your dream resume with ResumeGemini’s ATS optimized templates.
Q 16. How familiar are you with industry standards and regulations related to defect inspection?
I’m very familiar with industry standards and regulations regarding defect inspection. My experience encompasses standards like IPC-A-610 (for printed circuit board inspection), ISO 9001 (quality management systems), and industry-specific standards relevant to the products I’ve worked on, such as automotive (IATF 16949) and aerospace standards. I understand the importance of regulatory compliance and the implications of non-conformance. I’m proficient in applying these standards to ensure the integrity and reliability of our products. This includes understanding documentation requirements, inspection methods, and reporting procedures. Understanding these regulations is crucial for mitigating risk and maintaining product quality, and it’s something I prioritize in my work.
Q 17. How do you communicate technical information to non-technical audiences?
Communicating technical information to non-technical audiences requires a shift in perspective and language. I avoid jargon and technical terms whenever possible. Instead, I use clear, concise language and relatable analogies. For example, instead of saying “the signal-to-noise ratio is degraded,” I might explain “the signal is becoming weaker and harder to understand, like a faint radio station.”
Visual aids are also essential. Charts, graphs, and simple diagrams can help convey complex concepts effectively. I always tailor my communication style to my audience. If I’m speaking to executives, I’ll focus on the high-level impact of the defect and the potential cost implications. If I’m talking to production workers, I’ll emphasize the practical aspects and the necessary corrective actions.
Storytelling can be a powerful tool. I often use real-world examples or case studies to illustrate my points and make the information more memorable and engaging.
Q 18. What is your experience with root cause analysis techniques?
I’m experienced with various root cause analysis (RCA) techniques, including the 5 Whys, fishbone diagrams (Ishikawa diagrams), fault tree analysis (FTA), and Failure Mode and Effects Analysis (FMEA). My choice of technique depends on the complexity of the issue and the available data. For instance, the 5 Whys is a great starting point for simpler defects, enabling a quick and iterative approach to find the root cause by repeatedly asking “why” until the underlying issue is identified.
For complex defects with multiple contributing factors, a fishbone diagram provides a structured way to brainstorm and categorize potential causes. I find FTA particularly useful for systems-level issues, where it visually depicts the relationships between events leading to a failure. FMEA is beneficial in proactive defect prevention by identifying potential failure modes and their effects before they occur.
Regardless of the technique, my approach always includes thorough data collection, objective analysis, and clear documentation of findings and conclusions. I ensure the chosen technique is appropriate for the situation, and I always verify my findings through further investigation or testing. This collaborative approach often involves other engineering disciplines for comprehensive problem-solving.
Q 19. How do you handle disagreements with other engineers regarding defect classification?
Disagreements about defect classification are inevitable in engineering, especially when dealing with complex or borderline cases. My approach emphasizes professional collaboration and data-driven decision-making. I begin by actively listening to all perspectives, understanding the reasoning behind each classification. I then encourage a review of the relevant standards, inspection criteria, and available data. We might examine additional images or test results, or even conduct further analysis using different methods.
If a consensus cannot be reached based on evidence, I advocate for escalation to a senior engineer or a formal review board. The goal is not to “win” the argument, but to arrive at the most accurate and objective classification, ensuring consistency and quality.
Ultimately, fostering a collaborative environment where dissenting opinions are valued, and evidence drives the final decision, is crucial for the team’s success and reduces potential for conflict.
Q 20. How do you stay current with advancements in defect inspection and characterization technologies?
Staying current with advancements in defect inspection and characterization technologies is an ongoing process. I actively participate in professional organizations like ASME and IEEE, attending conferences and workshops to learn about new techniques and technologies. I subscribe to relevant journals and online publications to keep abreast of the latest research and industry trends. I also participate in online communities and forums where engineers discuss challenges and solutions in defect inspection.
Furthermore, I regularly review and update my skills through online courses and training programs focusing on new microscopy techniques, advanced imaging analysis software, and data analysis tools. This continuous learning ensures that I can apply the most effective methods in my work and maintain a high level of proficiency in the field.
Q 21. Explain the importance of traceability in defect inspection and characterization.
Traceability is paramount in defect inspection and characterization. It ensures that every defect can be linked back to its origin, allowing for efficient root cause analysis and preventive actions. A clear traceability chain enables us to understand the entire history of a defect – from its initial identification through to its resolution. This includes tracking the processes, equipment, and personnel involved at every stage.
For example, a well-defined traceability system might involve unique identification numbers assigned to each component and lot, along with detailed inspection records, including images and measurement data. This data should be stored securely and readily accessible, forming an audit trail that can be used to investigate issues and improve processes. Without proper traceability, it’s much harder to identify recurring problems or assess the effectiveness of corrective actions. This ultimately impacts product quality and can lead to significant costs and reputational damage.
Q 22. Describe your experience with image analysis software.
My experience with image analysis software spans several years and various platforms. I’m proficient in using software like MATLAB, ImageJ, and specialized commercial packages designed for defect inspection, such as those offered by Keyence or Cognex. I’m comfortable with a wide range of techniques, including image segmentation, feature extraction, and classification. For instance, in one project involving circuit board inspection, I used MATLAB to develop an algorithm that automatically identified solder bridge defects with high accuracy by analyzing grayscale images and employing thresholding and region-growing techniques. In another project, I leveraged ImageJ’s plugin capabilities to perform automated particle analysis on microscopic images of a material’s surface to quantify the size and density of microscopic defects. My skillset also extends to the use of machine learning algorithms integrated within these platforms to enhance the automation and accuracy of defect detection and classification.
Q 23. How would you approach inspecting a complex component with multiple potential failure points?
Inspecting a complex component with multiple potential failure points requires a systematic approach. I’d start by thoroughly understanding the component’s design, manufacturing process, and potential failure modes. This often involves reviewing design specifications, process flow charts, and historical defect data. Next, I’d develop a detailed inspection plan, prioritizing critical failure points based on their potential impact on functionality and safety. This prioritization might be informed by risk assessments or Failure Modes and Effects Analysis (FMEA). The inspection itself might involve a combination of techniques, including visual inspection, non-destructive testing (NDT) methods like X-ray or ultrasonic inspection, and potentially advanced imaging techniques such as micro-CT scanning for internal flaws. Each inspection step would be meticulously documented, with clear descriptions of the methodology, findings, and any necessary measurements. Finally, I’d use data analysis techniques to correlate defect locations and types with potential root causes, feeding this information back into the improvement of manufacturing processes. Imagine inspecting a turbine blade – we’d need to examine the surface for cracks, measure its dimensions precisely, and maybe even use ultrasound to detect internal flaws. A systematic approach ensures thoroughness and efficiency.
Q 24. What are some common challenges you face in defect inspection and characterization?
Several common challenges arise in defect inspection and characterization. One significant challenge is the sheer variety of defects encountered. Each material and manufacturing process presents unique challenges, demanding flexible inspection strategies. Another challenge is the subjective nature of some defect classifications, which can lead to inconsistencies between inspectors. This is where standardized procedures, clear guidelines, and training are crucial. Furthermore, limitations in resolution of inspection equipment can make it difficult to identify extremely small defects, or defects hidden within a component. Finally, the speed-accuracy tradeoff is ever-present; achieving both high speed and high accuracy can be difficult, especially with complex components. For instance, distinguishing between a minor surface scratch and a critical crack in a metal part can be challenging, especially if lighting conditions are poor. This often requires expertise and advanced image processing techniques.
Q 25. How do you balance speed and accuracy in your defect inspection work?
Balancing speed and accuracy is a constant challenge. I address it by utilizing automation wherever possible. This often involves implementing automated optical inspection (AOI) systems or programming image analysis software to identify and classify defects rapidly. However, I understand that complete automation isn’t always feasible or desirable. A human expert’s judgment is crucial for complex cases or when dealing with rare or unusual defects. Therefore, I employ a tiered approach: automating routine tasks and focusing my time and expertise on cases that require more subjective judgment and deeper analysis. Consider a production line inspecting circuit boards. AOI systems can quickly detect missing components or solder shorts, but a human inspector is needed for subtle defects or cases requiring interpretation.
Q 26. Describe your experience with conducting internal audits or inspections.
I have extensive experience conducting internal audits and inspections, focusing primarily on verifying the effectiveness of quality control processes and identifying areas for improvement. These audits have involved reviewing inspection procedures, examining records, and performing on-site observations of the inspection process. I’ve used various tools such as checklists, statistical process control (SPC) charts, and defect tracking databases to ensure thoroughness and identify trends. My aim in these audits is not just to find defects but to understand the underlying causes, so I often interview personnel involved in the processes being audited and analyze data to pinpoint areas that require adjustment or additional training. In one instance, an audit revealed a lack of consistent calibration of measuring equipment, leading to discrepancies in measurements and potential acceptance of non-compliant parts. This highlighted the importance of regular calibration schedules and staff training.
Q 27. How do you handle situations where a defect is found but the root cause is unclear?
When a defect is found but its root cause remains unclear, a systematic root cause analysis (RCA) is necessary. I would typically employ a structured approach like the 5 Whys, Ishikawa diagrams (fishbone diagrams), or fault tree analysis to identify potential contributing factors. This involves gathering information from various sources, including process records, operator logs, and discussions with manufacturing personnel. Physical examination of the defective component can provide valuable clues. Data analysis might reveal patterns or trends. For example, if several similar defects occur within a specific time frame, it might indicate a process issue or a problem with a particular machine. A multidisciplinary team approach is often helpful in uncovering hidden causes. Thorough documentation of the RCA process and its findings is crucial for future improvement and prevention.
Q 28. What steps would you take to prevent future occurrences of similar defects?
Preventing future occurrences of similar defects requires a multi-pronged approach. First, the root cause of the defect must be accurately identified (as described in the previous answer). Then, corrective actions are implemented to eliminate the root cause. These actions might include modifying equipment, adjusting process parameters, improving training protocols, or implementing new quality control checks. Furthermore, preventive measures should be put in place to prevent similar issues from arising in the future. This could involve implementing process controls, conducting regular equipment maintenance, and establishing clear quality standards. Finally, the effectiveness of corrective and preventive actions should be monitored to ensure they have resolved the issue. This often involves tracking defect rates and implementing continuous improvement initiatives. A well-documented corrective action report should outline all steps taken and be reviewed periodically.
Key Topics to Learn for Defect Inspection and Characterization Interview
- Microscopic Techniques: Understanding and applying techniques like optical microscopy, SEM, TEM, and AFM for defect identification and analysis. Consider the strengths and limitations of each technique.
- Defect Classification and Reporting: Mastering standardized defect classification systems (e.g., industry-specific standards) and developing clear, concise, and impactful defect reports.
- Statistical Analysis of Defects: Applying statistical methods to analyze defect data, identify trends, and understand defect density and distribution. This includes understanding yield and failure analysis.
- Material Characterization Techniques: Familiarity with techniques like X-ray diffraction, EDS, and other methods used to understand the material properties contributing to defects.
- Root Cause Analysis: Developing a strong understanding of methodologies to determine the origin of defects, including process-related issues, material imperfections, and design flaws.
- Defect Prevention Strategies: Discuss strategies for implementing preventative measures to minimize defect occurrence during manufacturing processes or design stages.
- Image Analysis and Software: Proficiency with image analysis software for quantifying and characterizing defects from microscopy images.
- Data Interpretation and Presentation: Clearly communicating technical findings and presenting complex data in an understandable format for both technical and non-technical audiences.
Next Steps
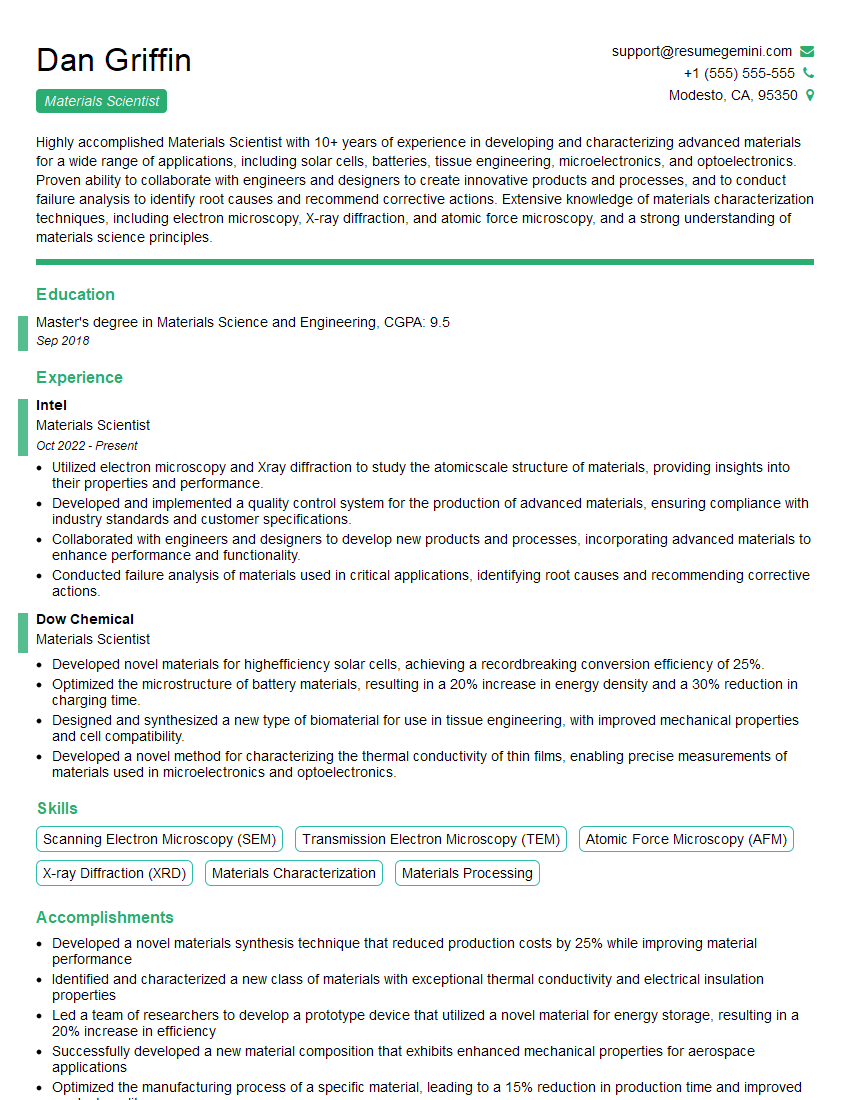
Mastering Defect Inspection and Characterization is crucial for career advancement in many high-tech industries. A strong understanding of these techniques positions you for roles with increased responsibility, higher compensation, and greater influence on product quality and development. To maximize your job prospects, building a compelling and ATS-friendly resume is essential. ResumeGemini can help you create a professional resume that highlights your skills and experience effectively. ResumeGemini provides examples of resumes tailored specifically to Defect Inspection and Characterization roles to help you craft a standout application.
Explore more articles
Users Rating of Our Blogs
Share Your Experience
We value your feedback! Please rate our content and share your thoughts (optional).
