The thought of an interview can be nerve-wracking, but the right preparation can make all the difference. Explore this comprehensive guide to Experience with Blender interview questions and gain the confidence you need to showcase your abilities and secure the role.
Questions Asked in Experience with Blender Interview
Q 1. Explain the difference between NURBS and polygon modeling in Blender.
Blender offers two primary modeling approaches: NURBS and polygon modeling. Think of it like sculpting with different tools. NURBS (Non-Uniform Rational B-Splines) uses mathematically defined curves and surfaces to create smooth, precise models ideal for things like cars or architectural designs. They’re great for organic shapes that need to be easily manipulated and require high precision. Polygon modeling, on the other hand, uses a mesh of interconnected polygons (triangles and quads) to represent the model. This method is more versatile and commonly used for organic models like characters or creatures, as it allows for complex detail and flexibility in shape manipulation. NURBS models are generally smoother and better suited for precise curves and surfaces, but can be less efficient for highly detailed models compared to polygons.
Imagine you’re making a car. You’d likely use NURBS for the smooth body curves. But if you were modeling a character’s face, with all its wrinkles and pores, polygon modeling would be far more suitable. Blender allows you to seamlessly switch between both modeling techniques, giving artists maximum flexibility.
Q 2. Describe your workflow for creating a realistic character model in Blender.
My workflow for creating a realistic character model usually begins with concept art or a reference image. From there, I start with a basic, low-poly model using polygon modeling, blocking out the major forms and proportions. This ‘blocking’ stage focuses on getting the overall silhouette and anatomy right. Next, I refine the mesh by adding more polygons in areas that require greater detail, such as the face and hands, while keeping the polygon count manageable. This is followed by sculpting in Blender’s Sculpt Mode, allowing me to add intricate details like wrinkles, muscles, and pores.
Once the sculpt is finished, I re-topologize the high-poly sculpt, creating a clean, low-poly mesh optimized for animation and texturing. This involves creating a new mesh that precisely follows the sculpted form but with significantly fewer polygons. Finally, I unwrap the UVs for texture mapping and begin the texturing process. This workflow is iterative; I might go back and forth between sculpting, re-topology, and texturing to refine the model until it meets my standards of realism.
Q 3. How do you optimize a Blender scene for rendering performance?
Optimizing a Blender scene for rendering performance involves a multi-pronged approach. First, I focus on reducing polygon counts. High-poly models can significantly slow down rendering. Level of Detail (LOD) techniques can help by automatically switching to lower-poly models at a distance. Second, I carefully manage materials. Complex shaders and textures can impact rendering times, so optimizing textures using image editing software (like Photoshop or GIMP) to reduce file size without sacrificing quality is essential. Finally, I utilize Blender’s built-in optimization tools. This includes disabling unnecessary modifiers, simplifying geometry where possible, and using appropriate render settings for the desired level of quality.
For example, using smart materials, which reuse the same material properties across multiple objects instead of creating redundant material instances, will significantly improve render times. Furthermore, employing occlusion culling, a technique that hides objects behind other objects that are unlikely to be visible, and disabling unnecessary lights and shadows that do not significantly contribute to the scene also helps.
Q 4. What are your preferred methods for texturing in Blender?
My preferred methods for texturing in Blender leverage both procedural and image-based techniques. Procedural textures offer great control and flexibility, allowing for creating complex patterns and effects within Blender itself. I frequently use them for creating base colors, subtle variations, and repeating patterns. For details and high-resolution textures, I often utilize image-based textures created in external software like Substance Painter or Photoshop. These are often scanned photographs or digitally painted textures that provide realistic detail. Blender’s node-based material system allows for combining these approaches seamlessly. I might use procedural noise to add subtle variation to a base color image texture, for instance.
For example, I might use a procedural wood grain texture for a table, then overlay a high-resolution photograph of wood grain for enhanced realism. Blender’s node-based system allows for a powerful combination and control of textures.
Q 5. Explain the key differences between Cycles and Eevee render engines.
Cycles and Eevee are Blender’s two main render engines, each with its strengths and weaknesses. Cycles is a path-traced renderer, meaning it simulates light bouncing realistically through the scene. This results in high-quality, physically accurate images but takes longer to render. It’s excellent for producing photorealistic images and animations. Eevee, on the other hand, is a real-time renderer, offering incredibly fast rendering speeds, making it ideal for interactive tasks like viewport rendering and animation previews. While not as photorealistic as Cycles, it produces surprisingly good results and is constantly improving. The choice depends on the project; if photorealism is paramount and rendering time is less critical, Cycles is the better choice. If speed and interactivity are prioritized, Eevee is more suitable.
Imagine making a short animation film versus creating an interactive game. For the film, Cycles’ realism would be preferable, despite the longer render times. For the game, the speed of Eevee would be crucial, even if some of the fine-grained realism is lost.
Q 6. How do you handle complex animations in Blender?
Handling complex animations in Blender requires a well-structured approach. I begin by carefully planning the animation, often creating an animatic (a rough, storyboarded version of the animation) to visualize the timing and key poses. For complex sequences, using action clips within Blender’s animation system helps in organization. This feature allows you to separate complex animations into manageable sections that can be combined later. Efficient use of constraints and armatures aids in creating fluid, believable movements. Using keyframes strategically, avoiding unnecessary keyframes, and utilizing animation tools like graph editor for fine-tuning curves are vital for creating smooth animation. Regular testing and iterative refinement are key to creating high-quality, complex animations.
Think of it like composing music. You wouldn’t just start randomly playing notes; you’d plan the melody, rhythm, and harmony. Similarly, planning the animation beforehand and separating it into smaller, organized sections significantly improves workflow and quality. Blender’s animation system and tools allow for both procedural and manual control, giving me flexibility in my process.
Q 7. Describe your experience with rigging characters in Blender.
Rigging characters in Blender is a process I am very comfortable with. I typically start by creating a rig (an armature) which is a skeletal structure that controls the character’s movement. The complexity of the rig depends on the character’s requirements. For simple animations, a simpler rig suffices. For more complex animations, such as facial expressions or detailed movements, a more sophisticated rig with multiple bones and controllers is necessary. I pay close attention to the placement of the bones to allow for natural movement and avoid deformation. Once the armature is created, I then ‘parent’ the mesh to the armature, allowing the mesh to deform according to the armature’s movements. I frequently use inverse kinematics (IK) and forward kinematics (FK) techniques to create both precise and natural movements, such as using IK for leg and arm movement and FK for facial controls. The use of constraints, such as copy location and rotation, is also crucial for controlling complex interactions between different parts of the rig. The final step is testing and refining the rig to ensure the movement is smooth, natural and fits the character’s design.
For instance, a simple character might only need a basic rig with bones for the limbs and head. But a character requiring realistic facial expressions would need a much more intricate rig with many bones carefully placed in the face and possibly driven by special controllers.
Q 8. How do you create believable lighting and shadows in a Blender scene?
Creating believable lighting and shadows in Blender is crucial for realism. It’s not just about slapping a light source in; it’s about understanding light’s interaction with objects and the environment. My approach involves a multi-step process:
Understanding Light Sources: I start by choosing the appropriate light type – Sun lamps simulate natural sunlight with realistic shadows, while point, spot, and area lights offer more control for specific effects. For instance, I might use a sun lamp for an outdoor scene and area lights for subtle illumination inside a building.
Shadow Properties: Blender’s shadow settings are key. I carefully adjust parameters like shadow softness (controlling blurriness), ray bounces (for realistic light reflection), and shadow bias (preventing self-shadowing artifacts). Experimenting with these settings is essential to achieving a natural look. For example, a harsh, sharp shadow might suggest a small, intense light source, while a soft shadow indicates a larger or more diffuse source.
Light Composition: I rarely rely on a single light source. I often combine several lights – a key light (main light source), fill light (softening shadows), and rim light (highlighting object edges) – to create depth and realism. Think of a portrait photograph: the key light illuminates the subject, the fill light prevents harsh shadows, and the rim light separates the subject from the background.
Environment Lighting: Adding an HDRI (High Dynamic Range Image) as an environment map significantly enhances realism. HDRIs provide realistic lighting and reflections, creating a believable atmosphere. I carefully select HDRIs based on the scene’s mood and time of day.
Indirect Lighting: Using techniques like path tracing or cycles renders with sufficient samples allow for realistic indirect lighting, where light bounces off surfaces and creates subtle illumination. This adds a significant layer of realism to the scene.
By carefully considering these elements, I can craft lighting that enhances the mood, realism, and overall visual appeal of my Blender projects.
Q 9. Explain your process for creating realistic materials in Blender.
Creating realistic materials in Blender involves more than just selecting a preset. My process focuses on understanding the properties of real-world materials and translating them into Blender’s material nodes. I typically start with a principled BSDF node, which is a highly versatile shader offering comprehensive control over various material properties.
Base Color: This defines the material’s overall hue. I might use a color picker, or for more precision, I might import a texture from an image or create a procedural texture.
Roughness: This controls the surface’s texture. A smooth surface (e.g., polished metal) has low roughness, while a rough surface (e.g., stone) has high roughness. I often use textures for roughness to simulate variations across the surface.
Metallic: This determines how much the material reflects light like a metal. A value of 0 indicates a non-metallic material, while 1 represents a fully metallic material.
Subsurface Scattering: This is essential for materials like skin or wax where light penetrates the surface. Adjusting this parameter can create a lifelike translucency.
Normal Map: To add surface details without increasing polygon count, I frequently use normal maps, which displace surface normals to create the illusion of bumps and crevices.
Texture Mapping: I utilize various types of textures like color maps, roughness maps, and normal maps to add realistic variations in color, roughness, and surface detail. This is vital for breaking up uniformity and making the material more believable.
For instance, to create a realistic wooden surface, I’d use a wood texture for the base color, a roughness map to simulate the wood grain’s texture, and possibly a normal map to enhance the grain’s depth. By combining these elements and iteratively refining the material properties, I create materials that look convincingly real.
Q 10. What are your preferred methods for sculpting in Blender?
My preferred sculpting methods in Blender leverage the power of its tools and workflow. I primarily use the Dynamic Topology brush for organic modeling, and the standard brushes for more precise work. My process often involves:
Base Mesh: I start with a simple base mesh, often a sphere or cube, to establish the overall form. This provides a foundation for adding details later.
Dynamic Topology: This allows me to sculpt without worrying about polygon count. I gradually refine the mesh by adding and subtracting detail, letting Blender handle the topology automatically. This offers a fluid and efficient workflow.
Brush Selection: I choose the appropriate brush based on the desired effect. Grab, Clay, Smooth, and Crease brushes are my go-to choices for shaping and refining forms. I adjust brush strength, size, and falloff to achieve the desired level of detail.
Symmetry: Using Blender’s symmetry tools is essential for creating symmetrical models. This helps maintain consistency and reduces the time required for sculpting.
Retopologizing: Once the sculpt is finalized, I often retopologize the high-poly sculpt to create a low-poly version suitable for animation or game development. This provides a clean mesh with optimized topology.
For example, when sculpting a character, I might start with a sphere for the head, use grab and clay brushes to establish the basic form, and then refine the details using smaller brushes and focusing on specific anatomical features like the eyes and muscles. This iterative approach helps to build a realistic and believable model.
Q 11. How do you use constraints in Blender?
Constraints in Blender are powerful tools for controlling object movement and relationships. They allow you to link objects in various ways, creating complex animations and interactions without extensive keyframing. My typical uses include:
Follow Path Constraint: This allows an object to follow a predefined path, ideal for animating a camera along a track or moving objects along a specific trajectory. I might use this to create a cinematic camera movement or simulate a train moving along tracks.
Copy Location/Rotation/Scale Constraint: These constraints link an object’s transformations to another object. For instance, I could make a child object always copy the rotation of its parent object, simplifying character rigging.
Track To Constraint: This constraint makes an object orient itself towards a target. This is particularly useful for making characters or cameras follow a moving object.
IK (Inverse Kinematics) Constraint: I use this frequently for character rigging, allowing me to animate a character’s pose by manipulating end effectors (e.g., hands and feet) while the system automatically calculates the joint rotations.
Damped Track Constraint: This allows for smoother and more controlled tracking, reducing jerky movements often seen with other tracking constraints.
Constraints significantly streamline my animation process, enabling me to create complex animations with greater efficiency and control.
Q 12. Describe your experience with compositing in Blender.
Compositing in Blender, using the compositor node editor, is crucial for finalizing render outputs, adding effects, and achieving a polished look. I use it extensively to achieve:
Color Correction: I utilize nodes like Color Balance, Curves, and Levels to adjust the overall color and contrast of my renders. This is vital for matching the mood and style of my project.
Adding Effects: I frequently incorporate nodes such as Glow, Blur, and Glare to enhance the visual appeal. For example, a subtle glow can highlight key elements, while a selective blur can draw attention to specific areas.
Matte Painting: I’ve used the compositor to integrate matte paintings, enhancing backgrounds or adding elements not present in the 3D scene. This opens up possibilities for creativity and design.
Keying: This technique, using nodes such as Keying nodes, allows me to remove backgrounds from footage or isolate specific elements for easier compositing.
Depth of Field: I combine render passes (depth pass, Z-pass) in the compositor to generate realistic depth of field effects, blurring the background and focusing attention on the main subject.
Compositing is a powerful post-processing stage allowing for fine-tuning and adding creative elements, ultimately enhancing the visual impact and professionalism of the final output. It’s an integral part of my pipeline, not just a ‘finishing touch’.
Q 13. How do you use modifiers effectively in Blender?
Modifiers in Blender are non-destructive tools that alter the geometry of an object without permanently changing its underlying data. This allows for iterative adjustments and easy experimentation. My effective use involves:
Subdivision Surface Modifier: I use this to smooth out polygon edges, resulting in a smoother, more refined model. This is particularly useful for organic shapes and characters.
Array Modifier: This modifier efficiently creates multiple copies of an object arranged in a specific pattern. This is very useful for creating fences, walls, or repeating patterns.
Mirror Modifier: This creates a mirror image of an object along a specified axis, ideal for creating symmetrical models.
Bevel Modifier: This adds rounded edges to an object, giving it a more polished and refined look. I use this for creating chamfers or smoothing hard edges.
Boolean Modifier: This allows for complex shapes by combining or subtracting objects. This is highly efficient for creating intricate forms.
I often use multiple modifiers in a stack, taking advantage of their non-destructive nature to experiment with different combinations and achieve desired results. For example, I might use a Bevel modifier followed by a Subdivision Surface modifier to create a smoothly rounded and detailed object. Modifiers are a core part of my workflow for efficient and flexible modeling.
Q 14. What are your preferred methods for creating particle effects in Blender?
Creating particle effects in Blender involves understanding the various particle systems and their parameters. My approach typically involves:
Particle System Settings: I begin by defining the emission settings, such as the number of particles, their lifetime, and velocity. I often experiment with different emission methods like ‘Hair’ or ‘Grid’ depending on the desired effect.
Physics Settings: Depending on the effect, I’ll use different physics settings. For realistic smoke or fire, I might use fluid simulation. For simpler effects like dust or snow, I may use gravity and wind forces.
Render Settings: I adjust render settings to achieve the desired visual quality, such as using different render engines (Cycles, Eevee) to optimize performance and visuals. I might use a custom material for each particle to fine-tune appearance.
Particle Modifiers: Blender offers modifiers specifically for particles, such as the ‘Mesh’ modifier to shape the particles into objects like leaves or snowflakes. I often combine several modifiers for complex effects.
Texture and Animation: To create more visually compelling effects, I often add textures to the particles, as well as use animation to adjust particle parameters over time, such as their size or color.
For instance, to simulate realistic fire, I might use a fluid simulation with appropriate settings for density, temperature, and heat dissipation. Then, I might add a custom material to the particles to create realistic flickering flames and smoke. This layered approach is crucial to creating believable and engaging particle effects.
Q 15. Explain your experience with Blender’s physics engine.
Blender’s physics engine is a powerful tool for simulating realistic interactions between objects. I’ve extensively used its capabilities, from simple rigid body simulations for things like falling objects and collisions, to more complex setups involving soft bodies, fluids, and cloth. Understanding the different physics types and their parameters is crucial. For example, rigid body simulations are great for animating a stack of boxes falling, while cloth simulation would be essential for animating a realistic flag waving in the wind. I’ve worked on projects requiring precise control over factors like friction, damping, and gravity to achieve specific visual effects. A recent project involved simulating a complex chain reaction of dominoes, requiring careful adjustment of rigid body parameters to ensure the desired cascading effect.
I’m also familiar with Bullet physics, the underlying engine, allowing me to troubleshoot issues effectively. For instance, I’ve encountered situations where interpenetrating objects caused instability. Addressing this required careful adjustment of collision margins and ensuring sufficient separation between objects at the start of the simulation.
Career Expert Tips:
- Ace those interviews! Prepare effectively by reviewing the Top 50 Most Common Interview Questions on ResumeGemini.
- Navigate your job search with confidence! Explore a wide range of Career Tips on ResumeGemini. Learn about common challenges and recommendations to overcome them.
- Craft the perfect resume! Master the Art of Resume Writing with ResumeGemini’s guide. Showcase your unique qualifications and achievements effectively.
- Don’t miss out on holiday savings! Build your dream resume with ResumeGemini’s ATS optimized templates.
Q 16. How do you troubleshoot rendering errors in Blender?
Troubleshooting rendering errors in Blender requires a systematic approach. I typically start by checking the obvious: are all textures properly loaded? Are there any missing materials? Often, the error messages themselves provide valuable clues. However, many errors are visual and require careful examination.
My process usually involves:
- Checking the Render Settings: I verify the selected render engine (Cycles, Eevee, Workbench), resolution, and sampling settings. Insufficient samples can lead to noisy renders, while improper settings can cause unexpected results.
- Examining the Scene: I systematically go through the scene, checking for any overlapping geometry, flipped normals, or degenerate faces which can cause rendering glitches. Blender’s ‘Select’ menu with options like ‘Select All by Trait’ is extremely helpful here.
- Material and Texture Review: I thoroughly check all materials and textures, looking for missing files, incorrect paths, or problematic node setups. A faulty shader can throw off an entire render.
- Lighting Analysis: I examine the scene’s lighting setup, as improper lighting can obscure issues or lead to unintended shadows or artifacts.
- Render Layers and Passes: Using render layers allows for breaking the render into manageable chunks. Isolating problems to specific layers helps in quicker diagnosis. Also, render passes, such as the depth pass, can highlight issues otherwise overlooked.
If the problem persists, I often start the render process again with a simplified scene, gradually reintroducing elements to pinpoint the source of the error. Using the ‘Debug’ menu and checking Blender’s console for messages can also offer critical insights.
Q 17. Describe your experience with importing and exporting assets in Blender.
Importing and exporting assets is a critical part of my workflow. I’m proficient in handling various file formats, including FBX, OBJ, and glTF. Each format has its strengths and weaknesses. FBX, for example, is great for preserving animation data, while OBJ is simpler and widely supported. glTF is excellent for web-based applications due to its efficiency and compact file size.
Before importing, I always assess the asset’s origin and its potential compatibility issues. For instance, if importing a model from a different software, I check for issues like scaling, unit systems (meters vs. centimeters), and UV unwrapping inconsistencies. I’m familiar with using Blender’s import/export options to resolve these, often employing techniques like scaling and transformation matrices to adjust model sizes and orientations. Similarly, when exporting, I meticulously configure options to ensure data integrity and compatibility with the target application. This might include adjusting the level of detail or optimizing meshes for better performance.
A recent project involved importing a high-poly model from ZBrush and then retopologizing and optimizing it within Blender for game engine usage, highlighting the importance of effective import/export procedures in a pipeline.
Q 18. What are some common pitfalls to avoid when working with Blender?
Several common pitfalls can significantly slow down or derail a Blender project. Here are some I’ve learned to avoid:
- Ignoring Unit Scaling: Inconsistent units (e.g., mixing meters and centimeters) can lead to significant problems during animation and physics simulations.
- Poorly Organized Scenes: Messy scenes with disorganized objects and collections make it challenging to work efficiently. Regular cleanup, using collections effectively, and naming conventions are essential.
- Overusing Modifiers: While modifiers are powerful, overusing them can greatly impact performance, particularly in large scenes. Applying modifiers (like subdivision surface) can sometimes improve performance.
- Neglecting File Management: Poor file management, like scattering files across multiple drives or using uninformative names, can lead to lost work and project chaos.
- Forgetting to Save Regularly (and Backing Up): This is a crucial aspect often overlooked. Data loss can cause immense frustration; regular saves and backups prevent catastrophic consequences.
- Unoptimized Meshes: High-polygon count meshes can significantly slow down rendering and animation. Using tools like the decimate modifier and optimizing meshes for their intended purpose is vital.
Q 19. Explain your experience with using add-ons in Blender.
Blender’s add-on system significantly expands its functionality. I’ve extensively used various add-ons to streamline my workflow and access specialized tools. Examples include:
- Import/Export Add-ons: Add-ons to import and export specialized file formats not natively supported by Blender, expanding compatibility with other software.
- Modeling Add-ons: Add-ons such as Hard Ops and Boxcutter significantly speed up modeling workflows by providing shortcuts and efficient tools.
- Texturing Add-ons: Add-ons for procedural texturing generation, such as those generating realistic materials (wood, stone, etc.), provide considerable efficiency.
- Animation Add-ons: Add-ons facilitating animation processes, including rigging and character animation.
When using add-ons, it’s essential to carefully select reputable sources to avoid potential security risks. Regular updates are also important to maintain stability and access the latest features. Understanding the add-on’s functionality and its impact on performance is key to efficient integration into your workflow. For example, a heavy add-on might slow down performance on low-end hardware.
Q 20. How do you manage large and complex Blender projects?
Managing large and complex Blender projects requires a well-defined organizational strategy. I rely on several key approaches:
- Scene Organization with Collections: I meticulously organize my scenes using collections, grouping objects logically, allowing for selective visibility and rendering. This is crucial for managing complex scenes with hundreds or thousands of objects.
- Data Blocking: Breaking down the project into manageable parts or ‘blocks’ (like separate models or environments) simplifies the process. This allows for easier modifications and parallel work.
- File Naming Conventions: Using clear and consistent file-naming conventions ensures easy tracking of different assets and avoids confusion.
- Version Control (e.g., Git): For collaborative projects or those requiring extensive revision history, version control is invaluable. This helps track changes, collaborate efficiently, and easily revert to previous versions if necessary.
- Proxy Objects/Low-Poly Models: Using proxy objects for high-poly models during early stages of development can significantly speed up navigation and interaction within the scene.
- Regular Backups: Regular automated backups to the cloud or external drives are essential, protecting your work against data loss.
Efficient use of these strategies allows me to effectively manage complex scenes, fostering better workflow and productivity even in large-scale projects.
Q 21. Describe your experience with procedural texturing in Blender.
Procedural texturing offers powerful capabilities for creating realistic and complex surface details. My experience encompasses using Blender’s built-in nodes, as well as utilizing add-ons that extend these capabilities.
I’ve worked on projects where procedural textures were crucial for creating variations in materials without resorting to manually painting textures. For example, I’ve used noise textures combined with color ramps to simulate variations in wood grain, stone patterns, and even realistic skin textures. Using these textures, I can create variations across a surface, ensuring no two parts of a material look exactly alike. This allows for a much higher level of detail, efficiency, and versatility compared to manually creating variations.
Furthermore, I understand the importance of optimizing procedural textures for performance. Complex node setups can significantly impact rendering time, so optimizing the node tree is vital. Techniques like using smaller textures and minimizing unnecessary calculations are critical for maintaining render performance.
Q 22. How do you use the UV unwrapping tools in Blender?
UV unwrapping in Blender is the process of projecting a 3D model’s surface onto a 2D plane, allowing for efficient texture mapping. Think of it like flattening an orange peel; you’re taking a complex 3D shape and making it flat so you can paint it easily. Blender offers several methods:
Smart UV Project: This is a great starting point for many models. It intelligently unwraps the mesh, minimizing distortion and seams. I often use this for character models or objects with relatively simple geometry.
Unwrap: This offers more manual control, ideal for complex models where you need to carefully place seams and manage UV islands. It’s less automated but provides greater precision. For example, on a highly detailed building, I’d use this to ensure minimal stretching on important facade textures.
Project from View: Useful for unwrapping planar surfaces. It projects the selected face(s) directly onto the UV map, which is perfect for things like walls or simple floor textures. I commonly use this for quick texturing of simple objects.
Custom UV unwrapping: For intricate models requiring specific UV island arrangement, manual manipulation using tools like seam placement, island selection, and scaling within the UV editor is crucial. This demands a good understanding of UV layout and its impact on texture efficiency and distortion.
After unwrapping, you’ll want to inspect your UV layout in the UV editor, checking for stretching and overlaps. You can then adjust islands, seams, and UV coordinates to optimize texture usage and minimize distortion.
Q 23. Explain your understanding of color management in Blender.
Color management in Blender is crucial for ensuring your renders look consistent across different monitors, devices, and workflows. It involves managing color spaces – the ranges of colors a system can represent. Without it, colors can appear drastically different depending on your screen settings.
Blender supports various color spaces (e.g., sRGB, Adobe RGB, Rec.709). I always work in a scene-referred workflow, usually using a color space like sRGB for most projects. This involves working with scene linear colors internally and applying output transforms for the target display or output format. Incorrect color management can lead to washed-out colors, overly saturated results, or significant differences between your screen preview and final render.
Key aspects of Blender’s color management include:
Color Space Settings: Selecting appropriate color spaces for the scene, display, and output.
View Transform: Transforming scene-linear colors to a display-friendly color space.
Exposure Settings: Controlling the overall brightness of the scene.
Using Color Management in the Compositor: Using nodes to apply color transforms and adjust color grading.
For professional work, proper color management is essential to maintain consistency and accuracy. I always ensure my settings are properly configured to prevent mismatched colors or unexpected color shifts during the rendering process. I often use external color management tools for calibration and profiling to ensure accuracy across my workflow.
Q 24. What are some techniques for improving the performance of animations?
Improving animation performance in Blender involves optimizing various aspects of your scene. Think of it like streamlining a complex machine – the fewer parts moving, the smoother and faster it runs. Some techniques include:
Reduce Polygon Count: Use lower-polygon models whenever possible, especially for background elements. High-polygon models significantly increase render times.
Optimize Mesh Topology: Use clean, efficient topology – avoiding unnecessary geometry and ensuring even distribution of polygons. Poor topology can create rendering bottlenecks.
Use Proxies: Replace high-detail models with lower-resolution proxies during animation previews. Then, swap back to the high-detail models only for final rendering.
Avoid Overuse of Modifiers: Modifiers are powerful but can be computationally expensive. Use them judiciously and consider converting to meshes when possible for faster rendering.
Bake Animations: Pre-render complex simulations (like cloth or hair) to create cached animations. This replaces computationally expensive real-time simulations with pre-rendered data.
Use Animation Layers: Breaking down complex animations into separate layers allows for selective rendering and easier debugging.
Optimize Materials and Textures: Using high-resolution textures can slow down rendering. Consider using lower-resolution textures when possible or using techniques like procedural textures.
For example, in a scene with hundreds of trees, I’d use simple low-poly trees for the background and high-detail models only for the few trees featured prominently.
Q 25. How do you create realistic hair and fur in Blender?
Creating realistic hair and fur in Blender typically involves using the particle system with a hair modifier. This is a powerful tool that allows for simulating the behavior and appearance of hair strands.
Here’s a breakdown of the process:
Create a hair particle system: This involves defining parameters like the number of strands, length, root distribution, and physics behavior. The physics settings determine the hair’s natural movement and dynamics.
Choose a hair render style: This usually involves selecting a combination of render settings and materials. There are different options for hair rendering, including using strands or composited cards. The choice depends on the look and performance requirements.
Create a hair material: This is crucial for realism. Hair shaders involve parameters such as color variations, reflectivity, and translucency, all of which can significantly impact the final visual appearance. Realistic hair shaders often incorporate subsurface scattering to simulate the way light penetrates the hair strands.
Grooming and Styling: Using particle editing tools like the comb and the various options under the physics settings (gravity, wind, etc) to achieve the desired style and flow.
Optimization: High-density hair can be computationally expensive. Techniques such as using hair cards instead of individual strands, or using simpler materials can dramatically improve rendering times without drastically impacting the realism.
I’ve found that a crucial aspect of achieving realistic hair is paying close attention to the details: root variation, individual strand dynamics, and the interplay of light and shadow on the hair. Experimentation with different render settings and materials is often necessary to achieve the desired results.
Q 26. Describe your experience working with different file formats (e.g., FBX, OBJ).
My experience working with different file formats in Blender is extensive, with FBX and OBJ being two of the most commonly used. Each format has its strengths and weaknesses:
FBX (Filmbox): A versatile format that generally preserves animations, materials, and textures well across different software. It’s my preferred format for transferring projects between Blender and other 3D packages, particularly game engines such as Unity or Unreal Engine. The preservation of animation data and material properties is a key advantage, making it ideal for collaborative projects.
OBJ (Wavefront OBJ): A simpler format that focuses primarily on geometry. It often lacks support for animations, materials, and textures; these elements usually need to be re-created or assigned in the target software. However, it is lightweight and widely compatible, making it useful for sharing only mesh data.
Other Formats: I also have experience with formats like
.blend(Blender’s native format),.dae(Collada), and.gltf(glTF)..blendoffers the highest level of data preservation within the Blender ecosystem, while.gltfis a great choice for web-based applications and game engines supporting this standard.
Choosing the right format depends on the project’s needs. For example, when exporting a model for 3D printing, I might use an OBJ file as it’s widely compatible with slicer software. For game development, FBX or glTF is usually the best option for efficient data transfer.
Q 27. How would you approach creating a realistic environment for a game?
Creating a realistic game environment in Blender involves a multi-faceted approach, focusing on visual fidelity, performance, and level design considerations. The key is to balance realism with efficiency, ensuring the environment is visually appealing without sacrificing performance.
My approach usually follows these steps:
Concept and Planning: Start with a clear vision of the environment’s style, mood, and scale. This involves creating concept art and planning the layout of the environment, ensuring efficient use of assets and optimized level design.
Modeling: Create high-quality models for essential elements like buildings, terrain, and props. Optimize the polygon count for game engine compatibility, utilizing techniques like level of detail (LOD) to improve performance. This means using lower-poly models for distant objects and higher-poly models for close-up views.
Texturing: Use high-resolution textures to enhance realism but optimize texture size to keep files manageable for the game engine. This often involves using tileable textures and normal maps to add surface detail without significantly increasing polygon count.
Lighting: Create a believable lighting setup using global illumination techniques, such as baking lighting data or using a real-time solution that is compatible with the game engine. This involves strategically placing lights to create realistic shadows, reflections, and ambient lighting.
Optimization: Constantly optimize the scene for performance by using techniques like LOD, baking lighting, and reducing polygon count. Game engine considerations are paramount at this stage, optimizing assets for the specific engine’s requirements.
Vegetation: Often utilizes techniques like instancing to create large numbers of trees and plants efficiently. Custom shaders might be used to improve the look of grass or foliage.
For example, in creating a forest environment, I might use a combination of hand-painted textures, procedural generation for grass, and instancing for trees to ensure both visual fidelity and efficient performance.
Q 28. What are some of your favorite Blender shortcuts?
My favorite Blender shortcuts significantly speed up my workflow. Here are a few:
G(Grab): Moves objects. AddingX,Y, orZrestricts movement to a single axis.R(Rotate): Rotates objects. Similar toG, addingX,Y, orZrestricts rotation.S(Scale): Scales objects. Again, axis constraints withX,Y, orZare very helpful.Alt+M(Merge): Merges selected vertices, edges, or faces.Ctrl+Z(Undo): Undoes the last action. A lifesaver!Shift+A(Add): Adds new objects (mesh, light, camera, etc.).Tab(Edit Mode Toggle): Switches between object mode and edit mode.Ctrl+LMB(Select): Selecting vertices, edges, or faces in edit mode.A(Select All): Selects or deselects all elements.
I use these shortcuts constantly, often combining them for quick and efficient modeling and manipulation. These are just a few, and there are many more specialized shortcuts that are useful depending on the task at hand.
Key Topics to Learn for Your Blender Interview
- Modeling Fundamentals: Understanding polygon modeling, edge loops, subdivisions, and retopology. Practical application: Describe how you’ve optimized a model for game engine performance or 3D printing.
- Texturing & Materials: Mastering shaders, node-based workflows, and creating realistic or stylized materials. Practical application: Explain your approach to creating a specific material, e.g., a realistic wood texture or a stylized cartoon material.
- Lighting & Rendering: Working with different light types, understanding global illumination, and choosing appropriate render settings for various projects. Practical application: Discuss how you’ve lit a scene to achieve a specific mood or effect.
- Animation Principles: Keyframing, constraints, armatures, and understanding basic animation principles like squash and stretch. Practical application: Explain your process for animating a character or object.
- Workflow & Organization: Efficient scene management, layer usage, and utilizing Blender’s organizational tools. Practical application: Describe how you maintain a clean and organized Blender project file.
- Troubleshooting & Problem-Solving: Diagnosing and resolving common Blender issues, such as modeling errors, rendering glitches, or animation problems. Practical application: Describe a challenging technical problem you encountered and how you solved it.
- Add-ons & Extensions: Familiarity with common add-ons and their practical applications to enhance workflow efficiency. Practical application: Discuss any add-ons you frequently use and why.
- Version Control (Optional): Understanding the importance of version control systems like Git for collaborative projects. Practical application: Explain how using version control could benefit a team project.
Next Steps
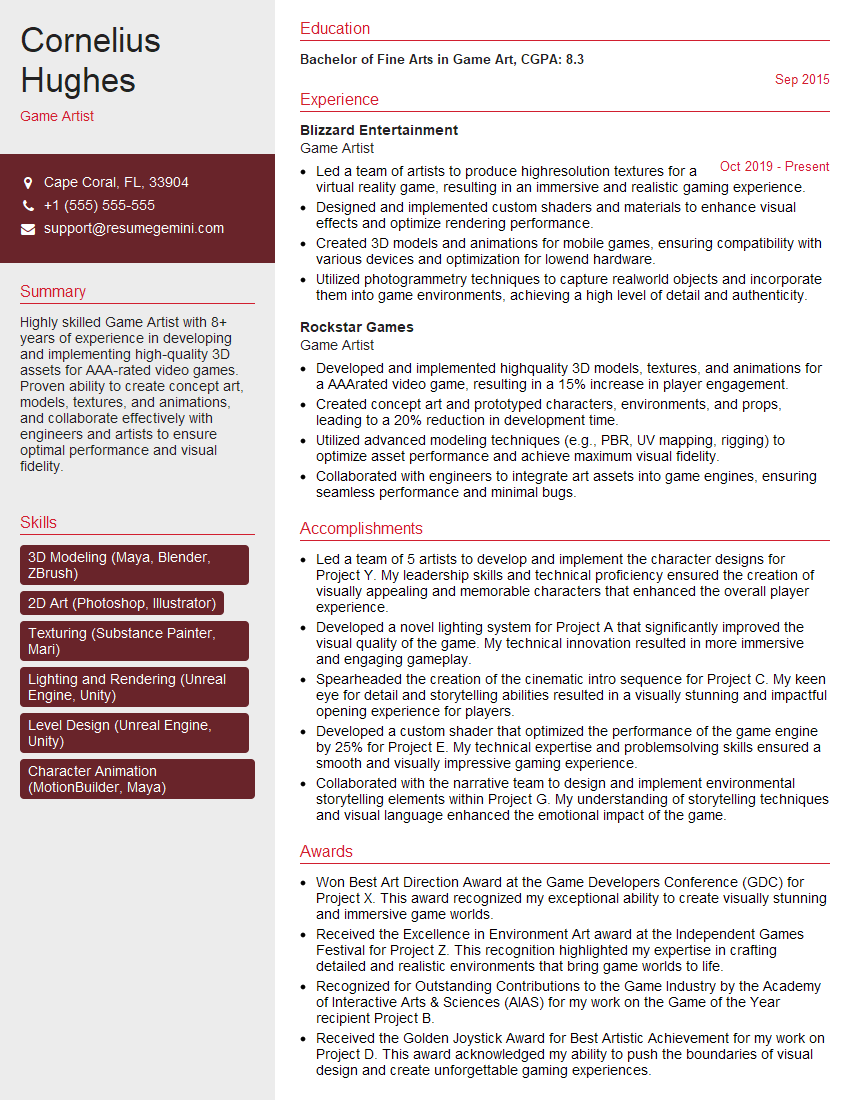
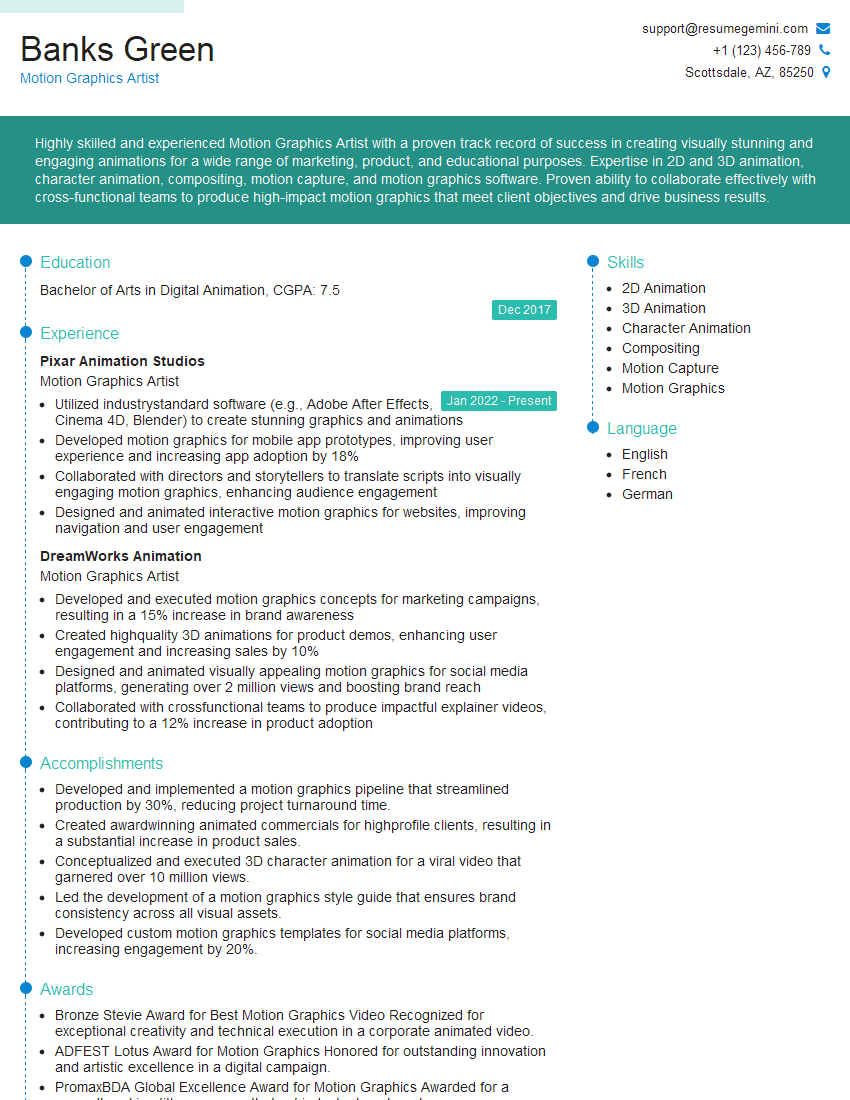
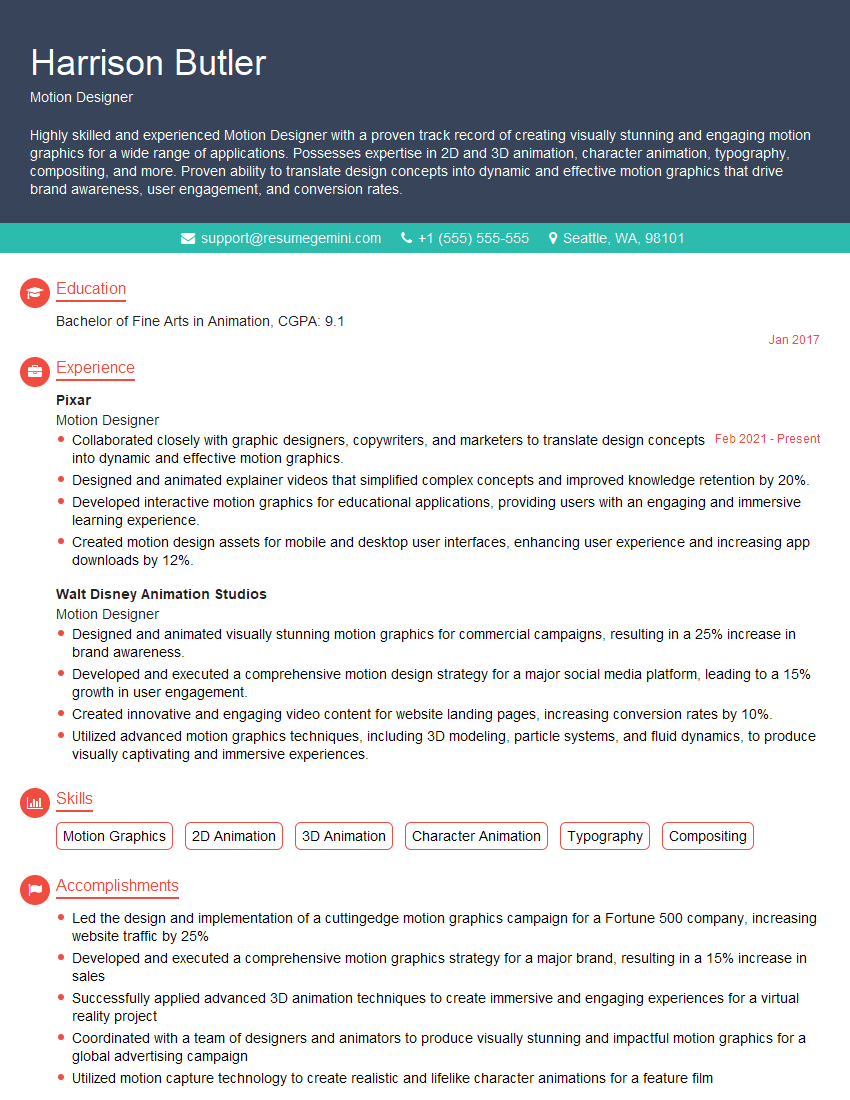
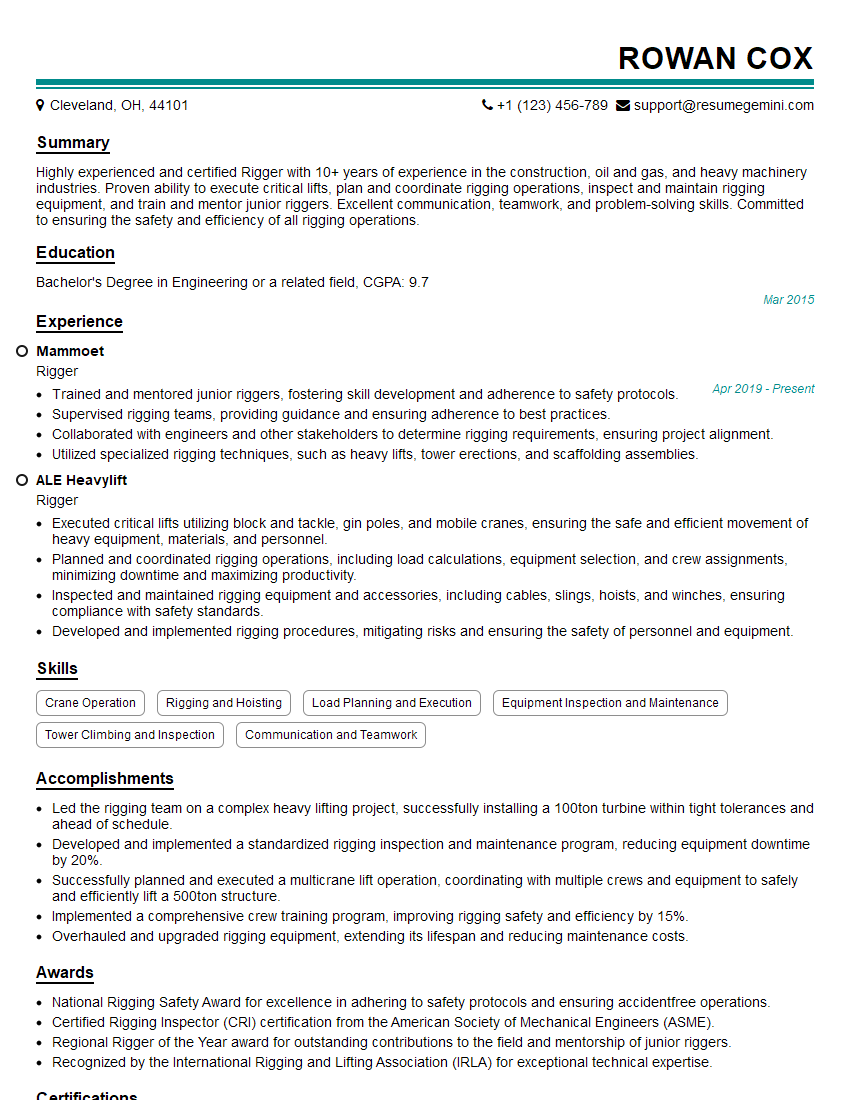
Mastering Blender opens doors to exciting careers in animation, VFX, game development, and architectural visualization. To showcase your skills effectively, create a resume that highlights your achievements and technical expertise. An ATS-friendly resume is crucial for getting noticed by recruiters and increasing your chances of landing your dream job. ResumeGemini is a fantastic resource to help you build a compelling and professional resume tailored to the specific requirements of your target roles. They provide examples of resumes optimized for showcasing Blender experience, ensuring your application stands out from the competition. Invest the time to craft a strong application – it’s an investment in your future!
Explore more articles
Users Rating of Our Blogs
Share Your Experience
We value your feedback! Please rate our content and share your thoughts (optional).
What Readers Say About Our Blog
Hello,
We found issues with your domain’s email setup that may be sending your messages to spam or blocking them completely. InboxShield Mini shows you how to fix it in minutes — no tech skills required.
Scan your domain now for details: https://inboxshield-mini.com/
— Adam @ InboxShield Mini
Reply STOP to unsubscribe
Hi, are you owner of interviewgemini.com? What if I told you I could help you find extra time in your schedule, reconnect with leads you didn’t even realize you missed, and bring in more “I want to work with you” conversations, without increasing your ad spend or hiring a full-time employee?
All with a flexible, budget-friendly service that could easily pay for itself. Sounds good?
Would it be nice to jump on a quick 10-minute call so I can show you exactly how we make this work?
Best,
Hapei
Marketing Director
Hey, I know you’re the owner of interviewgemini.com. I’ll be quick.
Fundraising for your business is tough and time-consuming. We make it easier by guaranteeing two private investor meetings each month, for six months. No demos, no pitch events – just direct introductions to active investors matched to your startup.
If youR17;re raising, this could help you build real momentum. Want me to send more info?
Hi, I represent an SEO company that specialises in getting you AI citations and higher rankings on Google. I’d like to offer you a 100% free SEO audit for your website. Would you be interested?
Hi, I represent an SEO company that specialises in getting you AI citations and higher rankings on Google. I’d like to offer you a 100% free SEO audit for your website. Would you be interested?
good
