The thought of an interview can be nerve-wracking, but the right preparation can make all the difference. Explore this comprehensive guide to Experience with rapid prototyping techniques (3D printing, CNC machining) interview questions and gain the confidence you need to showcase your abilities and secure the role.
Questions Asked in Experience with rapid prototyping techniques (3D printing, CNC machining) Interview
Q 1. Explain the difference between FDM and SLA 3D printing technologies.
Fused Deposition Modeling (FDM) and Stereolithography (SLA) are two prominent 3D printing technologies, but they differ significantly in their processes and the resulting part quality. FDM is an additive process that builds parts layer by layer by extruding molten thermoplastic filament. Think of it like a hot glue gun drawing in three dimensions. SLA, on the other hand, uses a laser to cure liquid photopolymer resin, creating highly detailed parts layer by layer. It’s like building with liquid that hardens when exposed to light.
- FDM: Advantages include lower cost, ease of use, and a wide range of materials. Disadvantages include lower resolution, visible layer lines, and less precise geometries. It’s great for functional prototypes or larger parts where precision isn’t paramount.
- SLA: Advantages include higher resolution, smoother surface finish, and better dimensional accuracy. Disadvantages include higher cost, slower printing speeds, and the need for post-processing (like washing and curing) to remove supports and fully cure the resin. It excels in creating detailed models, jewelry, or parts requiring fine features.
For instance, I once used FDM to quickly prototype a housing for an electronics project, prioritizing speed and functionality over perfect aesthetics. In another project, we used SLA to create a highly accurate miniature model for a client needing precise details.
Q 2. What are the advantages and disadvantages of CNC machining compared to 3D printing?
CNC machining and 3D printing are both crucial rapid prototyping methods, but their strengths lie in different areas. CNC machining subtractively removes material from a block of stock using rotating cutters controlled by a computer. Imagine a highly precise, automated wood carving process. 3D printing, as discussed earlier, additively builds a part layer by layer.
- CNC Machining: Advantages include high accuracy, excellent surface finish, and the ability to work with a wider array of materials (metals, composites etc.). Disadvantages include higher setup costs, longer lead times, and material waste. It’s ideal for creating robust, high-precision parts.
- 3D Printing: Advantages include lower cost per part, faster prototyping, and complex geometries. Disadvantages include lower accuracy (depending on the method), limited material choices (for some technologies), and slower production for large quantities. It excels in creating complex shapes and low-volume prototypes.
In practice, I often choose CNC machining for parts requiring high strength and tight tolerances, such as metal brackets or fixtures. For intricate designs or quick iterations of complex shapes, 3D printing is a better choice.
Q 3. Describe your experience with CAD software for prototyping.
My experience with CAD software spans over [Number] years and includes proficiency in [List software, e.g., SolidWorks, Fusion 360, AutoCAD]. I’m comfortable designing parts from scratch, modifying existing models, and preparing files for both 3D printing and CNC machining. I understand the importance of using appropriate design features to ensure manufacturability and have experience working with different file formats like STEP, STL, and IGES. For example, I successfully designed a complex assembly in SolidWorks, splitting it into individual components for 3D printing and then using Fusion 360 to create the CNC toolpaths for machining the mating parts.
Beyond the software itself, my expertise lies in understanding the design implications for different manufacturing processes. For example, I know how to design for support structures in 3D printing and to avoid undercut features in CNC machining to make parts easy to manufacture.
Q 4. How do you select the appropriate material for a specific rapid prototyping application?
Material selection is crucial for successful prototyping. The choice depends heavily on the application’s functional requirements and desired properties. Factors to consider include strength, flexibility, temperature resistance, chemical resistance, cost, and aesthetic appeal.
- Strength: For structural components, I might select ABS or nylon for 3D printing or aluminum for CNC machining.
- Flexibility: TPU (thermoplastic polyurethane) offers good flexibility in 3D printing.
- Aesthetics: SLA resin can produce high-quality surface finishes suitable for visually appealing prototypes.
For a recent project involving a biocompatible implant prototype, we selected a specific medical-grade resin for 3D printing that met stringent biocompatibility standards. This careful selection ensured the prototype could be tested reliably without introducing unwanted variables.
Q 5. Explain the process of designing for manufacturability in rapid prototyping.
Designing for manufacturability (DFM) is critical for successful rapid prototyping. It involves considering the limitations and capabilities of the chosen manufacturing process from the initial design stages. This minimizes errors, reduces costs, and ensures the final product meets its specifications.
- 3D Printing: DFM for 3D printing considers overhangs, support structures, wall thickness, and the orientation of the part on the print bed. Designing with these constraints in mind leads to faster printing times, reduced material usage, and better part quality.
- CNC Machining: DFM for CNC machining focuses on draft angles, avoiding undercuts, and designing parts with features that are easy to machine. Using standard sizes and minimizing intricate features reduces machining time and costs.
For example, in designing a complex part for 3D printing, I strategically added small features to enable easy support removal and reduced print orientation issues. When preparing a part for CNC machining, I consciously designed it to minimize complex geometry, reducing material costs and improving the precision of the final product.
Q 6. What are the common challenges encountered during 3D printing and how do you address them?
3D printing, while powerful, presents challenges. Common issues include warping, delamination, clogging of nozzles, and insufficient adhesion between layers.
- Warping: Often caused by uneven cooling or material shrinkage; mitigated by using a heated bed, enclosure, or brim/raft.
- Delamination: Layers separating from each other; addressed by adjusting print temperature, speed, or using a different material.
- Clogging: Extruder nozzle blockage; solved by cleaning or replacing the nozzle.
- Poor Adhesion: Layers not sticking together well; improved by cleaning the print bed, using adhesive, or adjusting bed leveling.
Troubleshooting involves systematically investigating the problem (e.g., checking the slicer settings, inspecting the filament, analyzing the print bed), making adjustments, and retesting. I often maintain a detailed log of my 3D printing projects, including settings and troubleshooting steps to improve my process over time.
Q 7. How do you ensure the accuracy and precision of parts produced through CNC machining?
Ensuring accuracy and precision in CNC machining requires careful attention to several aspects:
- Machine Calibration: Regular calibration of the CNC machine is crucial to ensure the tool moves precisely as programmed. This involves checking the machine’s axes and ensuring zero points are accurate.
- Tool Selection: Choosing the right tools and using sharp cutting bits is essential for precise material removal. Dull bits lead to inaccurate cuts and poor surface finish.
- Workholding: Securely clamping the workpiece is crucial to prevent vibrations or movement during machining. This minimizes errors and ensures consistent cuts.
- CAM Programming: Properly programming the CAM software (Computer-Aided Manufacturing) to generate precise toolpaths is critical. This involves considering feed rates, spindle speeds, and depth of cuts based on the chosen material and tool.
- Post-Processing: Post-machining inspection using CMM (Coordinate Measuring Machine) or other precision tools is important for verifying the dimensional accuracy and confirming the final part meets the specified tolerances.
For example, before starting a CNC machining project, I always perform a thorough machine calibration and tool inspection. I carefully program the CAM software, simulate the toolpaths to prevent collisions, and perform quality control checks using a measuring device or CMM afterwards.
Q 8. Describe your experience with post-processing techniques for 3D printed parts.
Post-processing of 3D printed parts is crucial for achieving the desired surface finish, accuracy, and functionality. It’s like taking a rough clay sculpture and refining it into a polished masterpiece. My experience encompasses a range of techniques, tailored to the material and the project’s requirements.
Support Removal: Carefully removing support structures, minimizing damage to the printed part. This often involves using small tools like hobby knives, wire cutters, and even compressed air to remove delicate supports from intricate geometries. For example, I once spent hours meticulously removing supports from a complex, biomimetic design, ensuring I didn’t compromise its structural integrity.
Cleaning: Removing excess material or debris using brushes, compressed air, or isopropyl alcohol. This is particularly important for resin-based prints, which often have a sticky residue. I regularly use a pressure washer for larger parts to remove the residue effectively and safely.
Sanding & Polishing: Smoothing rough surfaces using various grades of sandpaper, followed by polishing with compounds to achieve a glossy finish. The choice of sandpaper grit depends on the initial surface roughness and the desired smoothness – starting with coarser grit and gradually moving to finer ones. For example, I used this method to create a smooth, sleek finish for a prototype casing that needed to be aesthetically pleasing.
Painting & Finishing: Applying primers, paints, and coatings to enhance aesthetics, improve durability, and add functionality (e.g., UV resistance). I have experience with various paint types including acrylics, lacquers, and epoxies, always ensuring proper ventilation and safety precautions.
Heat Treatment: For certain materials like ABS, heat treatment can improve dimensional stability and reduce warping. This involves carefully heating the part to a specific temperature to relieve internal stresses and improve the overall quality of the final product.
Q 9. What safety precautions do you follow when operating CNC machines?
Safety is paramount when operating CNC machines. These machines can be powerful and dangerous if not handled correctly. My safety protocol is rigorous and follows best practices, including:
Proper PPE: Always wearing safety glasses, hearing protection, and a dust mask, depending on the material being processed. I also use appropriate gloves to avoid skin irritation or cuts.
Machine Inspection: Thoroughly inspecting the machine before each use, checking for loose parts, damaged tools, or any signs of malfunction. A pre-operational checklist is my standard procedure.
Secure Workholding: Ensuring the workpiece is securely clamped or held in place to prevent movement or accidental ejection during operation. Incorrect workholding can lead to damage to both the part and the machine.
Emergency Stop Awareness: Knowing the location and function of the emergency stop button. This is practiced regularly and is a key part of my safety procedure.
Controlled Environment: Operating the CNC machine in a well-lit, clean, and organized workspace, free from obstructions that could cause accidents. Good housekeeping is crucial in preventing accidents.
Regular Maintenance: Regularly maintaining and calibrating the machine to prevent malfunctions and ensure optimal performance. Regular maintenance minimizes the chance of a sudden malfunction.
Q 10. Explain your understanding of tolerance and its importance in rapid prototyping.
Tolerance in rapid prototyping refers to the permissible variation in the dimensions of a part. It’s the acceptable range of error from the ideal design. Think of it like making a cake; the recipe specifies certain measurements, but some variation is always acceptable and won’t affect the cake’s final taste.
Understanding and managing tolerances is critical because it directly impacts the functionality and fit of the prototype. Too loose tolerances can lead to parts that don’t fit together properly or perform as intended. Too tight tolerances can make manufacturing the parts difficult, expensive, or even impossible with the chosen rapid prototyping method. For example, a prototype part designed for a tight-fitting assembly will fail if the tolerances are too large. Conversely, extremely tight tolerances might make the 3D printing process challenging, leading to failure.
In my work, I carefully consider the desired functionality of the prototype and the capabilities of the chosen manufacturing method when defining tolerances. This involves using appropriate CAD software tools, checking for interference, and ensuring parts are manufacturable within the specified tolerances. Often, this involves iterative design and testing to refine the tolerance values and ensure the part meets its specifications.
Q 11. How do you troubleshoot common issues with 3D printer malfunctions?
Troubleshooting 3D printer malfunctions requires a systematic approach. I typically follow these steps:
Identify the Problem: Observe the symptoms, such as failed prints, layer adhesion problems, nozzle clogging, or material inconsistencies. Keep a detailed log of any unusual events or error messages displayed by the printer.
Check the Obvious: Verify that the filament is loaded correctly, the bed is level, the nozzle temperature is appropriate for the material being used, and the print settings are correct. These are often overlooked but essential.
Examine the Print Settings: Check the slicing software settings, ensuring the layer height, infill density, and print speed are appropriate for both the printer and the material. Inconsistent settings can lead to many issues.
Clean the Nozzle: If the nozzle is clogged, this will require careful cleaning. It might be necessary to use a small needle or specialized nozzle cleaning tools. Avoid excessive force that could damage the nozzle.
Inspect the Bed Adhesion: Ensure the print bed is clean, level, and properly adhered to. Using a suitable adhesive or a bed leveling process is critical.
Check the Filament: Ensure the filament is dry and free from moisture or debris. Moisture can lead to poor adhesion and other printing issues.
Firmware and Software Updates: If the problem persists, check for firmware and software updates for the 3D printer and slicing software. These updates frequently address bugs and improve printer performance.
Seek External Help: If all else fails, consult the printer’s manual, online forums, or seek help from experienced 3D printing professionals. Many online communities offer detailed assistance.
Q 12. What is your experience with different types of 3D printer filaments/resins?
My experience spans a wide range of 3D printer filaments and resins. The choice of material is crucial for achieving the desired properties of the final product. Each material has unique characteristics impacting the print process and the final part’s properties.
PLA (Polylactic Acid): A common, biodegradable, and easy-to-print filament. Ideal for prototypes requiring a relatively simple print process and sustainable materials. It’s what I typically use for functional prototypes that do not require extreme durability or high-temperature resistance.
ABS (Acrylonitrile Butadiene Styrene): A more durable and heat-resistant filament than PLA, but more challenging to print due to warping tendencies. I use ABS when a higher strength and temperature resistance are needed.
PETG (Polyethylene Terephthalate Glycol-modified): Offers a good balance between strength, flexibility, and ease of printing. It’s a good all-around choice for many applications. Its resistance to moisture makes it a good choice for outdoor use.
Nylon: A strong and flexible filament, often used for functional parts requiring high impact resistance. It’s more challenging to print than PLA or PETG due to its tendency to absorb moisture.
Resins (SLA/DLP): I have extensive experience with various resin types, including those offering high precision, strength, and transparency. These are suitable for highly detailed prototypes or parts with complex geometries, where the quality of the finish is paramount. SLA/DLP printing allows for highly detailed miniature models.
Material selection is driven by project requirements. For instance, if the prototype must be biocompatible, I would select a material certified for biomedical applications. If high temperature resistance is needed, then I would use a material like high-temperature ABS or a special type of nylon.
Q 13. Explain your experience with CAM software and its role in CNC machining.
CAM (Computer-Aided Manufacturing) software plays a vital role in CNC machining, translating the CAD (Computer-Aided Design) model into instructions for the CNC machine. Think of it as the translator between the design and the manufacturing process. My experience with various CAM software packages, such as Fusion 360, Mastercam, and Vectric, allows me to generate efficient and effective toolpaths for different CNC operations.
The process starts with importing the CAD model into the CAM software. I then define the material being used, select the appropriate cutting tools, and program the toolpaths. This involves setting parameters such as feed rate, depth of cut, and spindle speed. Careful consideration of these parameters is crucial for achieving optimal surface finish, accuracy, and minimizing tool wear. The CAM software then generates G-code, which is the machine-readable language the CNC machine understands.
For example, when creating a complex mold using CNC machining, I use CAM software to define multiple toolpaths for roughing (removing bulk material) and finishing (achieving a precise surface finish). I’d carefully optimize the toolpaths to minimize machining time and ensure a high-quality final product.
Simulations within the CAM software allow me to virtually machine the part and identify potential collisions or other issues before actually running the code on the CNC machine. This significantly reduces the risk of errors and damage.
Q 14. How do you manage and organize large CAD files for rapid prototyping projects?
Managing large CAD files for rapid prototyping projects requires a structured approach to avoid confusion and ensure efficient workflow. My strategy involves a combination of techniques:
File Organization: I use a consistent naming convention and file structure to categorize CAD files by project, part number, revision, and date. This makes it easy to locate specific files.
Data Management Software: Using dedicated Product Lifecycle Management (PLM) software or cloud-based storage solutions provides centralized access and version control of CAD files. This ensures that everyone involved in a project has access to the latest version of the files and that previous versions are preserved.
Assembly Management: For complex assemblies, I utilize CAD software features to manage and organize individual components, ensuring proper assembly and avoiding file bloat.
File Compression: Using lossless compression techniques, such as ZIP or 7z, for archiving of larger files to reduce storage space and improve transfer speeds. Lossless compression ensures that no data is lost during the compression process.
Data Backup: Regularly backing up CAD files to multiple locations, such as local drives, network storage, and cloud services, to safeguard against data loss.
Reference Files: Instead of embedding large parts into an assembly, I use reference files to reduce file size and improve performance. This is especially helpful when dealing with multiple versions of a component.
This systematic approach ensures easy access to information, version control, and backups, which is essential for smooth collaboration and project management in a rapid prototyping environment.
Q 15. Describe a time you had to optimize a design for faster prototyping.
Optimizing a design for faster prototyping often involves simplifying geometry and choosing the right manufacturing method. Imagine I was prototyping a complex housing for a small electronics device. Initially, the design included intricate curves and thin walls, which would have been time-consuming and expensive to 3D print. To optimize, I simplified the curves to simpler shapes that would be easier to print, using more basic geometry. I also considered using subtractive manufacturing (CNC machining) for certain features to ensure precision, reserving 3D printing for the complex parts of the housing. The end result was a significantly faster prototyping process with a minimal impact on functionality.
For example, I replaced a complex, organic-shaped curve with a series of simple arcs and straight lines. This reduced the print time dramatically and avoided potential support structures which can complicate the process and lead to more finishing work. Similarly, small, intricate details were either removed or simplified to be manufacturable more effectively. The trade-off in visual perfection was far outweighed by the speed increase.
Career Expert Tips:
- Ace those interviews! Prepare effectively by reviewing the Top 50 Most Common Interview Questions on ResumeGemini.
- Navigate your job search with confidence! Explore a wide range of Career Tips on ResumeGemini. Learn about common challenges and recommendations to overcome them.
- Craft the perfect resume! Master the Art of Resume Writing with ResumeGemini’s guide. Showcase your unique qualifications and achievements effectively.
- Don’t miss out on holiday savings! Build your dream resume with ResumeGemini’s ATS optimized templates.
Q 16. How do you determine the appropriate resolution for 3D printing a specific part?
Determining the appropriate resolution for 3D printing depends heavily on the part’s function, size, and required tolerances. Think of it like choosing the right resolution for an image; you wouldn’t use a low-resolution image for a high-detail photograph. For a functional prototype where high precision is crucial, a higher resolution (smaller layer height) is necessary, resulting in smoother surfaces and finer details. But higher resolution means longer print times and higher material consumption.
For instance, a part with tight tolerances, such as a precisely fitting gear, would require a very high resolution (e.g., 0.1mm layer height). However, a larger, less critical part, like a housing, might only need a medium resolution (e.g., 0.2mm or 0.3mm) to balance print time with acceptable surface quality. I always begin by analyzing the part’s critical dimensions and functional requirements. This dictates the resolution needed to meet the design specifications and maintain the necessary tolerances.
Q 17. What are the limitations of rapid prototyping technologies?
Rapid prototyping technologies, while incredibly useful, do have limitations. One major limitation is material selection – typically, you’re restricted to the materials compatible with the chosen process. For example, 3D printing with FDM (Fused Deposition Modeling) has limited material strength and is not suitable for high-temperature applications. Another significant restriction is surface finish; 3D-printed parts often require post-processing such as sanding and finishing to achieve smooth surfaces, and the precision of features can be limited. CNC machining can create more precise and high-quality parts, but it’s more costly and time-consuming for small batches.
Furthermore, the size and complexity of the part can also pose limitations. Very large parts might require extensive support structures or be difficult to handle on the machines. Similarly, complex geometries could increase the manufacturing time or lead to inaccuracies. Understanding these constraints is critical in the design phase to prevent wasted time and resources. I always assess the advantages and disadvantages of each technique in relation to the project’s specific needs and budget before proceeding.
Q 18. Explain your experience with different types of CNC machining processes (e.g., milling, turning).
My experience encompasses both milling and turning in CNC machining. Milling uses a rotating cutter to remove material from a workpiece, allowing for the creation of complex shapes and features. I’ve extensively used milling for creating molds, jigs, and prototypes of various parts. I’m proficient in programming CAM (Computer-Aided Manufacturing) software to generate toolpaths for different milling operations like face milling, pocket milling, and contour milling. For example, I once used 3-axis milling to create a precise mold for a plastic injection project. The result was a highly accurate mold with excellent surface finish, which facilitated the production of high-quality plastic parts.
Turning, on the other hand, uses a rotating workpiece and a stationary cutting tool to shape cylindrical parts. I’ve utilized turning to create shafts, pins, and other axially symmetric components. Programming for turning involves setting up cutting parameters like feed rate, spindle speed, and depth of cut using CAM software. I’ve worked with different lathe types, ranging from small benchtop lathes for smaller projects to larger CNC lathes for production-level components. Precision and the efficient use of materials are key considerations in this process.
Q 19. How do you ensure the quality control of parts produced through rapid prototyping?
Quality control in rapid prototyping involves a multi-step approach, starting with careful design and material selection. I employ dimensional checks using calipers and micrometers to ensure that the prototype meets the design specifications. I meticulously examine the surface finish, looking for flaws, defects, and any deviations from the design. For parts requiring higher precision, I utilize coordinate measuring machines (CMMs) for more accurate dimensional measurements. Beyond dimensional accuracy, functional testing is equally important; I would test the prototype under simulated operating conditions to assess its performance and durability.
Moreover, the process doesn’t end with the creation of the part. I maintain detailed records of the manufacturing parameters for each prototype including material type, print settings (for 3D printing), cutting parameters (for CNC machining), and any post-processing steps. This documentation allows for reproducibility and also helps in identifying any potential issues or deviations from expectations. A clear understanding of the design tolerances is also important when evaluating acceptable variation in the final product.
Q 20. Describe your experience with reverse engineering using 3D scanning.
Reverse engineering using 3D scanning involves capturing the geometry of an existing object and then creating a digital 3D model. I’ve used various 3D scanning techniques, including structured-light scanning and laser scanning, to capture the geometry of existing parts. The scan data is then processed using specialized software to create a point cloud that is further processed into a surface mesh and ultimately a solid model, ready for use in CAD software. I then use this digital model for further analysis, modification, or to manufacture new parts.
For example, I once reverse-engineered a vintage mechanical part to create a replacement, and using 3D scanning allowed me to faithfully capture all the fine details of the part including wear and tear. Once I had the digital model, I was able to analyze the design, identify areas for improvement, and then produce a revised design and manufacture the part using 3D printing. The process allowed for the efficient reproduction of a part that would otherwise have been difficult to replicate.
Q 21. How do you handle design changes during the prototyping process?
Handling design changes during prototyping is crucial for successful product development. Flexibility is key. I use iterative prototyping methods that readily accommodate changes. Design changes are incorporated through a well-defined feedback loop. This loop usually starts with reviewing the initial prototype and identifying areas for improvement. These changes are then implemented using CAD software and a new prototype is generated. I often use agile methodologies, where rapid iterations of the design allow for timely integration of feedback and swift adaptation.
For instance, if a functional test reveals a weakness in a certain area of the prototype, the CAD model is updated to address the issue, and a new prototype is created and tested. The ease with which changes can be made varies depending on the chosen rapid prototyping method and design complexity. While 3D printing offers quicker turnaround times for minor modifications, CNC machining might require more significant adjustments to the toolpaths. The project’s timeline and cost constraints are important factors that are considered when making the decision to iterate or abandon the current prototyping stage.
Q 22. What is your experience with different slicing software for 3D printing?
My experience with slicing software spans several popular programs, each with its strengths and weaknesses. Think of slicing software as the translator between your 3D model and the 3D printer. It takes the digital design and converts it into instructions the printer understands – layer by layer. I’ve extensively used Cura, PrusaSlicer, and Simplify3D. Cura, known for its user-friendly interface, is excellent for beginners and rapid prototyping due to its intuitive design and extensive plugin support. PrusaSlicer, developed by Prusa Research, offers superb quality and precise control, especially beneficial for complex prints and when maximizing print quality is critical. Simplify3D, while more expensive, provides advanced features for professionals who need fine-tuned control over every aspect of the printing process, such as support structures and material settings. The choice often depends on the complexity of the print, the printer being used, and the desired level of control. For instance, for a simple prototype, Cura’s speed and ease of use might be preferred, while for a highly detailed model requiring specialized support structures, Simplify3D might be necessary.
My workflow usually involves experimenting with different slicers for a given project to find the optimal balance between print time, material usage, and final quality. I often compare the generated G-code from different slicers to understand how their algorithms differ in terms of layer height, infill patterns, and support structure generation.
Q 23. Explain the importance of proper machine maintenance for CNC machines.
Proper CNC machine maintenance is paramount for ensuring accuracy, longevity, and safety. Neglecting maintenance is like driving a car without oil changes – it’ll eventually break down, and likely unexpectedly. My approach focuses on a preventative maintenance schedule, combining daily checks with more thorough servicing at regular intervals. Daily checks involve inspecting the machine for loose components, checking coolant levels, and cleaning away chips and debris. This simple step dramatically reduces the risk of collisions and component damage. Regular servicing, typically monthly or quarterly depending on usage, includes lubricating moving parts, inspecting and cleaning the spindle, checking the accuracy of the machine’s movements (often using a dial indicator), and replacing worn tooling.
Specific actions might include recalibrating the machine’s axes, cleaning and replacing air filters, and performing a thorough inspection of the control system. This is crucial not only for prolonging the life of the machine but also for maintaining the accuracy of the parts it produces. Ignoring these tasks can lead to increased wear and tear, costly repairs, and potentially hazardous situations.
Q 24. How do you choose the right tooling for a CNC machining project?
Tooling selection for CNC machining is crucial for achieving the desired surface finish, accuracy, and efficiency. It’s like choosing the right tool for a carpentry project; using a screwdriver to hammer a nail won’t work well. The material being machined is the primary determinant, followed by the desired surface finish and the required accuracy. For example, machining aluminum might use end mills with different flute counts depending on whether you need a rough cut or a fine finish. A high flute count end mill is ideal for fine finishing operations, while a low flute count is better for roughing.
I carefully consider factors like cutting speed, feed rate, and depth of cut when choosing a tool. This selection process involves consulting manufacturer’s recommendations and often conducting test cuts to fine-tune parameters. For harder materials such as steel, I’d likely use carbide tools, while softer materials such as wood might use high-speed steel tools. The geometry of the tool—the shape of the cutting edge—is also crucial. For example, a ball-nose end mill is ideal for creating curved surfaces, while a flat end mill is better for planar machining.
Q 25. How do you manage the cost-effectiveness of rapid prototyping projects?
Cost-effectiveness in rapid prototyping is about optimizing the balance between speed, quality, and expense. It’s not simply about choosing the cheapest option; it’s about choosing the most appropriate method for the project’s needs. My approach involves a thorough evaluation of the project’s requirements at the outset. For instance, if the goal is to quickly test the basic form and functionality of a design, 3D printing, despite its limitations in terms of precision and material selection, can be significantly more cost-effective than CNC machining. However, if the prototype requires high precision and a specific material, then CNC machining, although more expensive, might be justified.
I utilize design for manufacturability (DFM) principles from the very beginning of the design process to minimize material waste and simplify the manufacturing process. This means optimizing the design to reduce the number of parts, choosing appropriate tolerances, and selecting materials that are readily available and cost-effective for the chosen manufacturing process. Furthermore, careful planning and accurate estimations of material usage, machine time, and labor costs are vital for keeping expenses under control.
Q 26. Describe your experience with different file formats used in rapid prototyping (e.g., STL, STEP).
My experience with file formats in rapid prototyping encompasses the most common formats: STL and STEP. STL (Stereolithography) is a widely used file format for 3D printing, representing the 3D model as a mesh of interconnected triangles. It’s simple, readily supported by most 3D printers and slicing software, but lacks information about the design’s features and precise geometry, which can be limiting for complex designs. STEP (Standard for the Exchange of Product data) is a more advanced format that includes the complete design history, including geometry, features, and parameters. It’s useful for CAD software and provides a more robust representation of the model, suitable for CNC machining where dimensional accuracy is crucial. The choice depends on the application; STL is sufficient for simple 3D prints, while STEP is essential for complex projects where precise dimensions and features are vital. Additionally, I’ve used other formats like OBJ and IGES, especially when transferring files between different CAD/CAM software.
Q 27. What are your preferred methods for documenting the prototyping process?
Documenting the prototyping process is key for reproducibility, collaboration, and learning from past experiences. I employ a multi-faceted approach, combining digital and physical documentation. My digital documentation relies heavily on detailed CAD files, slicing software settings, and CNC machining parameters (cutting speeds, feed rates, tooling). This information is stored in a well-organized digital repository, usually a cloud-based system with version control. This allows easy tracking of revisions and ensures that all project-relevant information remains accessible. This is supplemented with detailed photographs and videos throughout the process, capturing the various steps and the resulting prototypes. I also maintain a comprehensive log file detailing each step of the process, including any challenges faced and solutions implemented. For particularly complex projects, I might create formal reports outlining the process, results, and lessons learned. This methodical approach ensures that the prototyping process is transparent, repeatable, and valuable for future endeavors.
Key Topics to Learn for Experience with rapid prototyping techniques (3D printing, CNC machining) Interview
- 3D Printing Fundamentals: Understanding different 3D printing technologies (FDM, SLA, SLS, etc.), material properties, print bed adhesion, slicing software, and troubleshooting common printing issues.
- CNC Machining Principles: Knowledge of various CNC machining processes (milling, turning, drilling), CAM software (e.g., Fusion 360, Mastercam), tool selection, workholding techniques, and understanding tolerances and surface finishes.
- Design for Additive Manufacturing (DFAM) & Design for Manufacturing (DFM): Knowing how to design parts specifically for 3D printing or CNC machining, considering limitations and optimizing for efficiency and cost-effectiveness.
- Material Selection: Understanding the properties of various materials (plastics, metals, composites) and selecting the appropriate material based on the application and prototyping requirements.
- Post-Processing Techniques: Familiarizing yourself with techniques like sanding, polishing, painting, and finishing for both 3D printed and CNC machined parts to achieve desired aesthetics and functionality.
- Safety Procedures: Demonstrating awareness of safety protocols for operating 3D printers and CNC machines, including proper use of personal protective equipment (PPE).
- Project Management and Prototyping Workflow: Ability to discuss your experience with the entire prototyping process, from initial design concepts to final testing and iteration.
- Troubleshooting and Problem-solving: Being able to articulate how you approach and resolve technical challenges encountered during the prototyping process.
- Software Proficiency: Highlighting your expertise in CAD software (SolidWorks, AutoCAD, etc.) and CAM software, as well as your experience with slicing software for 3D printing.
- Practical Applications and Case Studies: Prepare to discuss specific projects where you’ve utilized rapid prototyping techniques and the impact of your work.
Next Steps
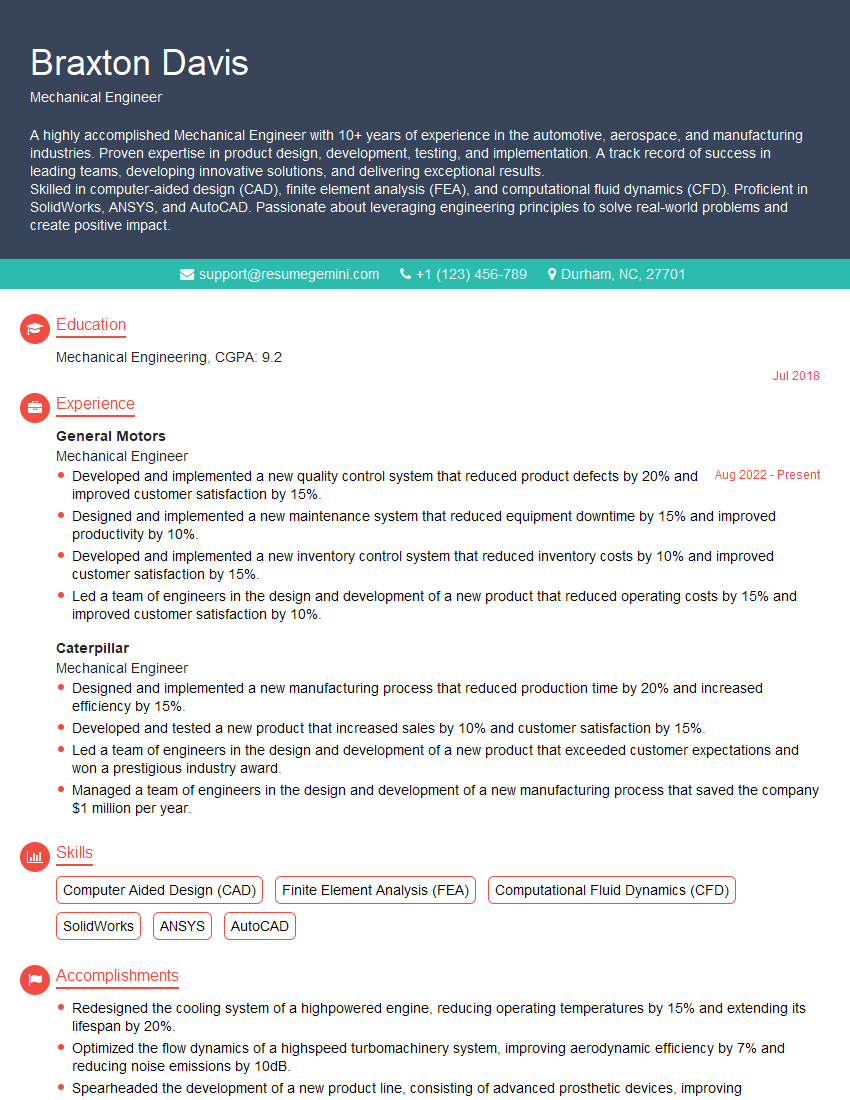
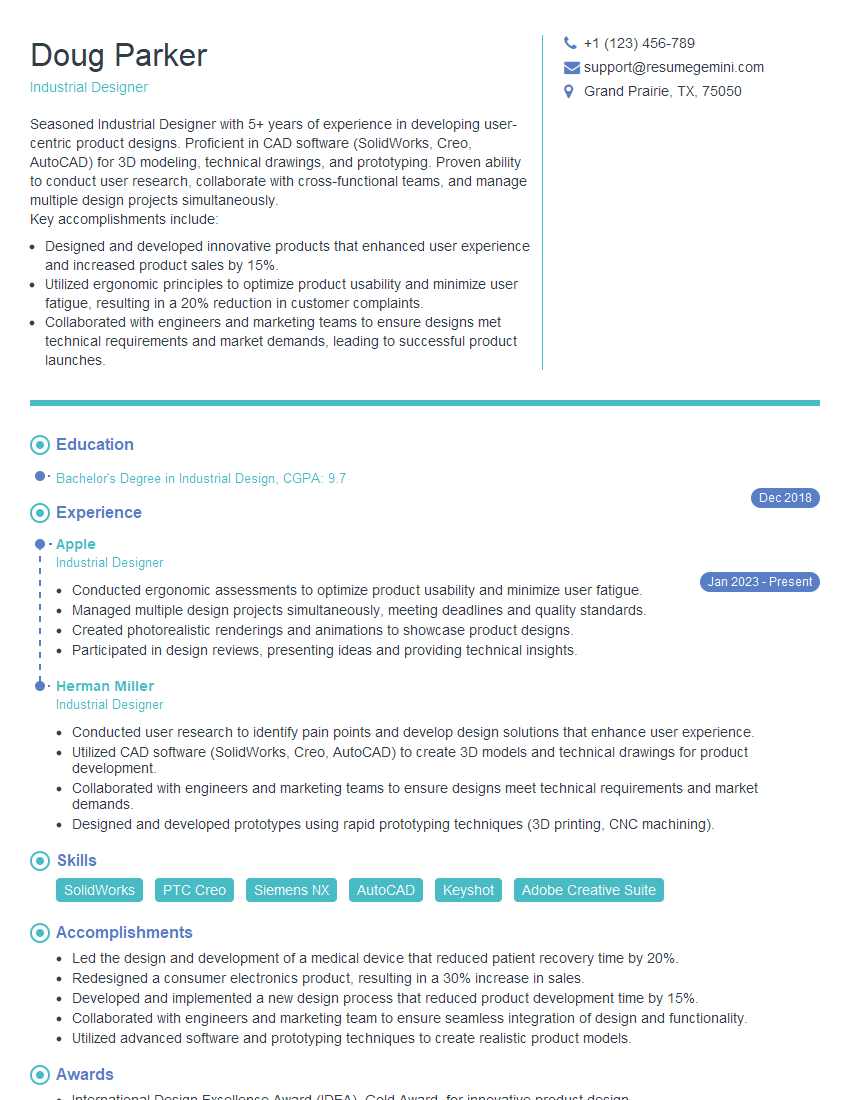
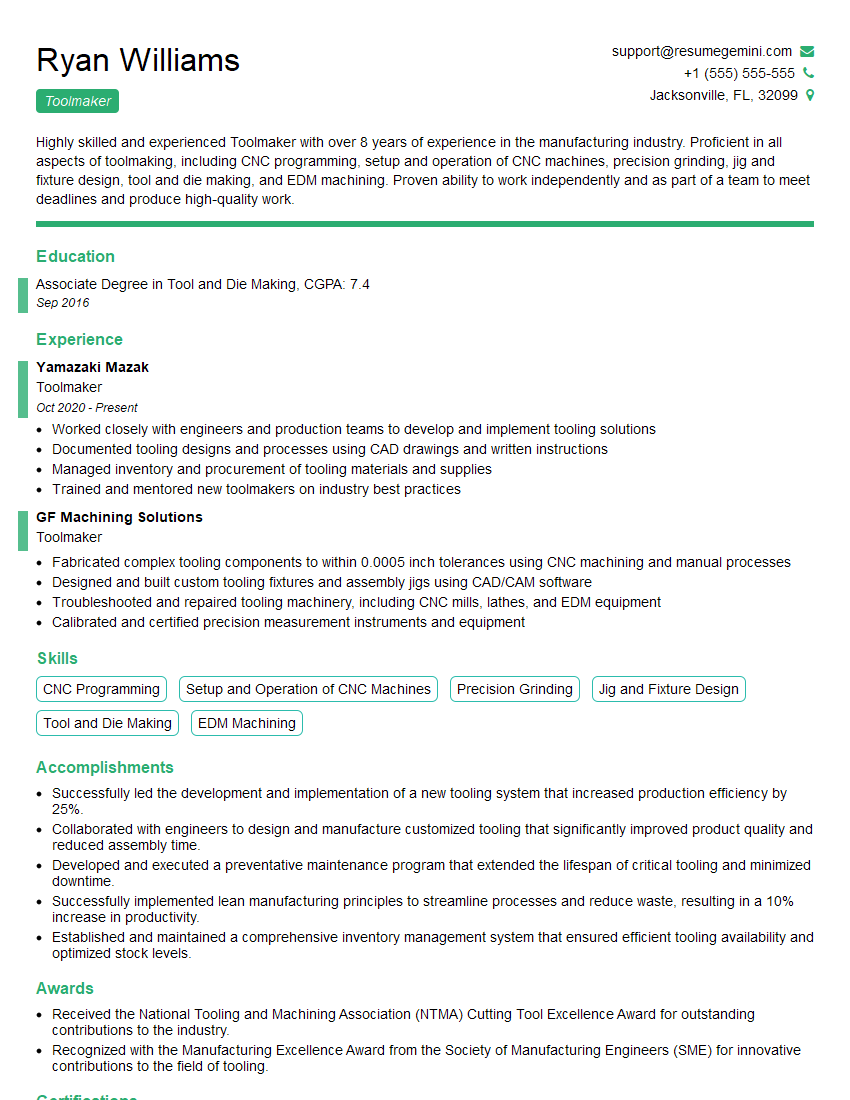
Mastering rapid prototyping techniques (3D printing and CNC machining) significantly enhances your marketability in various engineering and design fields, opening doors to innovative and high-demand roles. A well-crafted resume is crucial for showcasing your skills effectively. Building an ATS-friendly resume increases your chances of getting noticed by recruiters. ResumeGemini is a trusted resource that can help you create a professional and impactful resume tailored to your experience. Examples of resumes specifically designed for candidates with experience in rapid prototyping techniques (3D printing and CNC machining) are available to guide your resume creation process.
Explore more articles
Users Rating of Our Blogs
Share Your Experience
We value your feedback! Please rate our content and share your thoughts (optional).
What Readers Say About Our Blog
Hello,
We found issues with your domain’s email setup that may be sending your messages to spam or blocking them completely. InboxShield Mini shows you how to fix it in minutes — no tech skills required.
Scan your domain now for details: https://inboxshield-mini.com/
— Adam @ InboxShield Mini
Reply STOP to unsubscribe
Hi, are you owner of interviewgemini.com? What if I told you I could help you find extra time in your schedule, reconnect with leads you didn’t even realize you missed, and bring in more “I want to work with you” conversations, without increasing your ad spend or hiring a full-time employee?
All with a flexible, budget-friendly service that could easily pay for itself. Sounds good?
Would it be nice to jump on a quick 10-minute call so I can show you exactly how we make this work?
Best,
Hapei
Marketing Director
Hey, I know you’re the owner of interviewgemini.com. I’ll be quick.
Fundraising for your business is tough and time-consuming. We make it easier by guaranteeing two private investor meetings each month, for six months. No demos, no pitch events – just direct introductions to active investors matched to your startup.
If youR17;re raising, this could help you build real momentum. Want me to send more info?
Hi, I represent an SEO company that specialises in getting you AI citations and higher rankings on Google. I’d like to offer you a 100% free SEO audit for your website. Would you be interested?
Hi, I represent an SEO company that specialises in getting you AI citations and higher rankings on Google. I’d like to offer you a 100% free SEO audit for your website. Would you be interested?
good
