Interviews are more than just a Q&A session—they’re a chance to prove your worth. This blog dives into essential Gluing and Stitching interview questions and expert tips to help you align your answers with what hiring managers are looking for. Start preparing to shine!
Questions Asked in Gluing and Stitching Interview
Q 1. What types of adhesives are suitable for various materials (e.g., leather, fabric, wood)?
Selecting the right adhesive depends heavily on the materials being bonded. Think of it like choosing the right tool for the job – a hammer won’t work for screwing in a screw!
- Leather: Contact cements are excellent for leather because they provide a strong, flexible bond that can withstand stress. Water-based adhesives are also suitable for certain leathers, but might require longer drying times. Avoid adhesives that might damage the leather’s finish.
- Fabric: The best adhesive for fabric depends on the fabric type. For delicate fabrics, a fabric glue stick might be the best option. For heavier fabrics, hot melt adhesives or even a specialized textile adhesive might be needed. Always test on a hidden area first!
- Wood: Wood glues, like PVA (polyvinyl acetate) are widely used for their strength and water resistance. Epoxy resins offer superior strength for demanding applications like furniture making, but can be more challenging to use. The choice will depend on the type of wood, the application (interior vs. exterior), and the desired strength.
In my experience, understanding the material properties – porosity, flexibility, and chemical resistance – is key to choosing the appropriate adhesive. Always test a small, inconspicuous area before committing to a large project.
Q 2. Explain the different types of stitching techniques and their applications.
Stitching techniques are diverse and each serves a specific purpose. Think of them as different brushstrokes in a painting – each adds texture and character.
- Running Stitch: This is the simplest stitch, ideal for quick repairs or basting (temporary stitching). It’s like a quick sketch before the final painting.
- Saddle Stitch: Used for booklet binding, this technique folds the material and stitches through the spine. It’s robust and practical for documents.
- Blind Stitch: Creates an almost invisible seam, great for fine tailoring and upholstery. It’s like a magician’s trick in sewing.
- Overlock Stitch: Often used for finishing seams, preventing fraying. This prevents the ‘unraveling’ of your fabric’s edge.
- Chainstitch: A fast stitch used in industrial settings for sewing multiple layers of fabric efficiently. This is a workhorse of industrial stitching.
The application of each technique varies based on the desired strength, aesthetics, and the material being stitched. For example, a blind stitch would be unsuitable for a heavy-duty canvas bag, whereas an overlock stitch would be essential.
Q 3. How do you ensure consistent adhesive application for large-scale production?
Consistent adhesive application on a large scale requires precision and automation. Imagine trying to paint a whole house by hand versus using a spray painter!
We typically utilize automated dispensing systems: These systems use precise pumps and nozzles to apply a consistent amount of adhesive to the substrate. This helps minimize waste and ensures a uniform bond across all pieces. Some systems even use robotic arms for intricate applications.
Another method is screen printing the adhesive onto the substrate. This allows for precise placement and quantity, particularly useful for complex designs.
Careful monitoring and regular calibration of these machines are crucial to maintain quality and prevent inconsistencies.
Q 4. Describe your experience with different types of stitching machines.
My experience encompasses a range of stitching machines, from simple single-needle machines to complex multi-needle industrial machines. Each has its own strengths and weaknesses.
- Single-needle machines: Versatile for smaller projects and repairs, offering precise control. These are the workhorses of a small tailor shop.
- Multi-needle machines: Ideal for high-speed mass production; they significantly increase output. Think of an assembly line for clothing.
- Post bed machines: Specialised for thicker materials, these machines have a larger work area. They’re ideal for working with heavy-duty materials like leather or canvas.
- Walking-foot machines: These machines ensure even feed of multiple layers of fabric, particularly useful when stitching thick or uneven materials. These help prevent bunching up of material.
My expertise lies in understanding the capabilities of each machine and choosing the right one for the job, optimizing settings for different materials and stitch types.
Q 5. How do you troubleshoot common problems with gluing or stitching equipment?
Troubleshooting gluing and stitching equipment requires a systematic approach. It’s like diagnosing a car problem – you need to check various systems systematically.
Gluing Equipment:
- Uneven Adhesive Application: Check the nozzle, pump pressure, and adhesive viscosity. A clogged nozzle or low pressure could be the culprit.
- Adhesive Curing Issues: Examine temperature and humidity levels; inadequate curing may require adjustments to these factors or the choice of adhesive.
Stitching Equipment:
- Broken Needles: Replace the needle immediately; using a damaged needle can damage the fabric and the machine.
- Skipped Stitches: Check the tension settings, the bobbin, and the needle alignment. Improper tension is a common cause of skipped stitches.
- Machine Jams: Inspect for any obstructions – lint, fabric scraps – and clear them carefully.
Regular maintenance, including cleaning and lubrication, significantly reduces the occurrence of these problems.
Q 6. What are the safety precautions you take when using adhesives and stitching machines?
Safety is paramount in any gluing or stitching operation. Think of it as the golden rule – always prioritize safety.
- Adhesives: Always wear appropriate personal protective equipment (PPE) such as gloves and eye protection to avoid skin and eye irritation. Work in a well-ventilated area to prevent inhaling fumes. Follow the manufacturer’s safety data sheet religiously.
- Stitching Machines: Keep your hands and fingers clear of moving parts. Never reach into a running machine. Regular maintenance of the machine ensures safe operation. Ensure proper training before operating any stitching machinery.
In my experience, a proactive safety approach is crucial. This includes regular machine inspections, proper training for all personnel, and a strict adherence to safety protocols.
Q 7. How do you maintain quality control during the gluing and stitching process?
Maintaining quality control is a multi-faceted process, involving checks at each stage of the production. It’s like quality control in a restaurant – checking ingredients, preparation and the final product.
We implement the following:
- Incoming Material Inspection: Verify the quality of the raw materials to prevent defects from the outset. This includes checks for defects in leather, fabric, or wood.
- In-process Checks: Regular checks of the gluing and stitching processes, ensuring consistent adhesive application and stitch quality. This involves sampling and visually inspecting the work in progress.
- Final Product Inspection: Thorough examination of the finished product for any defects, ensuring it meets the specified standards before it leaves our facility. This often includes automated quality control checks.
- Documentation: Detailed records are maintained for each step of the process, allowing for traceability and problem identification.
By integrating these control measures into every stage of production, we ensure consistent high-quality output and reduce waste.
Q 8. How do you identify and resolve defects in glued or stitched products?
Defect identification and resolution in glued or stitched products requires a systematic approach. It starts with a thorough visual inspection, looking for inconsistencies like gaps, overlaps, misalignments, or weak adhesion in glued areas. In stitching, I’d check for skipped stitches, broken threads, uneven tension, or puckering.
For glued products, I might use a specialized tensile strength tester to measure the bond’s resilience. If a defect is found, I investigate the root cause. Was it improper surface preparation? Incorrect adhesive type or quantity? A machine malfunction?
For stitching defects, I would examine the needle, thread, and machine settings. A dull needle could cause skipped stitches, while improper tension could lead to breakage or puckering. I’d then adjust the machine accordingly, replace components if necessary, and retest.
For example, if I find inconsistent glue adhesion in a shoe, I might check if the surfaces were properly cleaned before gluing and if the correct amount of glue was applied and allowed sufficient drying time. If a seam on a garment is coming apart, I’d inspect the stitching pattern, thread quality, and the machine’s settings for tension and stitch length. Addressing the root cause is crucial for preventing future defects.
Q 9. Describe your experience with different types of needles and threads.
My experience encompasses a wide range of needles and threads. Needles vary greatly by size (denoted by numbers, smaller numbers indicating finer needles), type (sharps, ballpoints, embroidery needles), and material (steel, titanium). The choice depends on the fabric and stitching application. For example, delicate fabrics like silk require fine, sharp needles to prevent snags, while heavier materials may necessitate a sturdier needle. Ballpoint needles are best for synthetic fabrics to prevent piercing the fibers.
Threads also vary in material (cotton, polyester, silk, nylon), thickness (denier), and ply (number of strands twisted together). Polyester is a popular choice for its strength and durability. Cotton provides a softer feel, while silk offers a luxurious look. The thread’s properties must complement the fabric and needle. For instance, using a heavy-duty thread with a fine needle on a light fabric will lead to broken needles and uneven stitching. I’ve worked with various specialized threads, including elastic thread for stretch fabrics and decorative threads for embroidery.
Q 10. What are the best practices for preparing materials before gluing and stitching?
Proper material preparation is fundamental for successful gluing and stitching. For gluing, this involves cleaning the surfaces to be bonded. This often means removing dirt, grease, or old adhesive residue using appropriate solvents or cleaning agents. Surfaces must also be dry and free of any contaminants. Certain materials might require specific treatments, like roughening up smooth surfaces for better adhesion.
For stitching, fabric preparation is key. This may include pre-washing the fabric to prevent shrinkage after stitching, pressing the seams to ensure neatness, and marking precise cutting lines. Using a rotary cutter ensures accuracy, unlike scissors. Proper alignment of fabric pieces is important to avoid misalignments and ensure strong stitching.
A real-world example: When assembling a leather bag, I meticulously clean the leather pieces with a specialized cleaner before applying adhesive. Any residue could affect the bond’s strength. Similarly, before stitching a tailored shirt, I press the cut fabric pieces to make sure the stitching is smooth and even. These preparations significantly impact the final product’s quality and durability.
Q 11. How do you determine the appropriate amount of adhesive to use for a given application?
Determining the appropriate adhesive quantity depends on several factors: the type of adhesive, the materials being joined, the surface area, and the desired bond strength. Too little adhesive results in weak bonds, while too much can lead to excess residue, messy joints, or weakened adhesion.
I typically follow the manufacturer’s recommendations on the adhesive packaging. However, I also consider the materials’ porosity and surface texture. Porous materials require more adhesive as it will be absorbed. The application method also influences the amount used. For example, applying adhesive with a precise applicator allows better control compared to simply spreading a large quantity.
In practice, I might start with a small test application to determine the optimal amount. I might apply the adhesive, allow it to set, and then test the bond’s strength. I adjust the adhesive amount based on the outcome of the test. This method ensures both a strong and efficient use of adhesive.
Q 12. What are the different types of glues and their properties?
Numerous glues exist, each with unique properties.
- Cyanoacrylate (Super Glue): Sets quickly, offering strong bonds on various materials. However, it’s brittle and sensitive to moisture.
- Epoxy Resins: Two-part adhesives that cure to form extremely strong bonds, ideal for high-stress applications. They have longer curing times.
- Polyurethane Adhesives: Offer excellent adhesion to various substrates, including porous materials. They are flexible and resistant to moisture.
- Hot Melt Adhesives: Applied in molten form, they cool and solidify rapidly. They are simple to use but may not provide as strong a bond as other types.
- Water-Based Adhesives: Environmentally friendly, they offer decent adhesion but typically require longer drying times.
The selection of glue depends on the application. For example, super glue is suitable for minor repairs, while epoxy resin is ideal for structural bonding. Water-based adhesives are better suited for applications where environmental friendliness is paramount.
Q 13. How do you clean and maintain different types of stitching machines?
Cleaning and maintaining stitching machines is essential for their longevity and operational efficiency. The process varies depending on the machine type, but generally involves these steps:
- Regular Cleaning: Removing lint, dust, and thread clippings from the bobbin area, feed dogs, and shuttle mechanism using a brush or compressed air. This prevents jamming and ensures smooth operation.
- Lubrication: Applying appropriate lubricating oil to moving parts as recommended by the manufacturer. This reduces friction and wear.
- Needle Replacement: Regularly changing needles, especially when they become bent or dull, which prevents skipped stitches and thread breakage.
- Tension Adjustment: Regularly checking and adjusting thread tension to ensure consistent stitching quality. Tension that’s too tight or too loose will impact the stitching quality.
- Bobbin Maintenance: Cleaning and re-winding bobbins regularly to prevent lint build-up and ensure smooth feeding of the lower thread.
Ignoring regular maintenance can lead to machine malfunction, poor stitching quality, and ultimately, costly repairs. Regular servicing by a professional is highly recommended, especially for industrial machines.
Q 14. Describe your experience with hand-stitching techniques.
My hand-stitching experience includes various techniques, from basic running stitches to more intricate embroidery stitches. Running stitch is a simple, quick stitch useful for basting or mending. Backstitch is more durable and creates a stronger seam, while satin stitch is used for filling in areas with smooth, even coverage. I’m also proficient in blanket stitch, used for neatening fabric edges, and cross-stitch, a popular embroidery technique.
Hand-stitching requires dexterity, precision, and patience. The choice of stitch depends on the project’s requirements. For instance, a delicate garment might require fine, invisible stitches, while a heavier fabric bag could benefit from strong, visible stitching. I’ve used hand-stitching for mending clothes, creating custom embroidery designs, and repairing leather goods, showcasing its versatility.
A personal example: I once hand-stitched a decorative patch onto a denim jacket, choosing a contrasting thread to create a visually appealing design. The patience involved and the satisfaction of creating something unique by hand are unmatched.
Q 15. What is your experience with different types of fabric and their suitability for gluing and stitching?
My experience with various fabrics spans over a decade, encompassing natural fibers like cotton, linen, silk, and wool, as well as synthetics such as polyester, nylon, and blends. Each fabric presents unique challenges and opportunities for gluing and stitching. For example, natural fibers often absorb adhesives differently than synthetics, requiring adjustments in the application technique and adhesive type. Woven fabrics, with their interlacing structure, handle stitching differently than knitted fabrics, which have a more pliable and potentially stretchy nature.
Suitability Considerations:
- Cotton: Highly versatile, glues and stitches well, but can be prone to fraying.
- Linen: Strong and durable, but can be stiff and require careful handling during stitching to avoid puckering.
- Silk: Delicate and requires specialized adhesives and gentle stitching techniques.
- Polyester: Durable and resists stretching, suitable for both gluing and stitching, but may be less breathable.
- Nylon: Strong and resistant to wear, ideal for high-stress areas, but can be difficult to stitch unless the correct needle and thread are used.
Understanding a fabric’s weave, fiber type, and drape is critical in choosing the appropriate adhesive and stitching method for optimal results. I always conduct preliminary tests on fabric samples before tackling a large project.
Career Expert Tips:
- Ace those interviews! Prepare effectively by reviewing the Top 50 Most Common Interview Questions on ResumeGemini.
- Navigate your job search with confidence! Explore a wide range of Career Tips on ResumeGemini. Learn about common challenges and recommendations to overcome them.
- Craft the perfect resume! Master the Art of Resume Writing with ResumeGemini’s guide. Showcase your unique qualifications and achievements effectively.
- Don’t miss out on holiday savings! Build your dream resume with ResumeGemini’s ATS optimized templates.
Q 16. Explain the importance of proper surface preparation before applying adhesive.
Proper surface preparation is paramount for achieving strong, lasting bonds in both gluing and stitching. Think of it like building a house – you wouldn’t build on a shaky foundation! An unclean or uneven surface will compromise the adhesive’s hold and potentially weaken the stitching.
My preparation process includes:
- Cleaning: Removing dirt, dust, oil, or any other residue from the fabric surfaces using a suitable cleaner. For delicate fabrics, a gentle dry brushing might suffice.
- Pre-treatment: Depending on the fabric type, this might involve pre-washing to remove sizing or finishes that could interfere with adhesion.
- Drying: Thoroughly drying the fabric before applying adhesive is essential to ensure proper adhesion. Damp fabrics can hinder adhesion and potentially cause mold or mildew.
- Surface Leveling: For uneven fabrics, pressing or ironing might be necessary to create a smooth, consistent surface. This is particularly important when using precise stitching techniques or working with delicate materials.
Ignoring this step often leads to adhesive failure and stitching issues such as skipped stitches or broken threads. I have learned from experience that this investment in preparation time saves significantly on rework and ensures a high-quality finished product.
Q 17. How do you handle different types of fabric tensions during stitching?
Managing fabric tension during stitching is crucial to prevent puckering, distortion, or uneven seams. Different fabrics have varying degrees of stretch and recovery, necessitating adaptive techniques.
Strategies I Employ:
- Tension Control on the Sewing Machine: Adjusting the machine’s tension settings based on fabric type and thickness ensures consistent stitch formation and prevents breakage. For stretchy fabrics, a slightly looser tension might be needed.
- Pre-shrinking: Pre-shrinking the fabric before stitching minimizes the risk of shrinkage after the project is completed.
- Seam Allowances: Strategic seam allowances accommodate fabric stretch and provide enough room for comfortable stitching without causing excessive strain.
- Stabilizing Techniques: For particularly stretchy or delicate fabrics, I often use interfacing or other stabilizing materials to provide extra support during stitching. This prevents stretching or distortion of the fabric during the process.
- Hand Stitching for Delicates: Hand-stitching can offer more control over tension, particularly beneficial for delicate materials where machine stitching could damage the fabric.
For instance, when stitching a stretchy jersey knit, I’d use a ballpoint needle and a walking foot on my machine, adjusting the tension to prevent puckering. Conversely, stitching a crisp linen requires careful attention to consistent tension to prevent breaking the needle or pulling the fabric.
Q 18. How do you calculate the stitching length or stitch density for a specific project?
Calculating stitch length and density depends greatly on the project’s requirements, the fabric’s weight and type, and the desired aesthetic effect.
Factors Affecting Stitch Length/Density:
- Fabric Weight: Heavier fabrics generally require longer stitches to prevent breakage, while lighter fabrics can tolerate shorter stitches for a denser seam.
- Project Type: A decorative stitch might need a different density than a purely functional seam. A decorative seam for a visible part of a garment could even be hand-stitched for extra visual appeal.
- Stress Points: Areas under higher stress, like seams in bags or clothing, will need a higher stitch density to ensure longevity. This could include doubling the stitching or using reinforced stitching.
Practical Example: For a sturdy tote bag made from canvas, I’d choose a longer stitch length (e.g., 3-4 mm) for the main seams, but a shorter, denser stitch (e.g., 2 mm) for stress points like the handles or base.
There are no hard and fast rules, but experimentation and understanding the properties of the materials are key to getting the right balance between appearance and durability.
Q 19. What methods do you use to ensure the even distribution of adhesive?
Even adhesive distribution is critical to avoid weak spots or excessive build-up that could compromise the final product’s appearance. This requires understanding both the adhesive’s characteristics and the fabric’s properties.
Methods I Use:
- Controlled Application: I typically use a notched applicator or a thin spatula to apply a consistent, thin layer of adhesive. The amount of adhesive used should be minimal, focusing on even coverage rather than excessive application.
- Spreading Techniques: For larger areas, I may use a roller or a soft brush to distribute the adhesive evenly. This approach minimizes adhesive pooling or clumping.
- Open Time Consideration: I carefully observe the adhesive’s “open time” – the time it remains workable before bonding – allowing sufficient time to align the fabric pieces for bonding. This prevents the glue from setting too quickly.
- Test Runs: On complex projects, a test run helps to determine the optimal adhesive quantity and application technique before committing to the final product.
For instance, with a fabric like velvet, I would carefully apply a thin layer of adhesive to avoid damaging its delicate nap. Conversely, thicker fabrics may necessitate a slightly more generous application, but maintaining an even coating remains the key goal.
Q 20. How do you ensure the durability and longevity of your glued and stitched products?
Durability and longevity are ensured through careful attention to detail in every stage of the process, from fabric selection to finishing techniques.
Key Strategies:
- Appropriate Adhesive Selection: Choosing an adhesive specifically designed for the fabric type and intended application is vital. The adhesive’s bonding strength, flexibility, and resistance to factors such as washing or environmental exposure are key considerations.
- Reinforcement Techniques: In high-stress areas, reinforcing the seam with additional stitching or interfacing can dramatically increase durability. For instance, reinforcing the seams of a bag with stitching will prevent them from ripping over time.
- Finishing Touches: Properly finishing the edges of the fabric before gluing or stitching helps prevent fraying and enhances the product’s overall longevity. This might involve techniques like serging, pinking, or applying a sealant.
- Quality Control: A thorough inspection of the finished product ensures that all seams are secure and that there are no loose threads or weak spots. This includes checking seams for tension and strength, ensuring the glue is applied evenly and the project is made according to the desired quality standards.
By focusing on these aspects, I can ensure that my glued and stitched products can withstand everyday use and retain their quality for an extended period.
Q 21. Describe your experience with using different types of patterns and templates.
My experience with patterns and templates is extensive. I’ve worked with both commercially produced patterns and created my own, adapting them to suit different fabric types and project requirements.
Pattern & Template Usage:
- Commercial Patterns: I use these as a starting point, often modifying them based on the fabric chosen. For instance, I’d adjust seam allowances for stretchy fabrics and consider how a pattern designed for woven fabrics should be modified for knit fabrics.
- Custom Patterns: When working on unique designs, I create my own patterns using software like Adobe Illustrator or by creating paper templates from scratch. This level of control is essential for complex projects or projects that utilize unconventional shapes.
- Template Materials: I choose the template material based on the project’s intricacy and scale. I use paper for straightforward projects, and for more precise work or larger projects I might use plastic or even metal templates for repeatability.
- Adapting Patterns: I often adapt patterns, altering them to account for different fabric widths, desired dimensions, or styling choices. This involves skills in pattern drafting and cutting to ensure a proper fit and balance.
For example, while working on a custom-designed pillow cover, I used a computer-aided design (CAD) software to create the pattern, then used a laser cutter to cut the template from acrylic, resulting in precision and efficiency.
Q 22. What are the signs of a weak glue bond or a poorly stitched seam?
Identifying a weak glue bond or poorly stitched seam requires a keen eye and understanding of the materials involved. A weak glue bond might manifest as:
- Visible gaps or cracks along the glued joint. Think of trying to glue two pieces of wood – if you see daylight between them, the bond is compromised.
- Easy separation of the joined materials with minimal force. If you can easily pull apart two glued surfaces, the adhesive hasn’t done its job.
- Uneven surface around the joint. A bumpy or inconsistent surface suggests inadequate adhesive application or improper pressure during curing.
- Brittle bond that easily breaks or crumbles under stress. This could be due to incorrect adhesive selection or improper curing conditions.
Similarly, a poorly stitched seam might show:
- Loose stitches that can be easily pulled out. This points to inadequate tension during stitching.
- Uneven stitch length or inconsistent spacing. This indicates inconsistent technique or faulty equipment.
- Puckering or bunching of the fabric near the seam. This suggests insufficient tension or improper material handling.
- Broken or damaged thread along the seam. This is a clear sign of strain and potential failure.
In both cases, thorough inspection under good lighting is crucial for detection. Sometimes, a slight flexing of the joint can reveal weakness not immediately apparent.
Q 23. What is your experience with automated gluing and stitching systems?
My experience with automated gluing and stitching systems spans several years and includes working with various brands and models. I’m proficient in operating and maintaining both high-speed and precision automated systems. This includes:
- Programming and setup of automated gluing heads for different adhesive types and application patterns. This often involves adjusting parameters such as nozzle size, flow rate, and pressure to optimize the bonding process.
- Calibration and maintenance of stitching machines, including needle adjustments, thread tension regulation, and preventative maintenance procedures to ensure consistent stitch quality and operational efficiency.
- Troubleshooting malfunctions and resolving technical issues that may arise during operation. This frequently involves diagnostics and repairs to ensure minimal downtime.
- Integration with other automated systems, such as conveyor belts and robotic arms, to create an efficient and streamlined production line.
For example, I successfully implemented an automated system for gluing and stitching shoe uppers, leading to a 30% increase in production throughput with improved consistency in the final product. This involved careful selection of the automated system, meticulous programming, and ongoing monitoring to prevent defects.
Q 24. How do you adapt to different types of projects or customer specifications?
Adaptability is key in gluing and stitching. I approach different projects by first thoroughly understanding the customer’s specifications and the properties of the materials involved. This includes:
- Material analysis to determine the appropriate adhesive or thread type. Different materials require different adhesives; for instance, a strong epoxy might be needed for metal, whereas a water-based adhesive might be suitable for paper.
- Design review to identify potential challenges and develop strategies to mitigate them. This might involve adjustments to the design to enhance the bond strength or reduce stitching complexity.
- Trial runs and testing to optimize the process and ensure quality. This is a critical step to refine the parameters, material combinations and methods.
- Documentation of the process for future reference and reproducibility. This ensures consistency across multiple projects.
For instance, transitioning from stitching leather to a lightweight synthetic fabric required adjusting the stitching tension and needle type to prevent fabric damage while maintaining seam strength. Careful planning and testing were vital for a successful outcome.
Q 25. What are the most common challenges you have encountered in gluing and stitching?
The most common challenges I’ve encountered include:
- Inconsistent material properties: Variations in the thickness, density, or surface finish of materials can significantly impact glue adhesion and stitch quality. A solution might be to pre-treat materials to ensure consistency or to select adhesives that are less sensitive to variations.
- Improper adhesive application: Inadequate pressure, insufficient drying time, or incorrect adhesive distribution can result in weak bonds. Careful training of personnel and precise equipment calibration help to resolve these issues.
- Thread breakage: Using incorrect thread for material or improper tension settings can lead to thread breaks. Selecting the correct thread type, managing tension correctly, and conducting routine machine maintenance are key solutions.
For example, a project using a new adhesive faced challenges due to its sensitivity to humidity. By carefully controlling the humidity in the workspace and adjusting the curing time, we successfully resolved the issue and achieved high-quality bonds.
Q 26. Describe your experience with quality control processes and documentation.
Quality control and documentation are paramount in my work. My experience encompasses:
- Regular inspections at various stages of the production process to identify and address defects early. This includes visual inspections, using measuring tools to assess tolerances, and sometimes employing specialized testing equipment to assess bond strength.
- Statistical process control (SPC) techniques for monitoring process parameters and identifying trends that might signal impending problems. This involves using charts and other analytical methods to manage quality.
- Detailed documentation of all procedures, material specifications, equipment settings, and test results. This allows for repeatability, traceability and improvement.
- Maintaining accurate records of material usage, production output, and defect rates to track efficiency and identify areas for improvement. This might involve the use of dedicated software or spreadsheets to keep a detailed history.
We use a detailed checklist to ensure every glue joint and stitch is checked against pre-defined standards. Any deviation is carefully documented, enabling us to analyze root causes and implement corrective actions.
Q 27. How do you prioritize tasks and manage your time effectively in a fast-paced production environment?
In a fast-paced environment, effective task prioritization and time management are vital. My approach involves:
- Prioritizing tasks based on urgency and importance using methods like the Eisenhower Matrix (urgent/important). This ensures that critical tasks are addressed first.
- Breaking down large tasks into smaller, manageable steps to improve focus and tracking progress.
- Utilizing project management tools to track deadlines and allocate resources effectively. This might involve using software to schedule tasks, track progress, and allocate team members’ time.
- Effective communication and collaboration with team members to ensure coordinated efforts and avoid delays. Regular communication prevents unnecessary delays or conflicts.
I regularly review my schedule and adjust priorities as needed, ensuring flexibility to adapt to unexpected changes or delays. For instance, during a particularly busy period, I successfully prioritized urgent customer orders, ensuring timely delivery while also maintaining quality standards.
Q 28. How do you stay updated on the latest techniques and technologies in gluing and stitching?
Staying current in this field requires continuous learning. My strategies include:
- Attending industry conferences and workshops to learn about new technologies, techniques, and best practices. This provides opportunities to hear presentations and network with other experts.
- Reading industry publications and journals to stay informed on recent advancements and research findings. This provides an insight into emerging trends and new applications.
- Participating in online forums and communities to engage with other professionals and share knowledge. This allows for a broader perspective and problem-solving opportunities.
- Seeking out training opportunities offered by equipment manufacturers or industry associations to enhance technical skills. This focused learning develops advanced skills in specific areas.
Recently, I completed a course on advanced adhesive technologies, which significantly improved my ability to select and apply the best adhesive for different projects. I actively seek opportunities to update my skill set to remain competitive.
Key Topics to Learn for Gluing and Stitching Interview
- Adhesive Selection: Understanding different adhesive types (e.g., epoxy, cyanoacrylate, hot melt) and their properties, including bonding strengths, curing times, and suitability for various materials. Consider factors like temperature resistance and flexibility.
- Surface Preparation: Mastering techniques for preparing surfaces for optimal adhesion, including cleaning, degreasing, and roughening. Discuss the impact of surface irregularities on bond strength.
- Joint Design: Analyzing different joint types (e.g., lap, butt, scarf) and their strengths and weaknesses. Explore how joint design influences the overall strength and durability of the glued assembly.
- Stitching Techniques: Familiarize yourself with various stitching methods (e.g., saddle stitch, blind stitch, running stitch) and their appropriate applications. Understand stitch density and its effect on strength and aesthetics.
- Material Compatibility: Knowing which adhesives and stitching methods are compatible with different materials (e.g., leather, fabric, wood, plastics). Be prepared to discuss potential challenges and solutions.
- Quality Control and Inspection: Understanding methods for inspecting glued and stitched joints for defects, such as voids, gaps, or weak bonds. Discuss common quality control measures and their importance.
- Troubleshooting: Developing problem-solving skills to identify and address common issues in gluing and stitching processes, such as adhesive failure or stitch breakage. Consider the role of environmental factors.
- Safety Procedures: Familiarity with safety protocols and best practices related to handling adhesives and using stitching equipment. Highlight the importance of personal protective equipment (PPE).
Next Steps
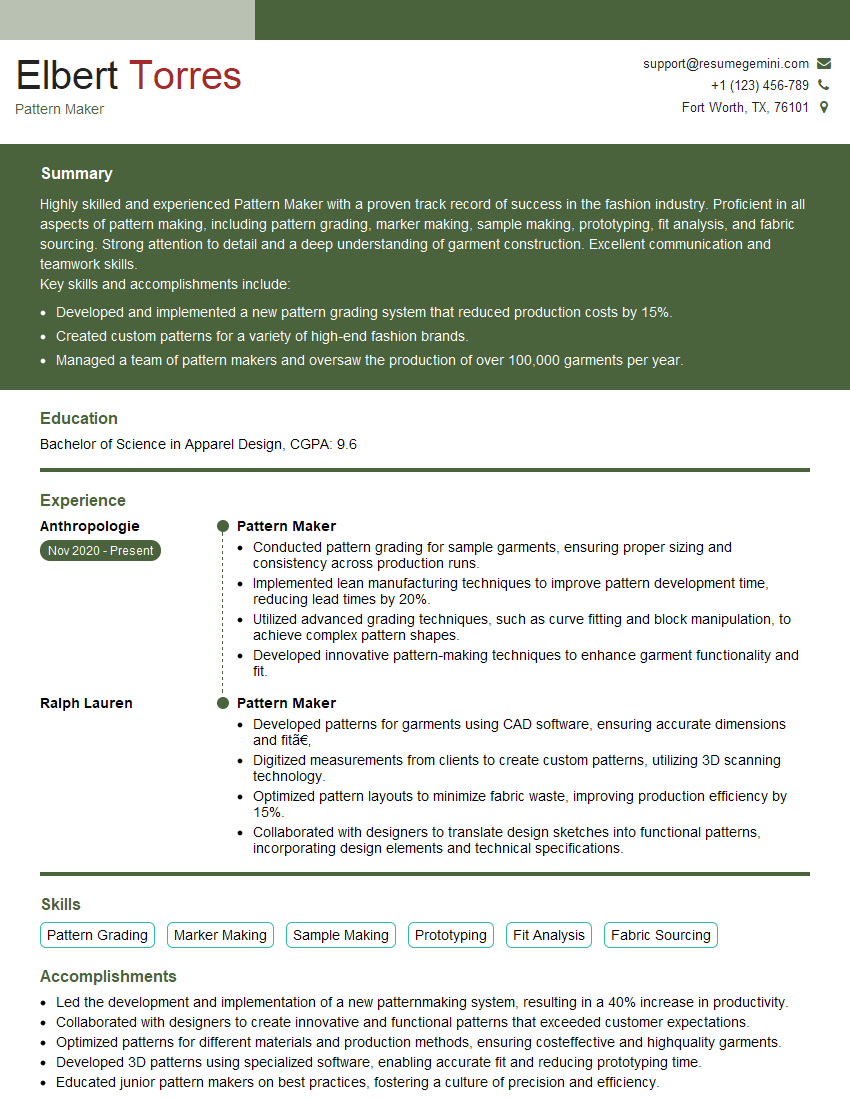
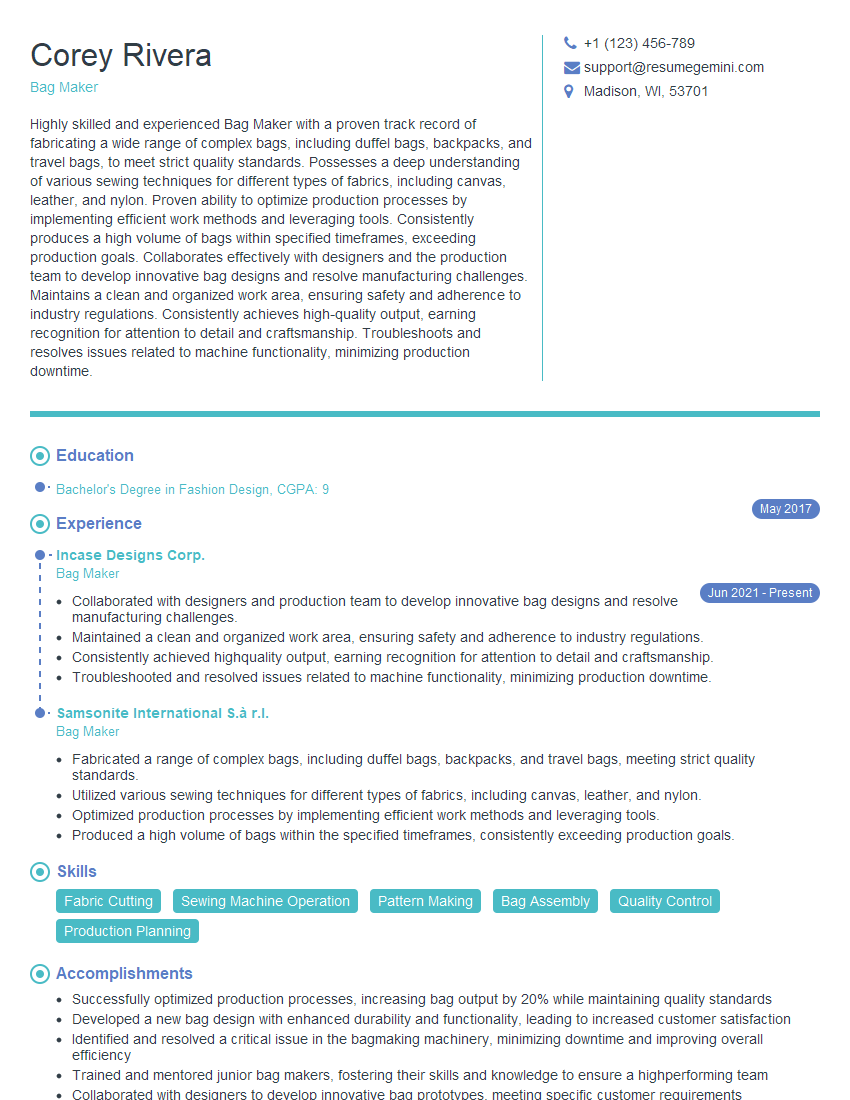
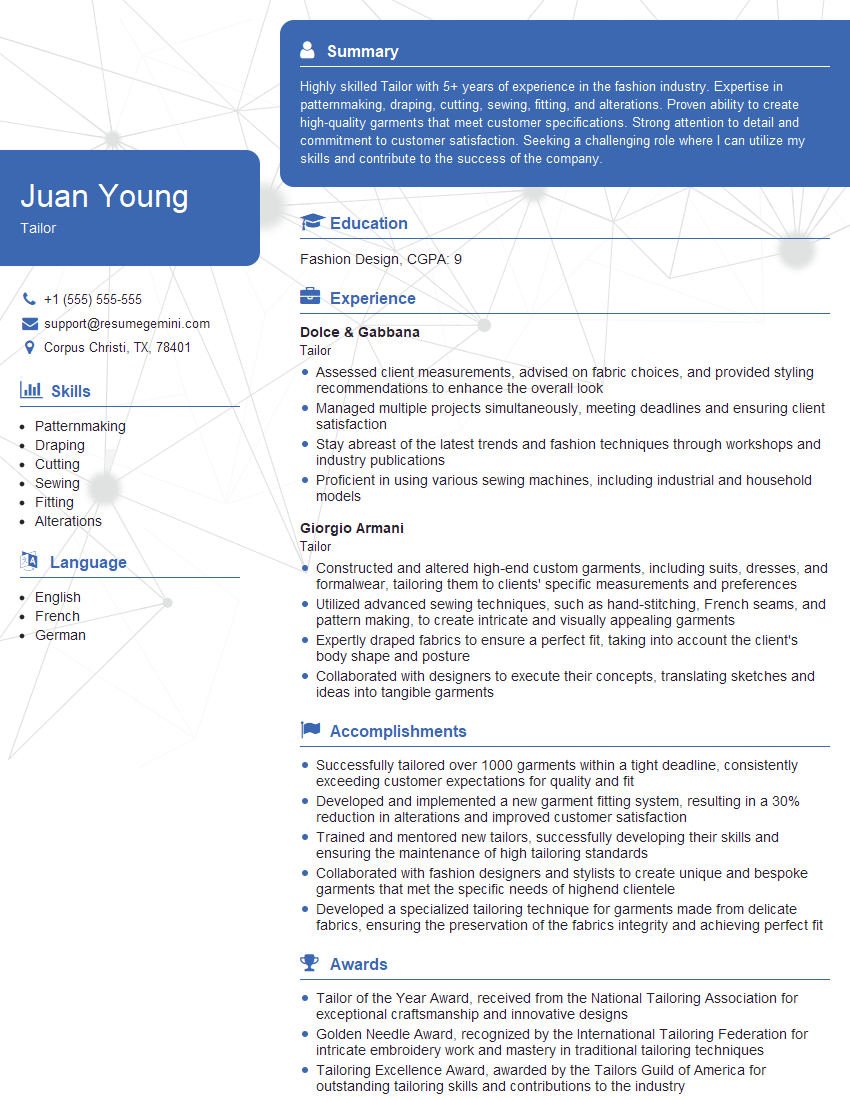
Mastering gluing and stitching techniques is crucial for career advancement in many manufacturing and production roles. A strong understanding of these skills demonstrates your practical abilities and attention to detail, making you a valuable asset to any team. To increase your job prospects, creating an ATS-friendly resume is essential. ResumeGemini is a trusted resource to help you build a professional resume that highlights your skills effectively. We provide examples of resumes tailored to Gluing and Stitching to help you get started.
Explore more articles
Users Rating of Our Blogs
Share Your Experience
We value your feedback! Please rate our content and share your thoughts (optional).
What Readers Say About Our Blog
Hello,
We found issues with your domain’s email setup that may be sending your messages to spam or blocking them completely. InboxShield Mini shows you how to fix it in minutes — no tech skills required.
Scan your domain now for details: https://inboxshield-mini.com/
— Adam @ InboxShield Mini
Reply STOP to unsubscribe
Hi, are you owner of interviewgemini.com? What if I told you I could help you find extra time in your schedule, reconnect with leads you didn’t even realize you missed, and bring in more “I want to work with you” conversations, without increasing your ad spend or hiring a full-time employee?
All with a flexible, budget-friendly service that could easily pay for itself. Sounds good?
Would it be nice to jump on a quick 10-minute call so I can show you exactly how we make this work?
Best,
Hapei
Marketing Director
Hey, I know you’re the owner of interviewgemini.com. I’ll be quick.
Fundraising for your business is tough and time-consuming. We make it easier by guaranteeing two private investor meetings each month, for six months. No demos, no pitch events – just direct introductions to active investors matched to your startup.
If youR17;re raising, this could help you build real momentum. Want me to send more info?
Hi, I represent an SEO company that specialises in getting you AI citations and higher rankings on Google. I’d like to offer you a 100% free SEO audit for your website. Would you be interested?
Hi, I represent an SEO company that specialises in getting you AI citations and higher rankings on Google. I’d like to offer you a 100% free SEO audit for your website. Would you be interested?
good
