The right preparation can turn an interview into an opportunity to showcase your expertise. This guide to Collar Pressing interview questions is your ultimate resource, providing key insights and tips to help you ace your responses and stand out as a top candidate.
Questions Asked in Collar Pressing Interview
Q 1. What types of collars are most challenging to press and why?
The most challenging collars to press are often those with intricate designs, such as those with multiple layers, high stands, or pointed shapes. For example, a wingtip collar requires precise pressing to maintain its sharp points and avoid unwanted creases. Similarly, a cutaway collar’s dramatic angles demand careful attention to prevent distortion. The difficulty stems from the increased precision needed to manipulate the fabric without causing unwanted impressions or damaging the delicate construction. A poorly pressed collar, regardless of its style, can detract significantly from the overall appearance of a garment, highlighting the importance of skill and experience.
- Intricate Designs: Multiple layers and complex stitching patterns.
- High Stands: Requires maintaining a consistent height without creating creases.
- Sharp Points: Precise manipulation is needed to avoid dulling the points or creating asymmetry.
Q 2. Explain your experience with different types of pressing equipment.
My experience encompasses a wide range of pressing equipment, from traditional steam irons to professional-grade industrial presses. I’m proficient in using both hand-held irons with various settings and specialized collar pressing tools, including clapper boards and tailors’ ham. I’ve also worked with industrial steam presses capable of handling large quantities of garments efficiently. Each tool offers unique advantages and requires different techniques. For instance, the precision of a clapper board is crucial for creating crisp edges on delicate collars, while an industrial press provides consistent pressure for higher volume and more robust fabrics. Understanding the capabilities of each tool is key to achieving optimal results and efficiency.
Q 3. Describe your process for pressing a dress shirt collar.
My process for pressing a dress shirt collar begins with careful inspection for any existing wrinkles or creases. I then spritz the collar lightly with water or steam to relax the fibers. Next, I use a tailor’s ham to provide a curved support that mirrors the collar’s shape, distributing the pressure evenly and preventing distortion. Using a pressing cloth to protect the fabric, I gently press the collar from the underside, working from the center outward towards the points. For sharp points, I might employ a clapper to set the shape while the fabric is still warm. The entire process involves gentle, controlled movements to avoid leaving creases or imprints. This method ensures a smooth, clean, and perfectly shaped collar every time.
Q 4. How do you identify and address common collar pressing issues (e.g., wrinkles, creases)?
Identifying and addressing collar pressing issues requires a keen eye for detail. Wrinkles are often caused by uneven pressure or insufficient moisture. I remedy this by re-dampening the area and pressing it carefully. Creases are usually a result of incorrect placement on the ironing surface or excessive pressure in one area. I address creases by re-pressing the collar using a tailor’s ham for even distribution of heat and pressure. Sometimes, shiny marks indicate the iron was too hot or was left in one spot for too long. In such cases, I use a lower temperature and more gentle pressure. Understanding the cause of the issue – be it lack of moisture, pressure, or temperature control – is crucial for finding the appropriate solution. Experience plays a significant role in quickly identifying and addressing these issues.
Q 5. What fabrics require special care during collar pressing?
Certain fabrics require special care during collar pressing to prevent damage or shrinkage. For example, linen requires more moisture and careful handling, as it can wrinkle easily. Silk needs low heat settings and a protective pressing cloth. Wool should be pressed with low heat to prevent scorching. The key is to know the fabric’s properties – its heat resistance, tendency to wrinkle, and susceptibility to water – and adjust the pressing techniques accordingly. Using the correct temperature and pressure, along with a protective cloth where necessary, are crucial for achieving excellent results without causing damage.
Q 6. How do you maintain the sharpness of collar points?
Maintaining the sharpness of collar points involves several key techniques. Using a clapper after pressing helps set the shape while the fabric is still warm. For exceptionally sharp points, I may use a point presser tool. The use of a tailor’s ham is paramount for shaping and supporting the collar, helping to prevent the points from becoming dull or rounded. It’s all about controlled heat, pressure, and support during the pressing process. Precision and attention to detail are paramount. I often use a combination of techniques to ensure the crisp, perfectly-defined points that are hallmark of professional-grade collar pressing.
Q 7. How do you prevent collar shrinkage or damage during pressing?
Preventing collar shrinkage or damage involves several steps. Always use the appropriate temperature setting for the fabric, referring to the garment’s care label if necessary. Use a pressing cloth to protect delicate fabrics. Avoid excessive pressure or leaving the iron in one place for too long. Always press from the underside of the collar, unless otherwise specified for the particular fabric. Following these guidelines ensures that the collar retains its shape and integrity while preserving the quality of the garment. Experience helps develop an instinctive understanding of the pressure, heat, and moisture balance required for different fabrics.
Q 8. Describe your experience using different types of pressing cloths.
My experience with pressing cloths is extensive, encompassing a wide range of materials tailored to different fabric types. I regularly use cotton press cloths for their absorbency and versatility, particularly with delicate fabrics like silk or linen. For heavier fabrics like wool or denim, I often opt for a heavier-weight canvas or even a slightly dampened towel to distribute the heat and pressure evenly. Pressing cloths made from silicone-coated materials are also valuable, as they prevent shine and provide a smooth finish, especially important on dark-colored garments. The choice of cloth is a crucial step in achieving the desired result—preventing shine or creating crispness, depending on the fabric and desired outcome.
- Cotton: Best for most fabrics, providing excellent absorbency and preventing shine.
- Canvas: Ideal for heavier fabrics, distributing heat evenly and preventing imprints.
- Silicone-coated: Prevents shine and creates a smooth finish, particularly effective on dark-colored garments.
Q 9. What are the temperature settings for various fabrics during collar pressing?
Temperature settings for collar pressing are crucial and highly dependent on the fabric composition. It’s essential to always test a hidden seam area first to avoid damage.
- Cotton: Medium to high heat (around 300-400°F, depending on the thickness and weave).
- Linen: Medium heat (around 250-350°F). Linen can be more prone to scorching.
- Silk: Low heat (around 200-250°F) with a press cloth, or ideally, steam-only pressing.
- Wool: Low to medium heat (around 250-300°F) with a press cloth, using steam gently to avoid matting.
- Synthetic Fabrics (Polyester, Rayon): Low to medium heat (around 250-300°F). Too much heat can melt synthetic fibers.
Always use a heat-resistant pressing cloth and avoid direct contact with the iron on delicate fabrics.
Q 10. How do you ensure consistent collar pressing quality in high-volume production?
Maintaining consistent quality in high-volume production requires a systematic approach. This starts with standardized procedures and properly trained staff. We use jigs or collar forms to ensure consistent shape and prevent distortion. Quality control checks at each stage are critical, from initial pressing to final inspection. Regular equipment maintenance, such as cleaning and calibration of the iron and press, is vital to avoid inconsistent results. Furthermore, a well-defined workflow, clear instructions, and a focus on ergonomic practices improve efficiency and reduce errors.
Think of it like an assembly line—each step needs to be perfected and consistently repeated for optimal output. This includes regular recalibration of machinery to guarantee even heat distribution and pressure.
Q 11. Explain the importance of using proper pressing techniques.
Proper pressing techniques are paramount for achieving a high-quality, professional finish. Using the wrong technique can lead to wrinkles, creases, shine, or even fabric damage. Key aspects include using the correct amount of pressure, maintaining consistent temperature, employing appropriate steam levels, and knowing when to lift and press as opposed to dragging the iron.
- Pressure: Too little pressure won’t smooth out wrinkles, while too much pressure can crush the fabric.
- Steam: Steam helps to relax fibers, making pressing more effective, but too much moisture can lead to watermarks.
- Direction: Pressing in the direction of the fabric grain helps to prevent distortion.
Think of it like sculpting clay—gentle, controlled pressure and the right tools are crucial for achieving the perfect shape.
Q 12. How do you handle collars with intricate details or designs?
Collars with intricate details require a more nuanced approach. I often use specialized tools like tailor’s ham or sleeve board to support the collar and provide a three-dimensional surface for pressing. For delicate embellishments like embroidery or beading, I use a press cloth or even a thin layer of tissue paper to protect the design. The goal is to carefully press the base fabric without damaging the intricate design. Patience and precision are essential.
Imagine pressing a delicate lace collar; you’d need to carefully maneuver the iron to avoid damaging the lace. This requires a delicate touch and a keen eye for detail.
Q 13. Describe your method for pressing collars with interfacing.
Pressing collars with interfacing requires careful attention to prevent the interfacing from showing through or causing unwanted texture. I generally press the interfacing into the fabric before attaching it to the collar. Then, after the collar is constructed, I press from the wrong side, using a press cloth, focusing on even pressure to avoid leaving impressions. The key is to be gentle and avoid excessive heat, which could cause the interfacing to melt or warp.
Think of the interfacing as the supporting structure—you want it to be secure but not noticeable. Careful and strategic pressing ensures this outcome.
Q 14. What safety measures do you take when operating pressing equipment?
Safety is paramount when using pressing equipment. I always ensure the work area is well-ventilated to avoid inhaling excessive steam. The iron and pressing equipment should be placed on a stable surface to prevent accidents. I never leave the hot iron unattended and unplug it when not in use. Appropriate personal protective equipment (PPE) such as heat-resistant gloves should be used, especially when handling high-temperature equipment. Regular inspections of equipment for any potential hazards are also crucial. Finally, a clear understanding of the equipment’s operational procedures is crucial to minimize risk.
Safety is not an option—it’s a non-negotiable requirement that needs to be at the forefront of every pressing operation.
Q 15. How do you adapt your pressing techniques for different collar styles?
Collar pressing techniques must adapt to the specific collar style because different styles have unique shapes and construction. For example, a classic point collar requires a more precise and sharper crease than a softer, rounded collar. A spread collar needs careful attention to ensure both points are perfectly aligned and crisp.
- Point Collars: These require a firm press, often using a point presser or tailor’s ham to achieve a sharp, defined point. The focus is on creating a crisp roll line and ensuring the collar lays perfectly flat against the shirt.
- Spread Collars: The focus is on symmetry. Both collar points must be pressed evenly and accurately to achieve the desired spread. Use of a collar roll can be crucial.
- Button-Down Collars: Gentle pressing is key to avoid damaging the buttons or creating unwanted creases. The buttons must be carefully positioned, and pressing is often done in sections to prevent distortion.
- Band Collars: These collars require less pressing than other styles as the band provides inherent structure. The focus is on maintaining the collar’s shape and achieving a clean finish on the visible portion.
I always consider the fabric weight and type, adjusting pressure and temperature accordingly to avoid scorching or damage. Linen, for example, requires lower heat and more careful handling compared to cotton.
Career Expert Tips:
- Ace those interviews! Prepare effectively by reviewing the Top 50 Most Common Interview Questions on ResumeGemini.
- Navigate your job search with confidence! Explore a wide range of Career Tips on ResumeGemini. Learn about common challenges and recommendations to overcome them.
- Craft the perfect resume! Master the Art of Resume Writing with ResumeGemini’s guide. Showcase your unique qualifications and achievements effectively.
- Don’t miss out on holiday savings! Build your dream resume with ResumeGemini’s ATS optimized templates.
Q 16. How do you maintain the integrity of collar seams during pressing?
Maintaining collar seam integrity during pressing is paramount for a professional finish. Excessive heat or pressure can distort the seams, causing puckering or even seam breakage. My approach is multi-faceted:
- Protect the seams: I use a press cloth, typically a thin, damp muslin cloth, to prevent direct heat contact with the seam. The press cloth acts as a buffer and distributes the heat evenly.
- Targeted pressing: I focus my press on the collar’s face, avoiding pressing directly on the seam allowance. This helps to prevent flattening of the seam. Instead, I press the fabric *around* the seam, allowing the steam to penetrate and reshape the collar without distorting the stitch.
- Gentle pressure: I use light to medium pressure, avoiding excessive force that could flatten the seams or cause unwanted impressions.
- Seam direction: I’m conscious of the seam direction and press with the grain. Pressing against the grain can distort the seam.
For delicate fabrics, I might use a tailor’s clapper to set the crease quickly after pressing and improve the integrity of the seam. Think of it like a cooling tool that helps ‘lock in’ the shape.
Q 17. What are the signs of a poorly pressed collar?
A poorly pressed collar is easily identifiable. Common signs include:
- Uneven creases or wrinkles: A lack of crispness and unevenness throughout the collar indicates inconsistent pressing.
- Puckered or distorted seams: This suggests excessive pressure or heat was applied directly to the seams.
- Shiny patches or scorch marks: These are clear indicators of too much heat or pressure.
- Collar points not aligned: For spread collars, misaligned points mean an uneven and unprofessional look.
- Collar not lying flat: A collar that doesn’t lie flat against the shirt shows uneven pressing or improper use of supporting tools.
- Visible seam allowance: Pressing should create a smooth, clean collar without visible stitch lines.
These issues significantly detract from the overall appearance of the garment, signaling a lack of attention to detail.
Q 18. Describe your process for cleaning and maintaining pressing equipment.
Maintaining pressing equipment is crucial for consistent and high-quality results. My cleaning and maintenance routine involves:
- Daily cleaning: After each use, I wipe down the pressing surface with a damp cloth to remove any lint, starch residue, or fabric particles. I also clear any debris from the steam vents to maintain efficiency.
- Regular descaling: Depending on the water hardness in my area, I regularly descale my pressing equipment to prevent mineral buildup, which can impede steam production and damage the equipment. I typically use a commercial descaler following manufacturer’s instructions.
- Periodic deep cleaning: Every few months, I conduct a thorough cleaning, including removing and cleaning any removable parts. I also check for any signs of wear and tear and replace worn components promptly.
- Inspection: Regular inspection of the equipment helps in early detection of potential issues such as leaks, faulty heating elements, or damaged cords.
- Proper storage: When not in use, I ensure that the equipment is stored in a dry, safe place, away from dust and moisture.
This routine extends the life of the equipment and guarantees consistent performance. Preventative maintenance is far cheaper than reactive repairs.
Q 19. How do you troubleshoot common issues with pressing machines?
Troubleshooting pressing machines often involves a systematic approach:
- No heat or steam: This could indicate a problem with the power cord, heating element, thermostat, water level, or a clogged steam vent. I check each component systematically.
- Uneven heat distribution: This might be due to mineral buildup, a faulty heating element, or a problem with the internal mechanism. Thorough cleaning or professional service might be necessary.
- Leaks: Leaking water indicates a problem with the water reservoir, hoses, or seals. Identifying the leak point is crucial to repair or replacement.
- Weak steam: This could be from low water, mineral buildup, or a faulty pump. Again, cleaning and checking the water supply is the first step.
- Machine overheating: This may indicate a faulty thermostat or a blocked ventilation system. Professional assistance might be required here.
Keeping a detailed record of maintenance and problems helps identify recurring issues. Reading the machine’s manual is always the first step!
Q 20. What are the advantages and disadvantages of different collar pressing techniques?
Various techniques exist for collar pressing, each with advantages and disadvantages:
- Hand Pressing: Uses an iron and a press cloth. Advantages: Great control, less expensive initial investment. Disadvantages: Time-consuming, requires skill and experience, may not produce perfectly consistent results for large batches.
- Machine Pressing (e.g., vacuum press): Uses a specialized machine. Advantages: Fast and efficient, consistent results, often better for mass production. Disadvantages: High initial investment, requires specialized training, machine maintenance required.
- Tailor’s Ham and Point Presser: Uses shaped pressing tools for specific areas. Advantages: Excellent for shaping and creating crisp edges, adaptable to different collar types. Disadvantages: Requires more skill and knowledge of tool usage, more time-consuming than machine pressing.
The best technique depends on the scale of operation, the budget, and the level of skill available. In my experience, a combination of hand pressing with specific tools for critical details and machine pressing for large batches often offers the ideal balance of efficiency and quality.
Q 21. How do you ensure the collar lies flat and smooth?
Ensuring a collar lies flat and smooth is a matter of precision and technique:
- Proper preparation: Begin with a clean, pressed shirt. The collar should be free from wrinkles and creases before pressing.
- Supporting tools: Using a tailor’s ham or collar roll provides a curved surface that mimics the natural collar shape, ensuring a smooth, even press. The tool aids in shaping and preventing flat spots.
- Correct temperature and pressure: Use the appropriate temperature and pressure for the fabric type. Avoid scorching or flattening by using a press cloth and controlled pressure.
- Pressing direction: Press from the center outwards, smoothing the collar’s fabric in the direction of the grain. This prevents unwanted creases and ensures an even finish.
- Steam effectively: Use steam to soften the fibers and allow the collar to relax into its desired shape. This also helps to smooth and remove wrinkles effectively.
- Cooling and setting: After pressing, use a clapper to set the shape quickly. The heat from the press and the immediate cooling by the clapper helps to ‘lock in’ the results.
It’s a combination of careful techniques that consistently delivers a professional look. Consider it sculpting with heat and pressure; patience and precision are key.
Q 22. What is your experience with different types of starch?
My experience with different types of starch is extensive, encompassing a wide range used in collar pressing. The choice of starch depends heavily on the fabric type and the desired level of stiffness.
- Wheat starch: This is a classic choice, offering a good balance of stiffness and drape. It’s readily available and relatively inexpensive, making it suitable for everyday use.
- Cornstarch: Provides a slightly softer finish compared to wheat starch. It’s ideal for lighter fabrics where a crisp but not overly stiff collar is desired.
- Rice starch: Known for its fine texture and ability to create a very crisp, almost translucent finish. It’s excellent for delicate fabrics and formal shirts.
- Pre-mixed starch sprays: These offer convenience but may vary in quality. It’s essential to carefully read labels and choose a spray appropriate for the fabric.
- Liquid starches: These are versatile and allow for precise control over the level of stiffness. They can be diluted to achieve different levels of crispness.
I regularly experiment with different starch concentrations and types to achieve optimal results depending on the client’s needs and the shirt’s fabric.
Q 23. How do you assess the quality of a pressed collar?
Assessing the quality of a pressed collar involves a meticulous evaluation of several key aspects. Think of it like judging a piece of art – every detail matters.
- Crispness and Shape: The collar should exhibit a sharp, defined shape with crisp points and a consistent roll. Any wrinkles or creases detract from the overall quality.
- Symmetry: The collar should be perfectly symmetrical, with both sides mirroring each other. Any asymmetry indicates an uneven press.
- Smoothness: The surface should be flawlessly smooth, free from any puckers or uneven texture. The starch should be evenly distributed.
- Roll and Height: The collar’s roll should be consistent and even, with the appropriate height depending on the style of the collar. A properly pressed collar has an elegant, balanced roll.
- Fabric Integrity: The pressing process should not damage the fabric. There should be no scorch marks, glossiness (unless intentionally achieved), or distortion.
I use a combination of visual inspection and tactile examination to determine the overall quality of the pressed collar. The light helps reveal subtle imperfections.
Q 24. How do you handle collars with different levels of stiffness?
Handling collars with different levels of stiffness requires adapting the pressing techniques. It’s like working with different types of clay; each needs a specific approach.
- High Stiffness: For collars requiring high stiffness (e.g., formal shirts), I would use a higher concentration of starch and employ more aggressive pressing techniques, potentially using a heavier press cloth and multiple passes to achieve a crisp, sharp finish.
- Medium Stiffness: This is the most common level and allows for a balance between crispness and drape. I adjust the starch concentration and pressing pressure accordingly.
- Low Stiffness: For softer, more relaxed collars, I might use less starch or a different type of starch (like cornstarch). I’d also use gentler pressing techniques to avoid over-stiffening the fabric.
The key is to understand the fabric and the desired level of stiffness before selecting the starch and pressing method. Experimentation and practice are vital.
Q 25. How do you deal with collars that are misshapen or damaged?
Dealing with misshapen or damaged collars requires a more nuanced approach. It’s like restoring a damaged painting; precision and patience are key.
- Minor Misshapen: I often use a combination of damp pressing and carefully applied pressure to reshape the collar. This may involve strategically placing the press cloth to target specific areas.
- Severe Misshapen: Sometimes, severe misshaping necessitates more involved techniques. I might use a combination of steam, careful stretching, and strategically placed pins to restore the collar’s shape before pressing.
- Damaged Collars: Depending on the nature of the damage (e.g., burns, tears), I might need to employ specialized repair techniques such as patching or careful mending before attempting to press the collar. In some cases, repair might not be possible.
Careful assessment of the damage is crucial to determine the best course of action. The goal is to restore the collar’s shape and appearance to the maximum extent possible.
Q 26. What are the best practices for achieving a professional collar press?
Achieving a professional collar press is the result of meticulous attention to detail and a systematic approach. It’s more than just ironing; it’s a craft.
- Proper Preparation: This includes pre-treating the shirt to remove wrinkles and ensuring the collar is clean and dry.
- Appropriate Starch: Selecting the right starch based on the fabric and desired stiffness is paramount.
- Consistent Pressure and Temperature: Maintaining consistent pressure and temperature throughout the pressing process is essential to achieve even results.
- Press Cloth: Using a press cloth protects the fabric from direct heat and prevents shine.
- Systematic Pressing Technique: A methodical approach to pressing, focusing on achieving proper roll, shape, and symmetry, ensures a professional finish.
- Final Inspection: A final inspection under good lighting allows for detection of any imperfections.
Following these best practices elevates the collar press from a simple ironing task to a refined skill, resulting in a flawlessly pressed shirt.
Q 27. Describe a time you had to troubleshoot a pressing issue effectively.
I once encountered a particularly challenging situation with a high-end silk shirt. The collar, after pressing, had developed unusual glossiness despite using a press cloth. This indicated either excessive heat or improper starch application.
My troubleshooting involved:
- Identifying the cause: I examined the iron’s temperature settings and realized it was set slightly too high for the silk. I also reassessed my starch application technique.
- Adjusting the technique: I lowered the iron temperature and used a lighter hand while pressing, focusing on even distribution of pressure and avoiding lingering in one spot.
- Testing: I tested my adjusted technique on a small, inconspicuous area of the shirt before proceeding with the entire collar.
- Success: The revised technique resulted in a beautifully pressed collar without the unwanted glossiness.
This experience reinforced the importance of careful temperature control, the correct starch selection for delicate fabrics, and meticulous attention to detail during the entire pressing process.
Q 28. How do you stay updated on the latest collar pressing techniques and technology?
Staying updated on the latest techniques and technologies in collar pressing involves continuous learning and exploration. The industry is constantly evolving.
- Professional Journals and Publications: I regularly read industry-specific publications to stay informed about new techniques, technologies, and best practices.
- Workshops and Seminars: Attending workshops and seminars offered by experts in the field provides hands-on learning opportunities and networking with fellow professionals.
- Online Resources: There are valuable online forums and communities dedicated to pressing and laundry techniques, offering opportunities to share knowledge and learn from others.
- Experimentation: I constantly experiment with different techniques and technologies to improve my skills and stay ahead of the curve.
Maintaining a commitment to continuous learning ensures I provide the highest quality collar pressing services and remain at the forefront of the industry.
Key Topics to Learn for Collar Pressing Interview
- Understanding Fabric Types: Learn to identify different fabrics (cotton, linen, silk, etc.) and how their properties affect pressing techniques. This includes understanding fiber content and its impact on heat sensitivity.
- Mastering Pressing Equipment: Gain proficiency in using various pressing tools, including irons (steam and dry), pressing cloths, and pressing boards. Practice maintaining equipment for optimal performance.
- Collar Pressing Techniques: Develop expertise in different collar pressing methods, such as using a clapper, point pressing, and roll pressing. Understand how to achieve a crisp, professional finish on various collar styles.
- Troubleshooting Common Issues: Learn to identify and resolve common problems encountered during collar pressing, such as wrinkles, shine, or puckering. Practice problem-solving skills to maintain quality and efficiency.
- Quality Control and Inspection: Develop a keen eye for detail to ensure consistently high-quality results. Understand the standards for acceptable collar pressing in professional settings.
- Health and Safety Procedures: Familiarize yourself with safe work practices related to using pressing equipment, including proper handling, maintenance, and safety precautions.
- Production Efficiency and Workflow: Understand strategies to optimize your workflow and achieve high-volume collar pressing while maintaining quality.
Next Steps
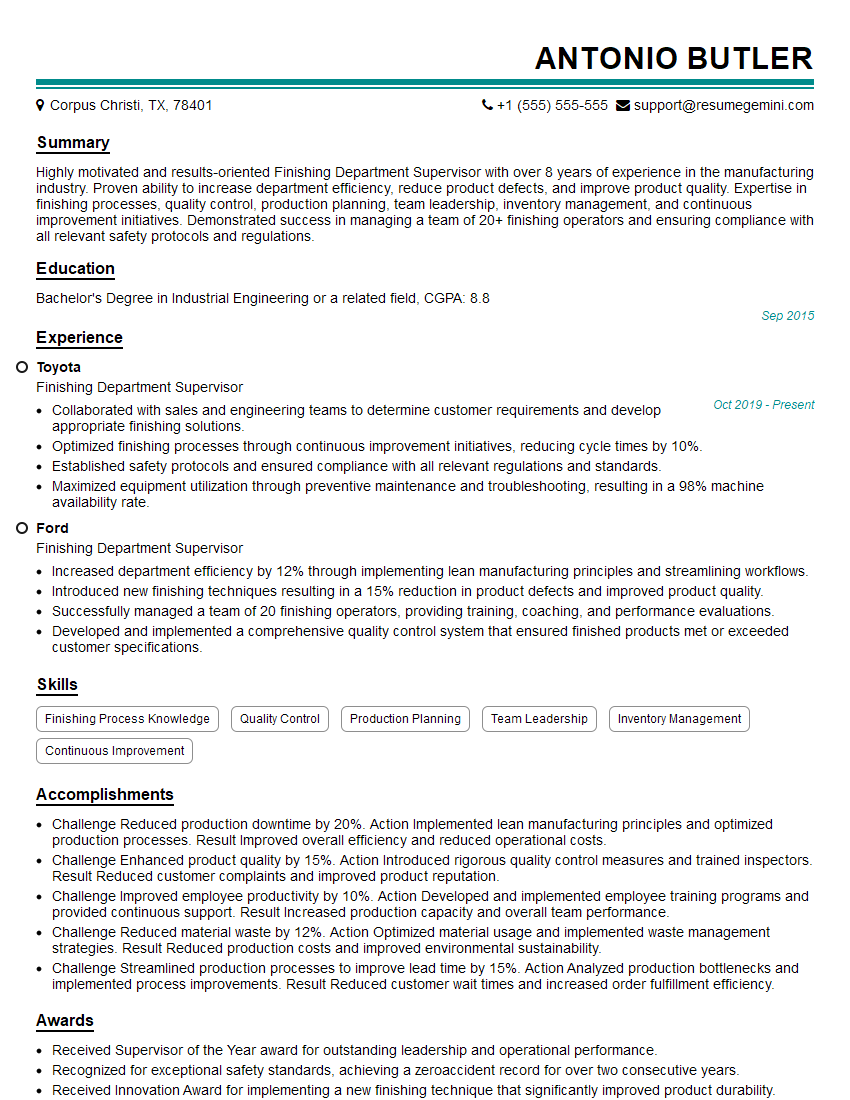
Mastering collar pressing opens doors to rewarding careers in the garment industry, offering opportunities for growth and specialization. A strong resume is crucial for showcasing your skills and experience to potential employers. To maximize your job prospects, create an ATS-friendly resume that highlights your abilities and achievements. ResumeGemini is a trusted resource that can help you build a professional, impactful resume tailored to the specifics of your experience. Examples of resumes tailored to Collar Pressing are available to guide you. Take the next step in your career journey and craft a resume that makes you stand out!


Explore more articles
Users Rating of Our Blogs
Share Your Experience
We value your feedback! Please rate our content and share your thoughts (optional).
What Readers Say About Our Blog
Very informative content, great job.
good